

- List View
- Inventory View
- Reserve & Withdraw Inventory
- Add Inventory After Crossing & Advancement
- Add Inventory with Germplasm Import
Inventory is managed from several locations in the BMS.
- Manage germplasm: Search, browse, reserve, and withdraw inventory
- Manage nurseries: Add inventory
- Manage trials: Add inventory
- Germplasm Import: Add inventory (not covered in this manual section)
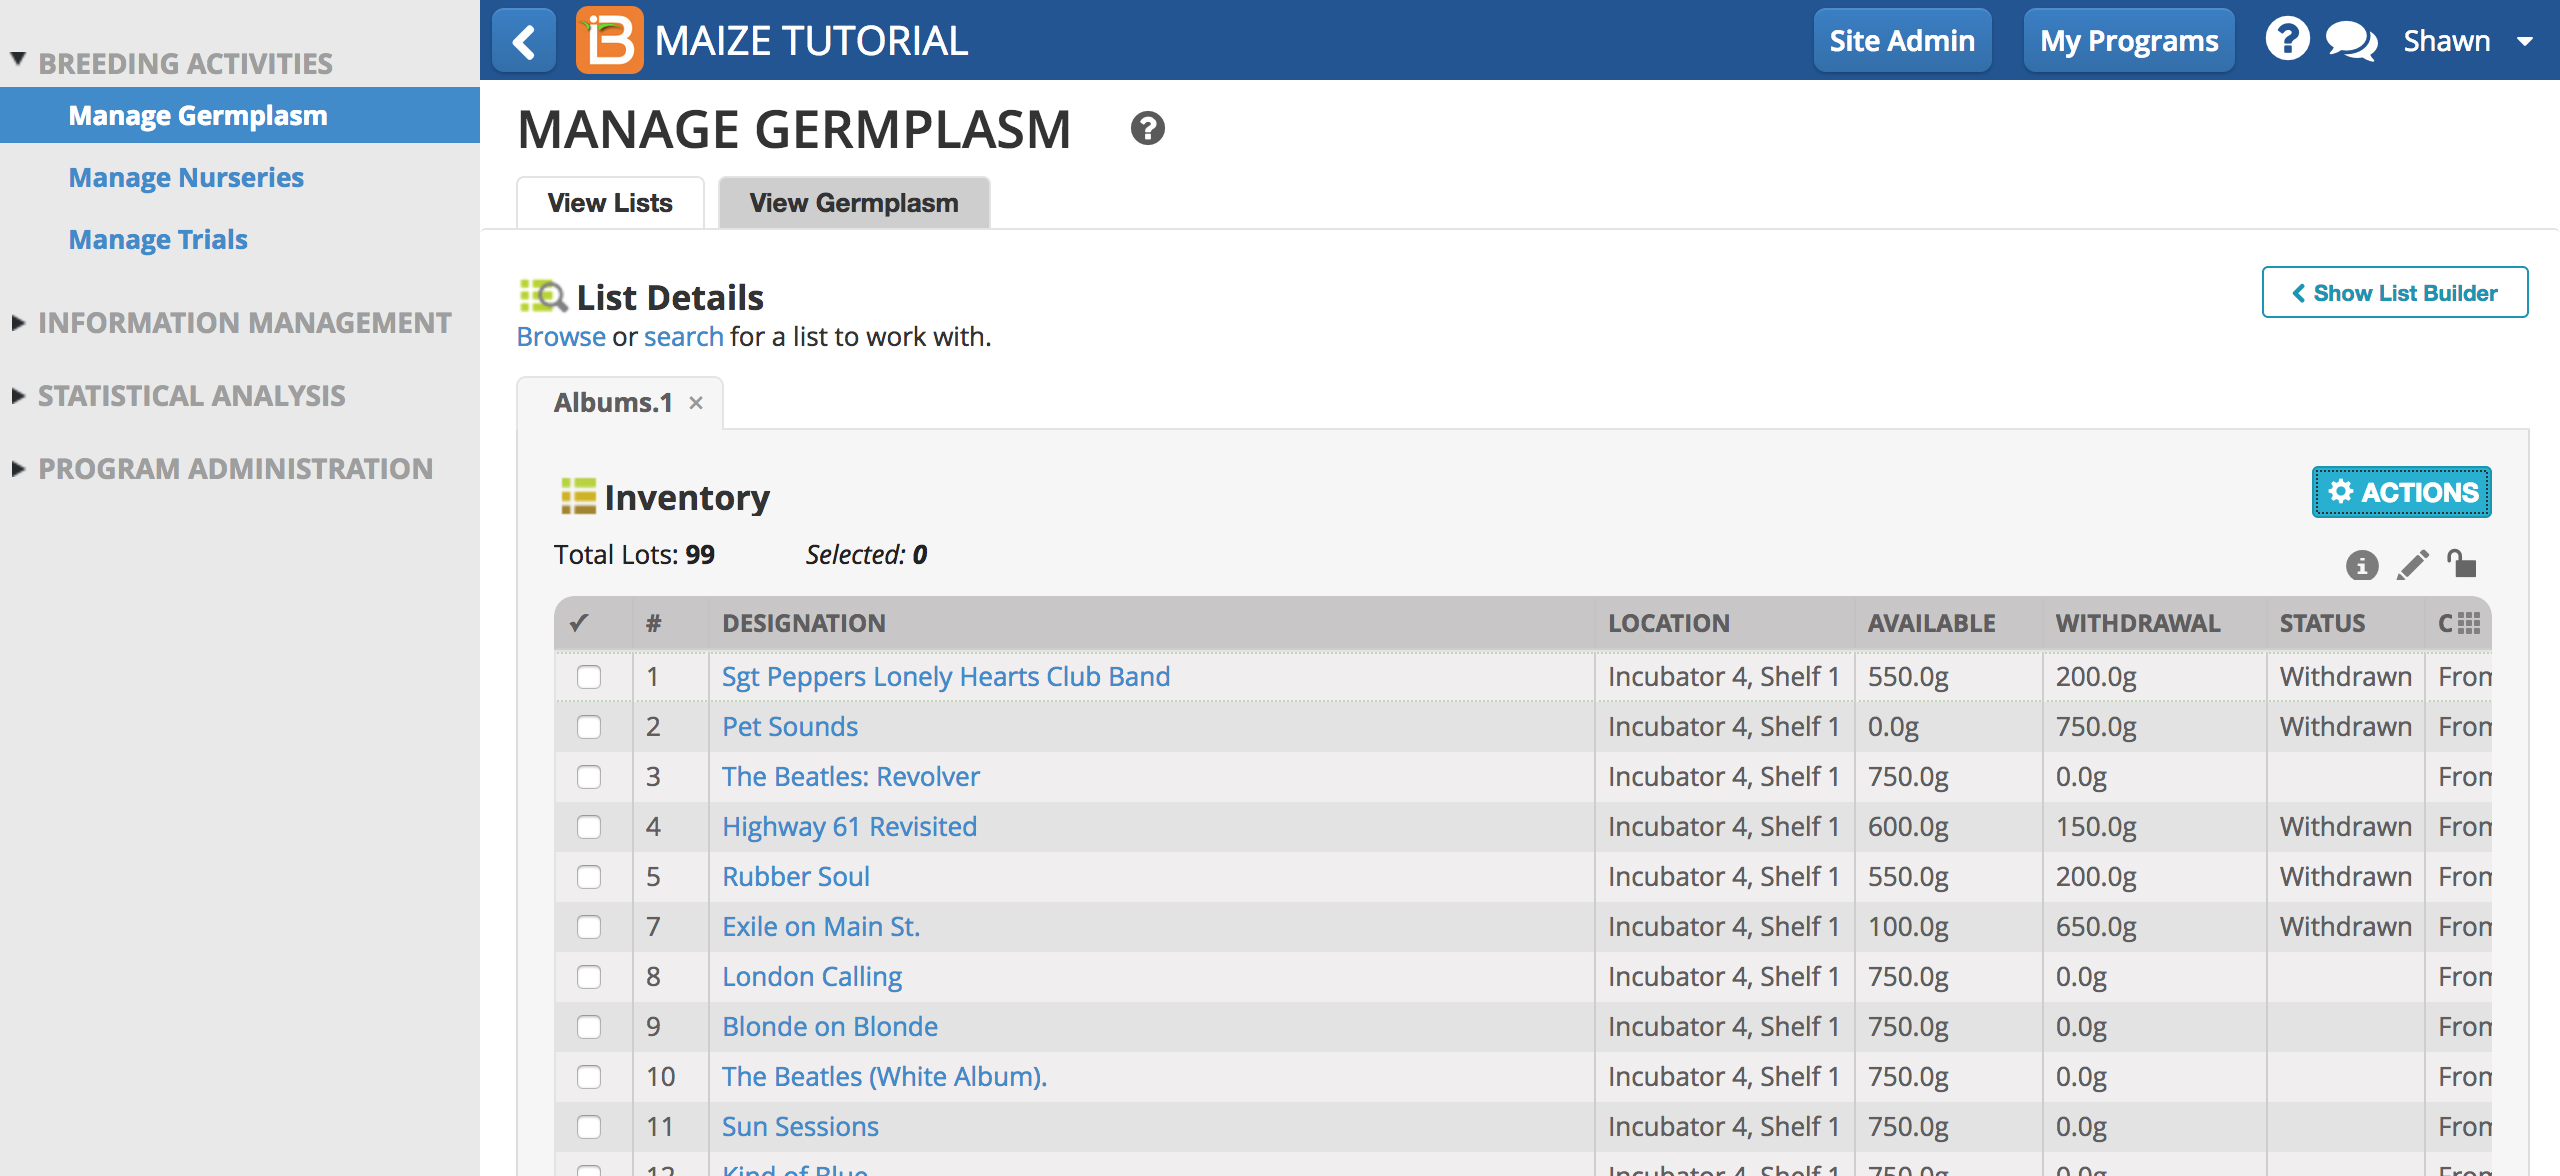
List View
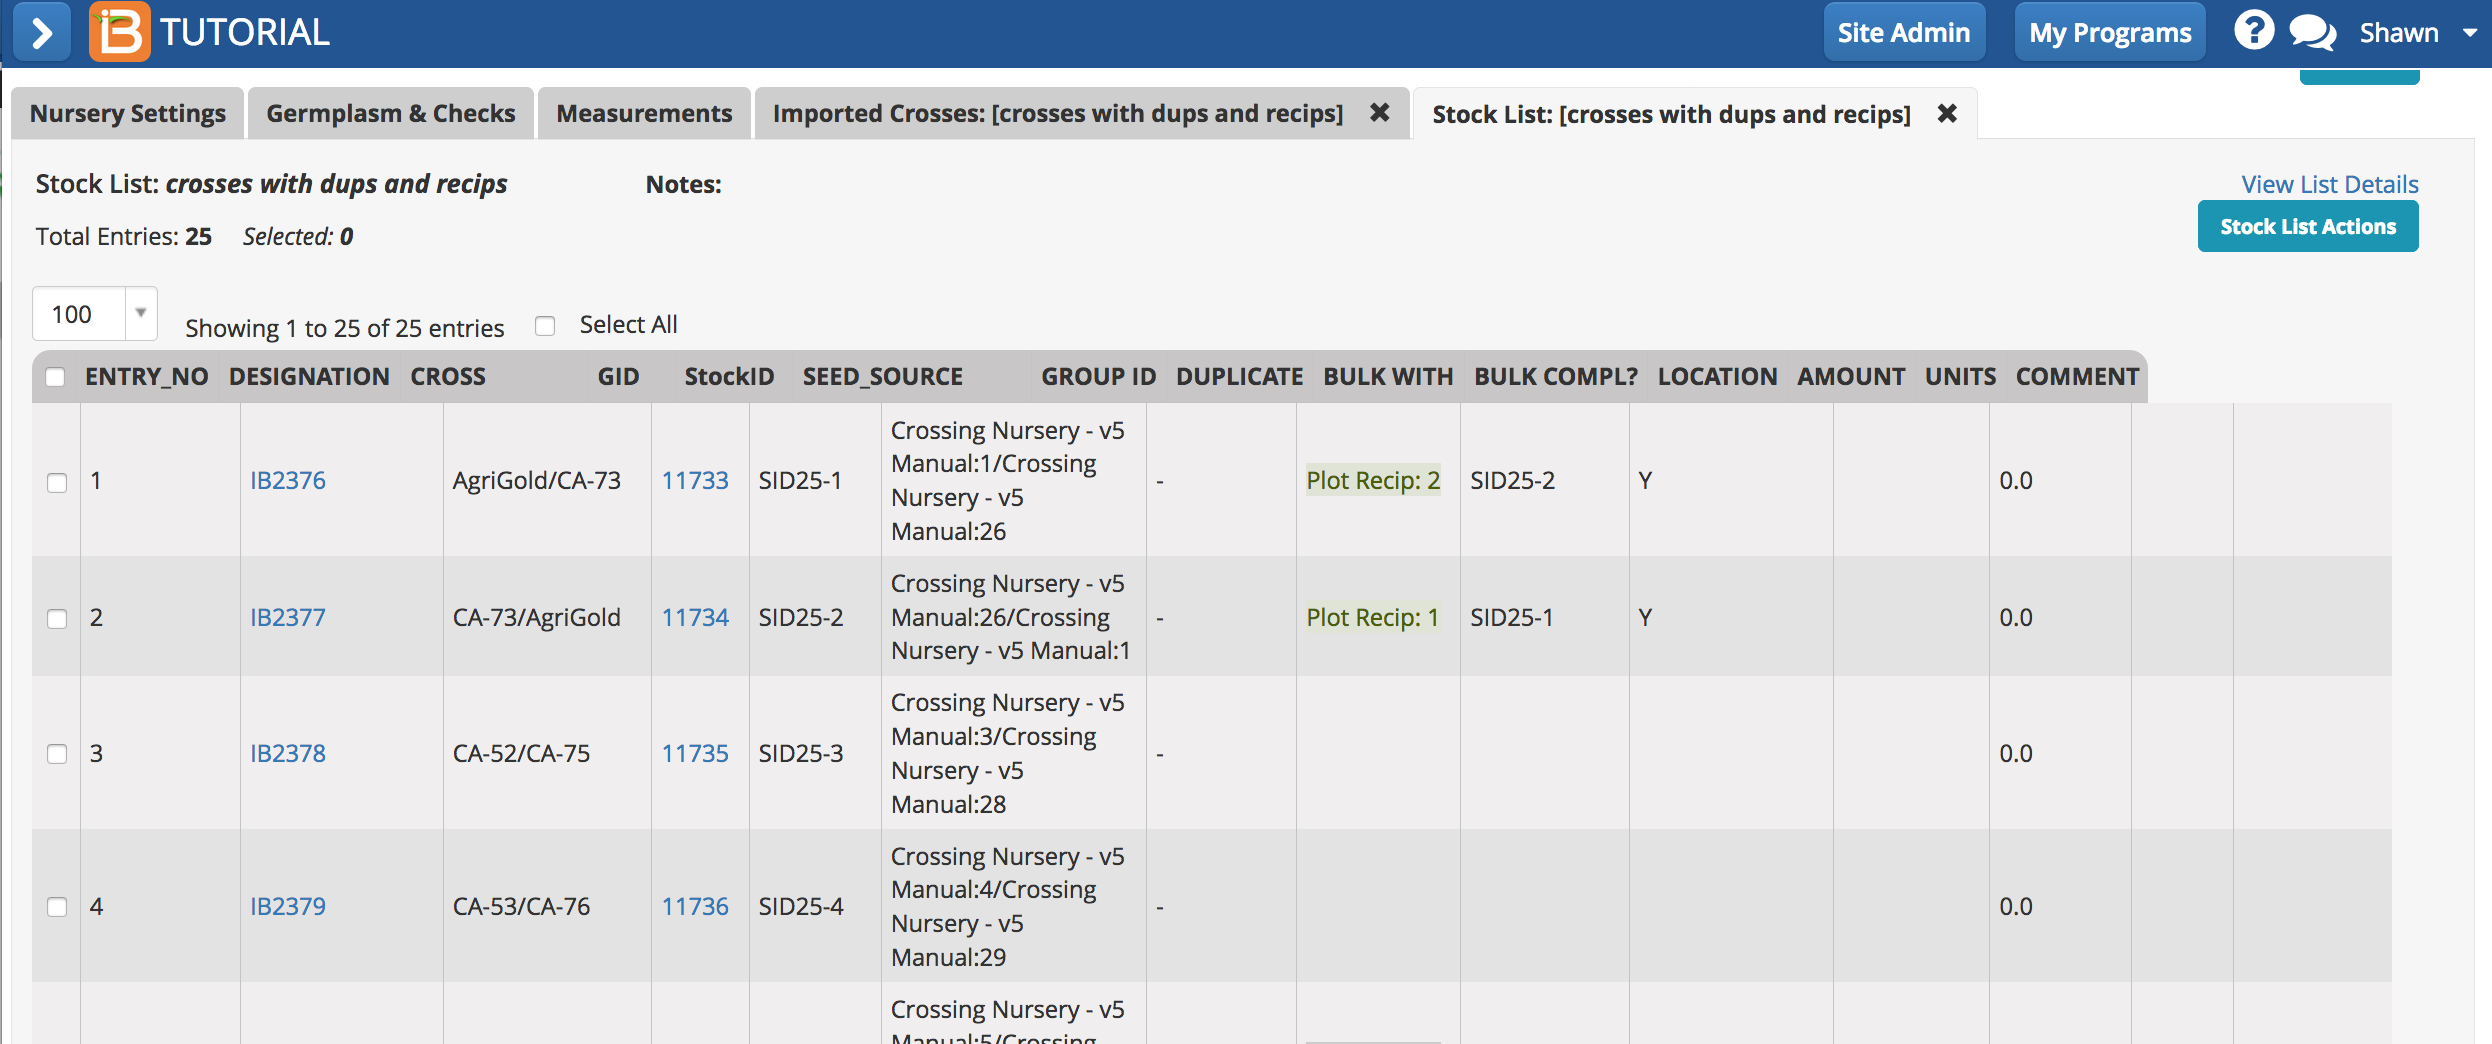
Germplasm with associated inventory will display one or more LOTS in list view. Lots represent different packs of identically sourced seeds. For example, harvesting individual duplicate crosses will result in a single GID being associated with multiple lots. STOCK IDs are also displayed from list view. Most often there will be a one-to-one relationship between StockIDs and Lot. However, a single Lot may contain multiple StockIDs, such as when germplasm with inventory is imported multiple times matching to a single GID.
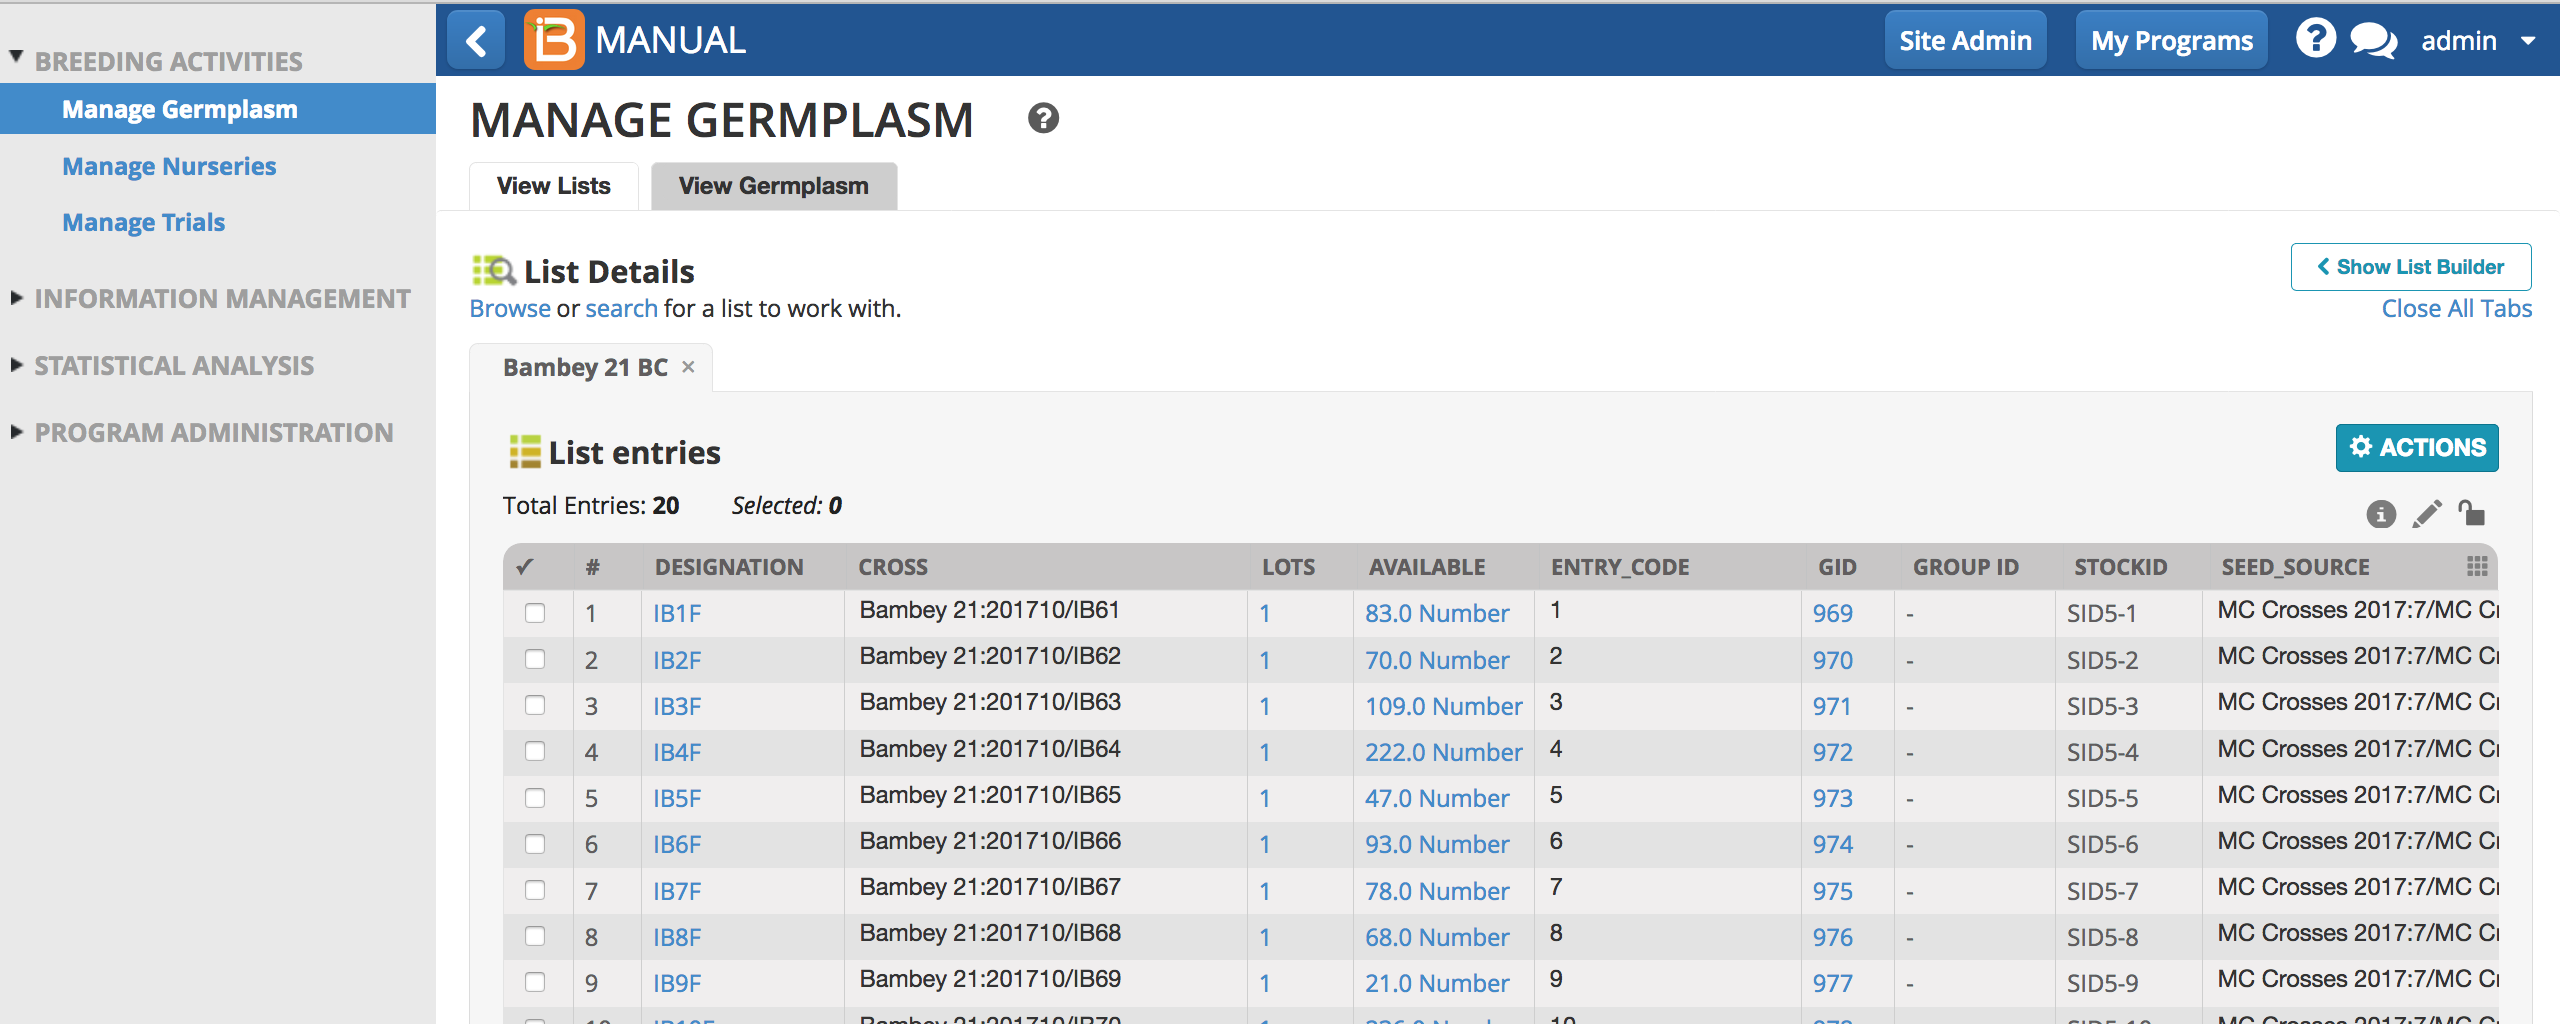
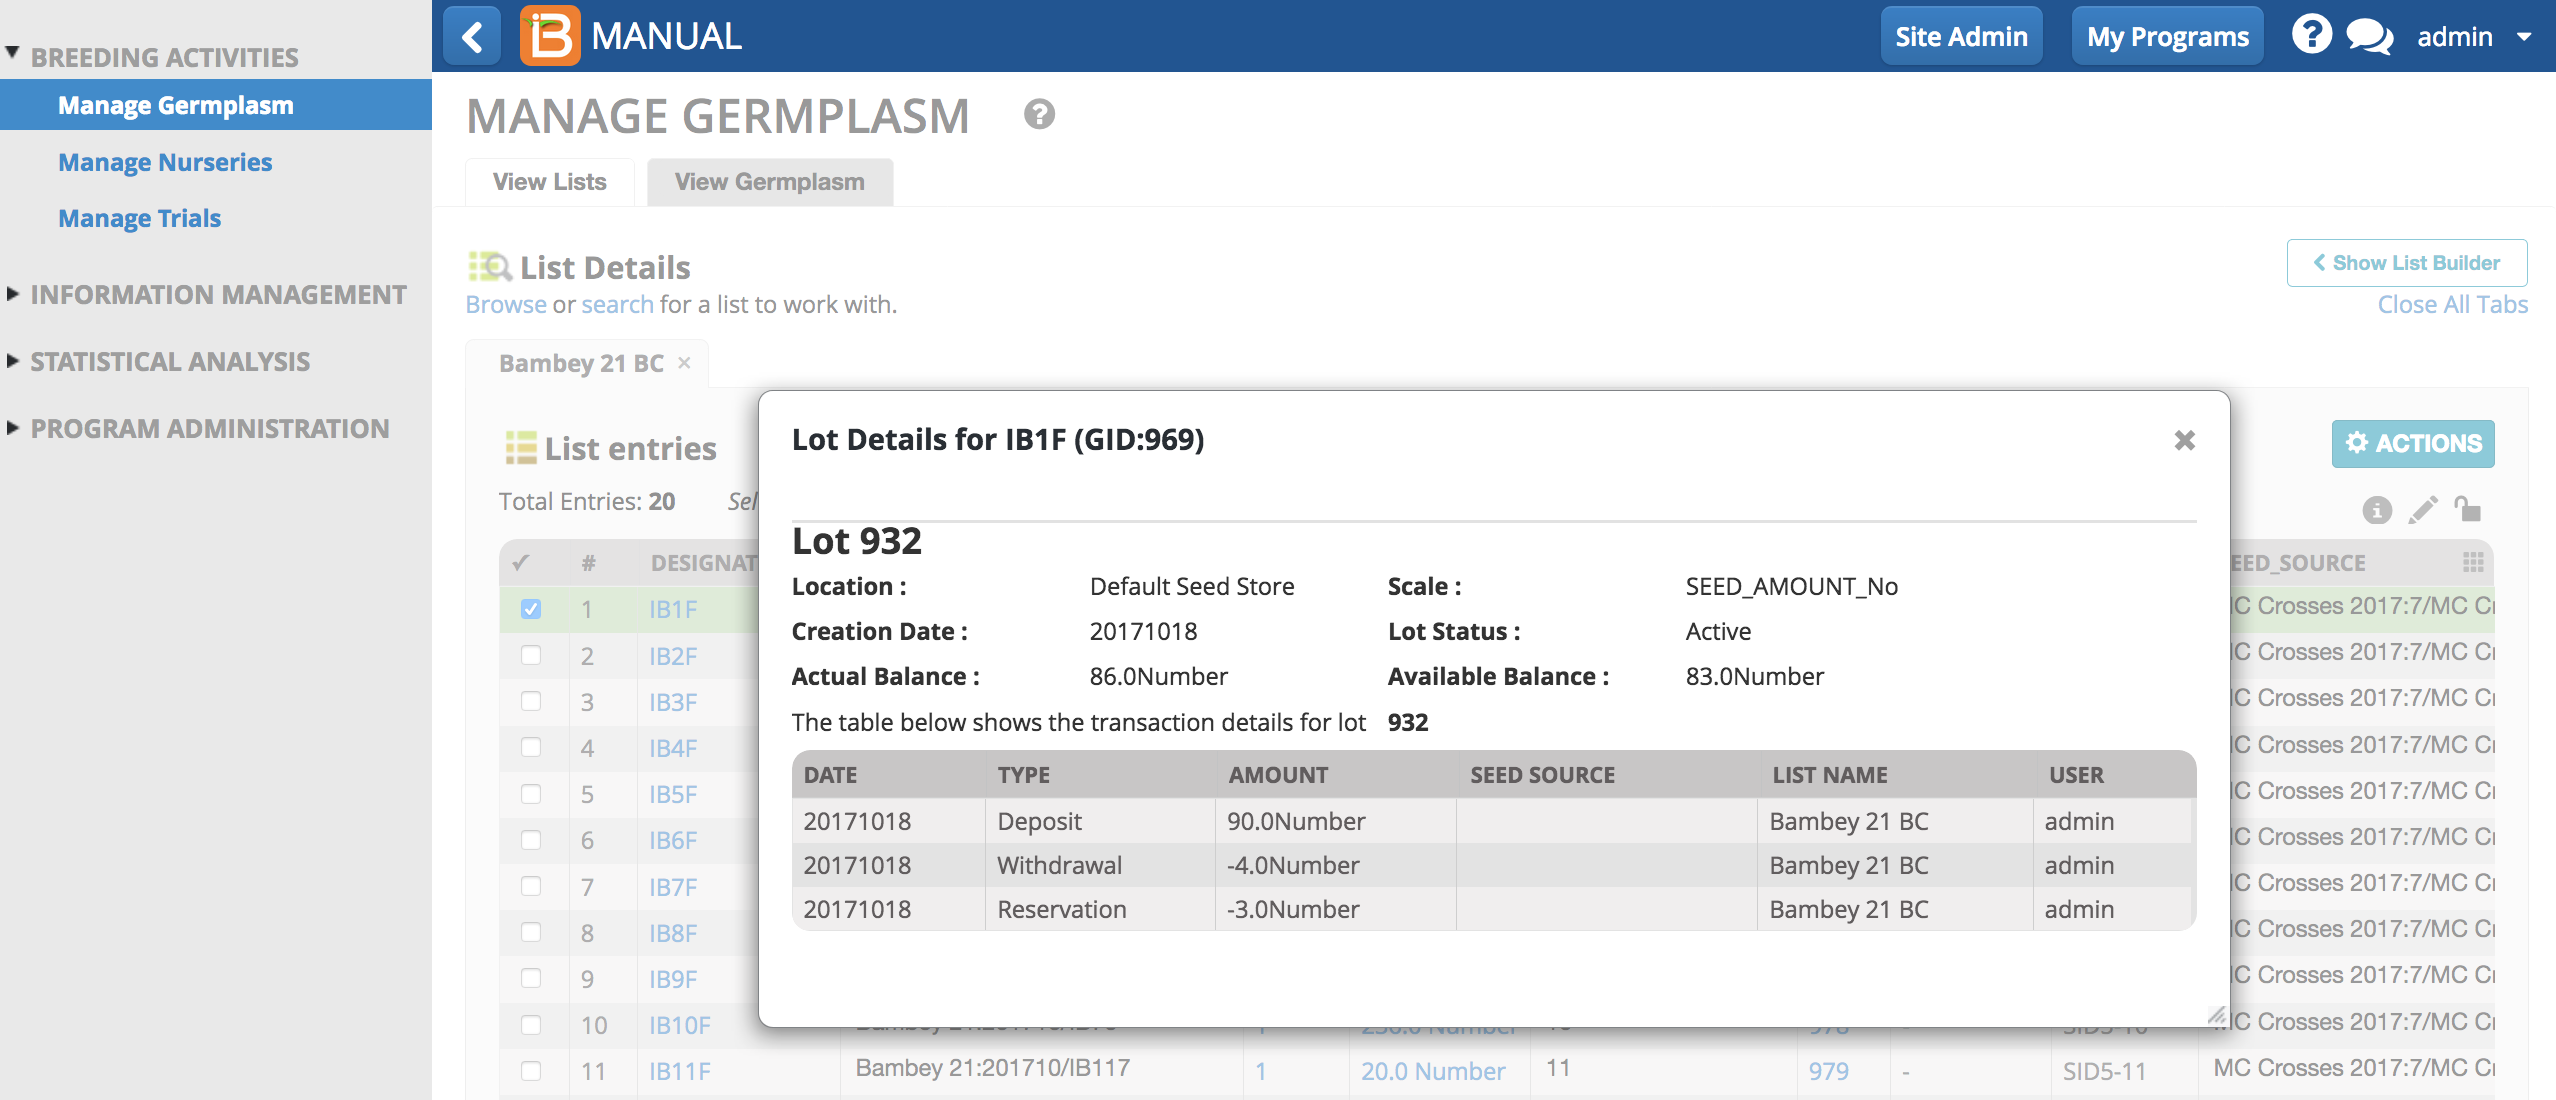
- From List Details, select individual lot entries to reveal lot details.
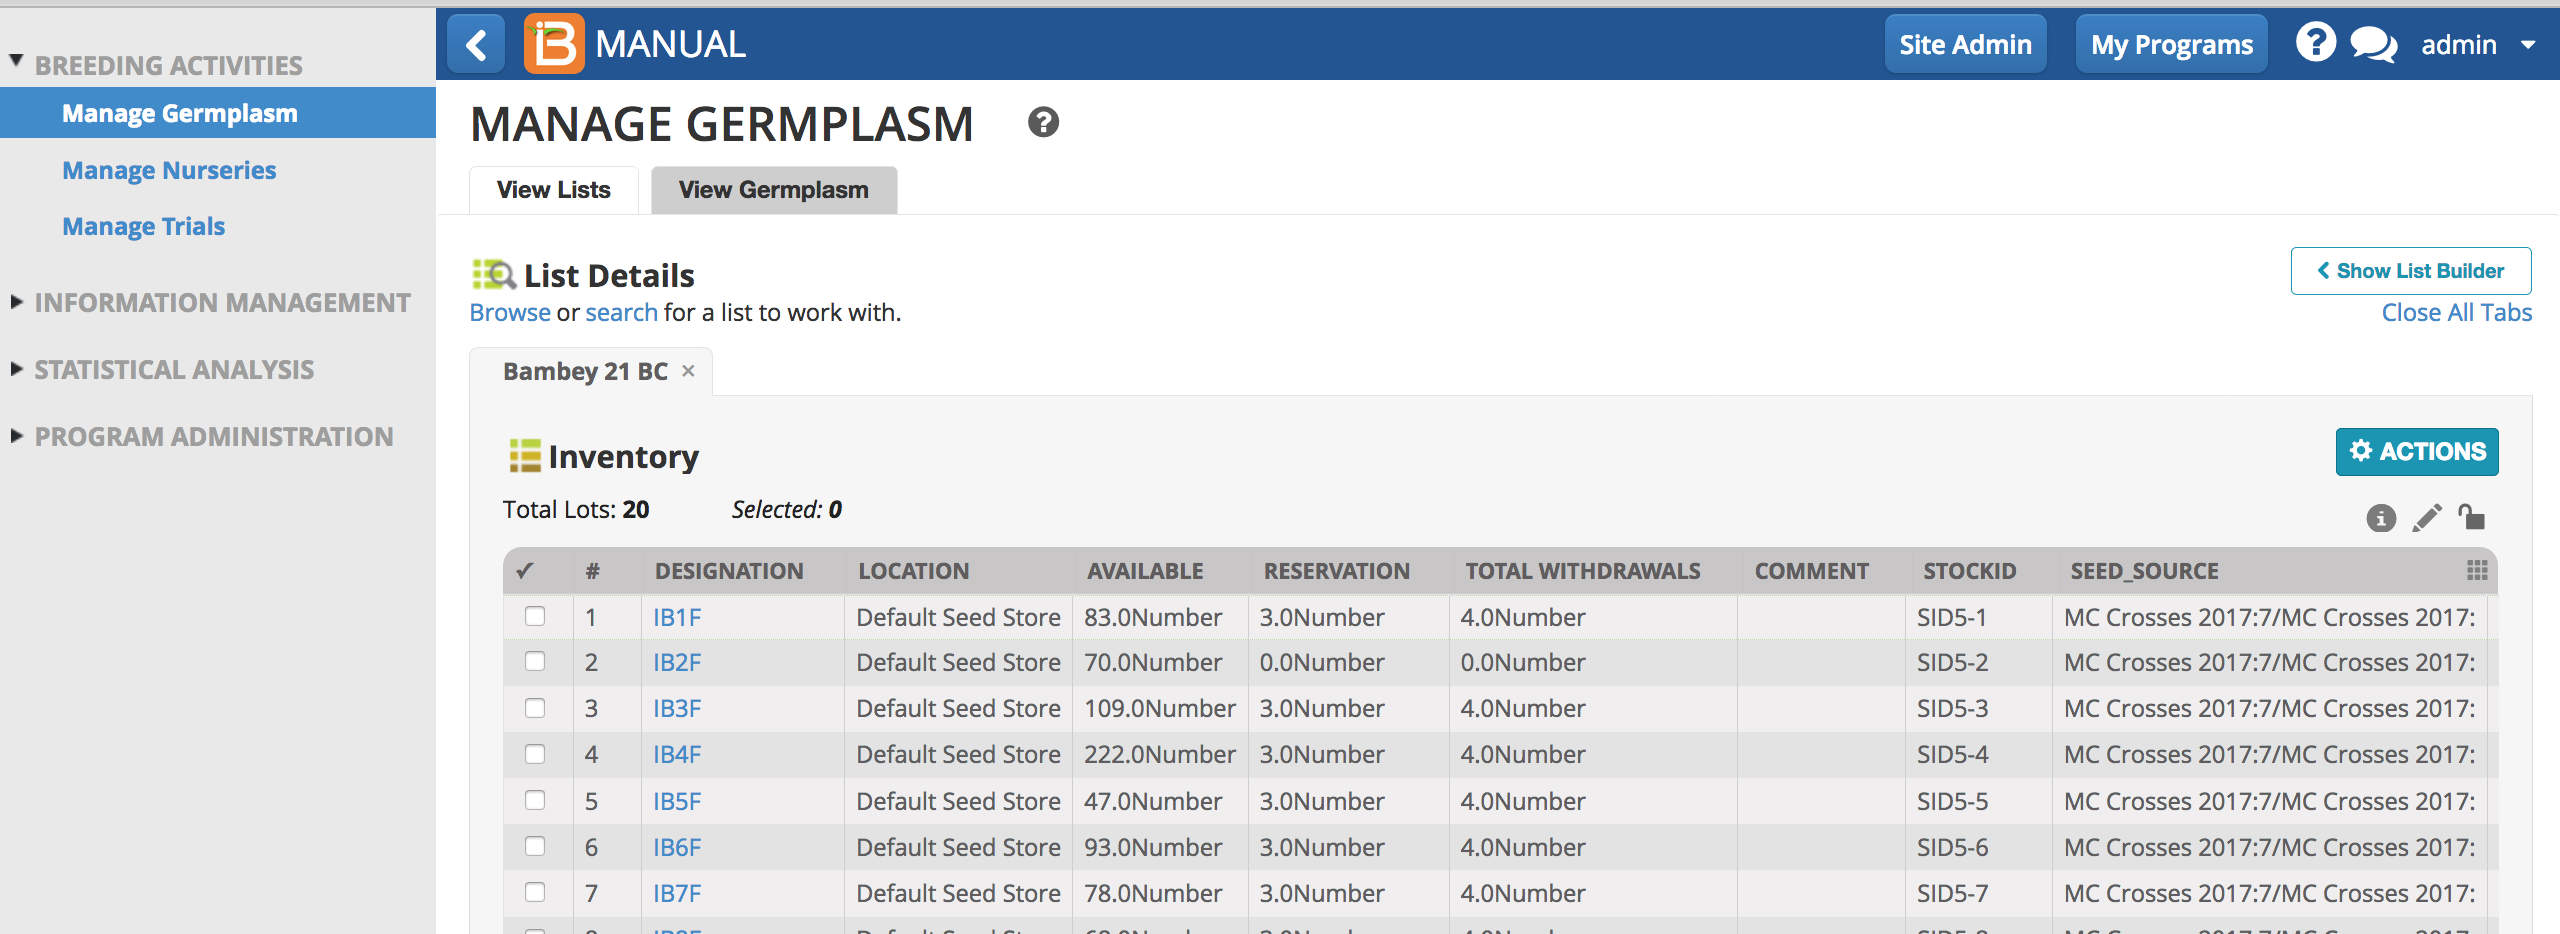
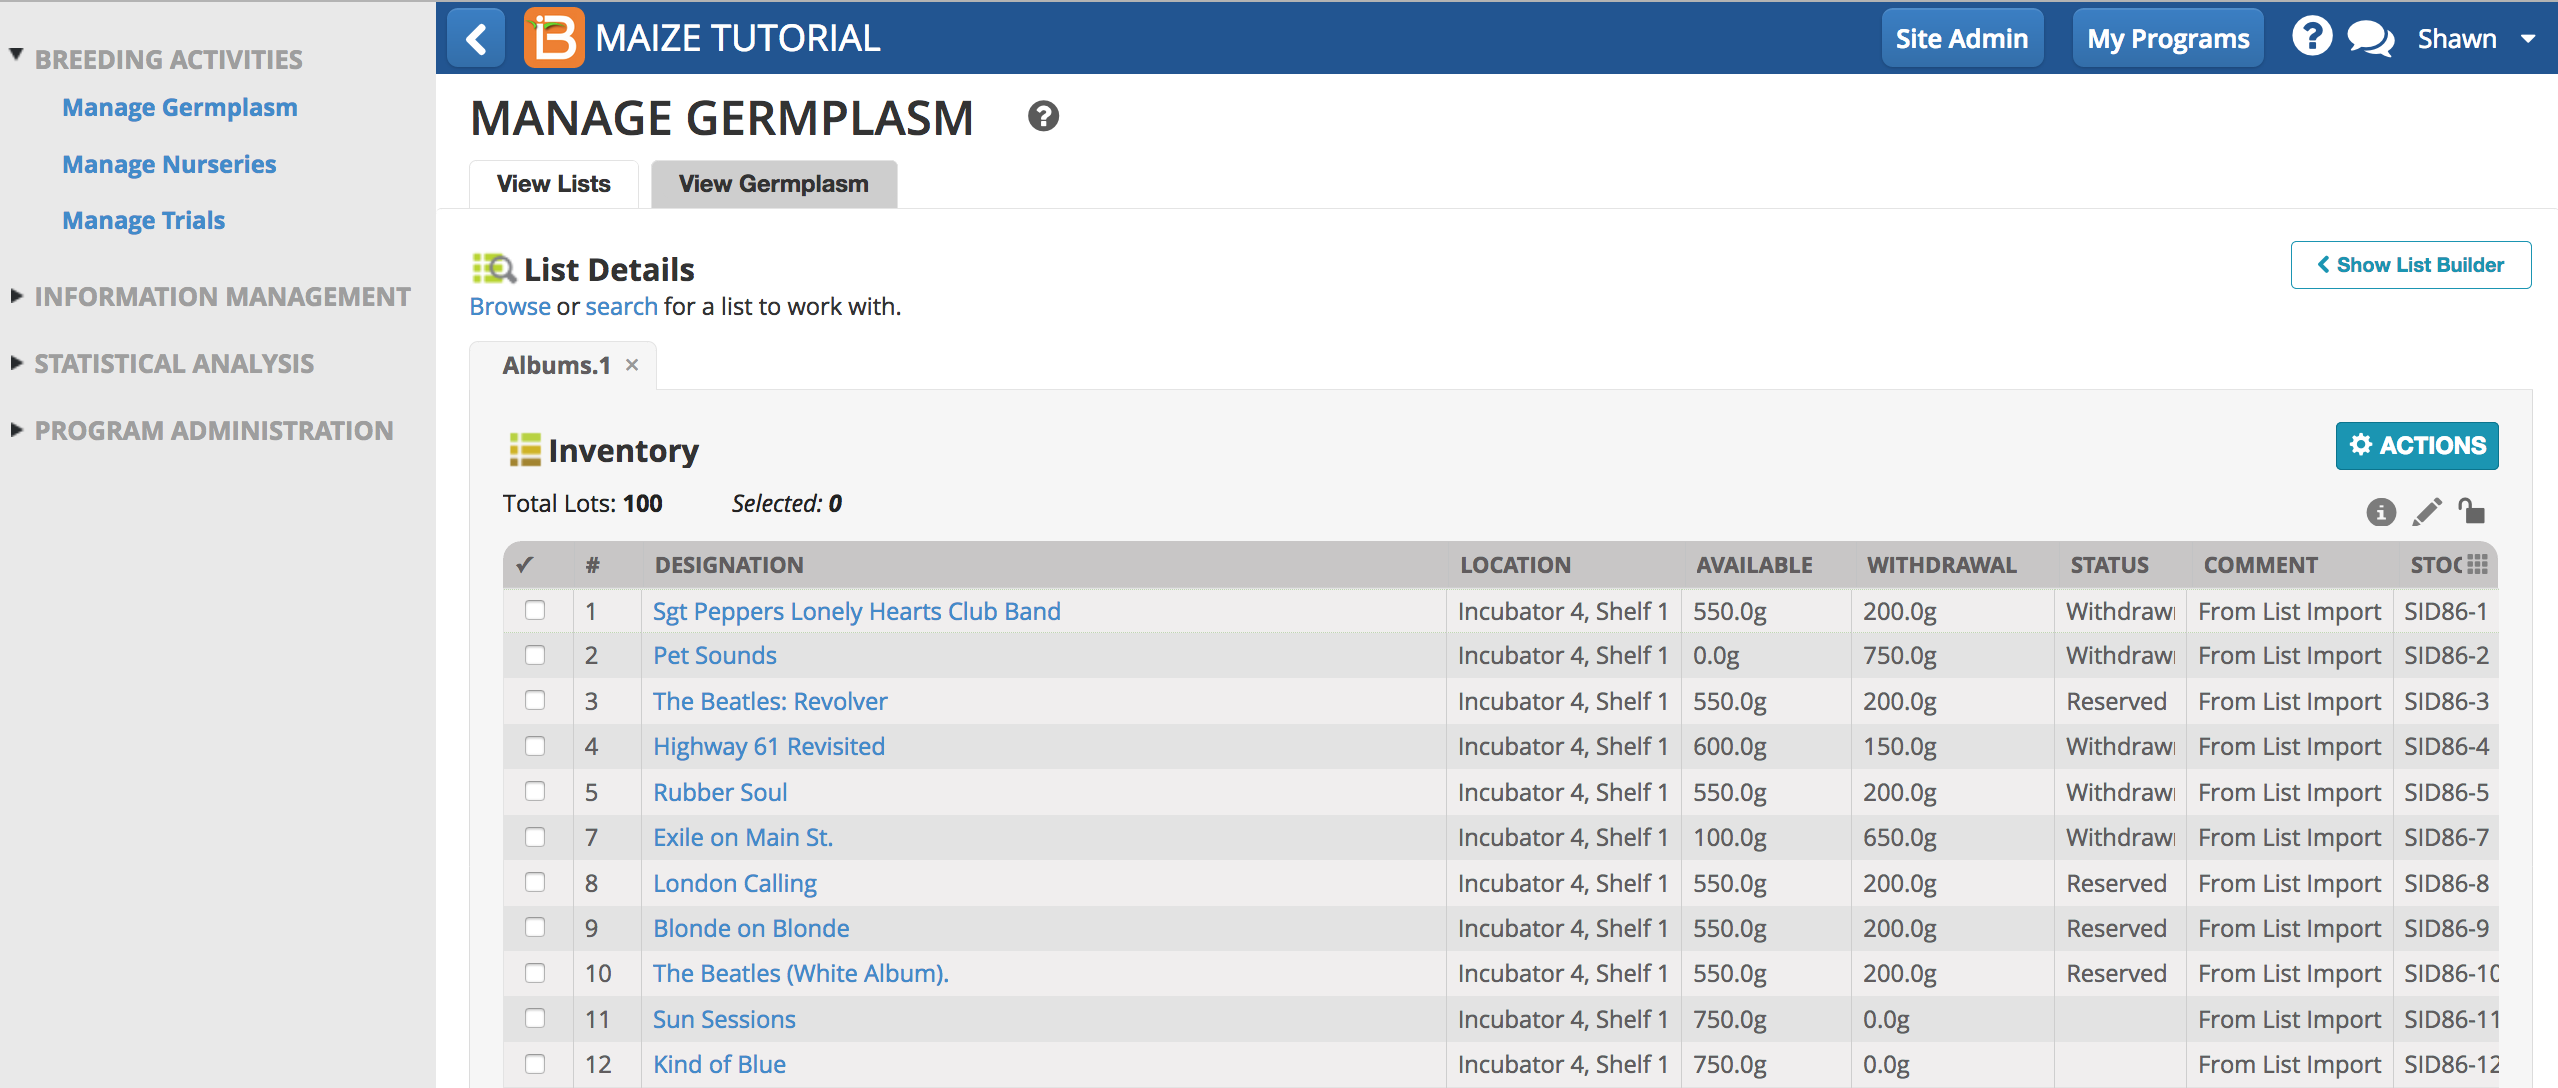
Inventory View
- From List Details Action menu, select Inventory View to reveal lot details for the entire list. Inventory view offers an expanded tabular view of all lots, including pending reservations and total withdrawals.
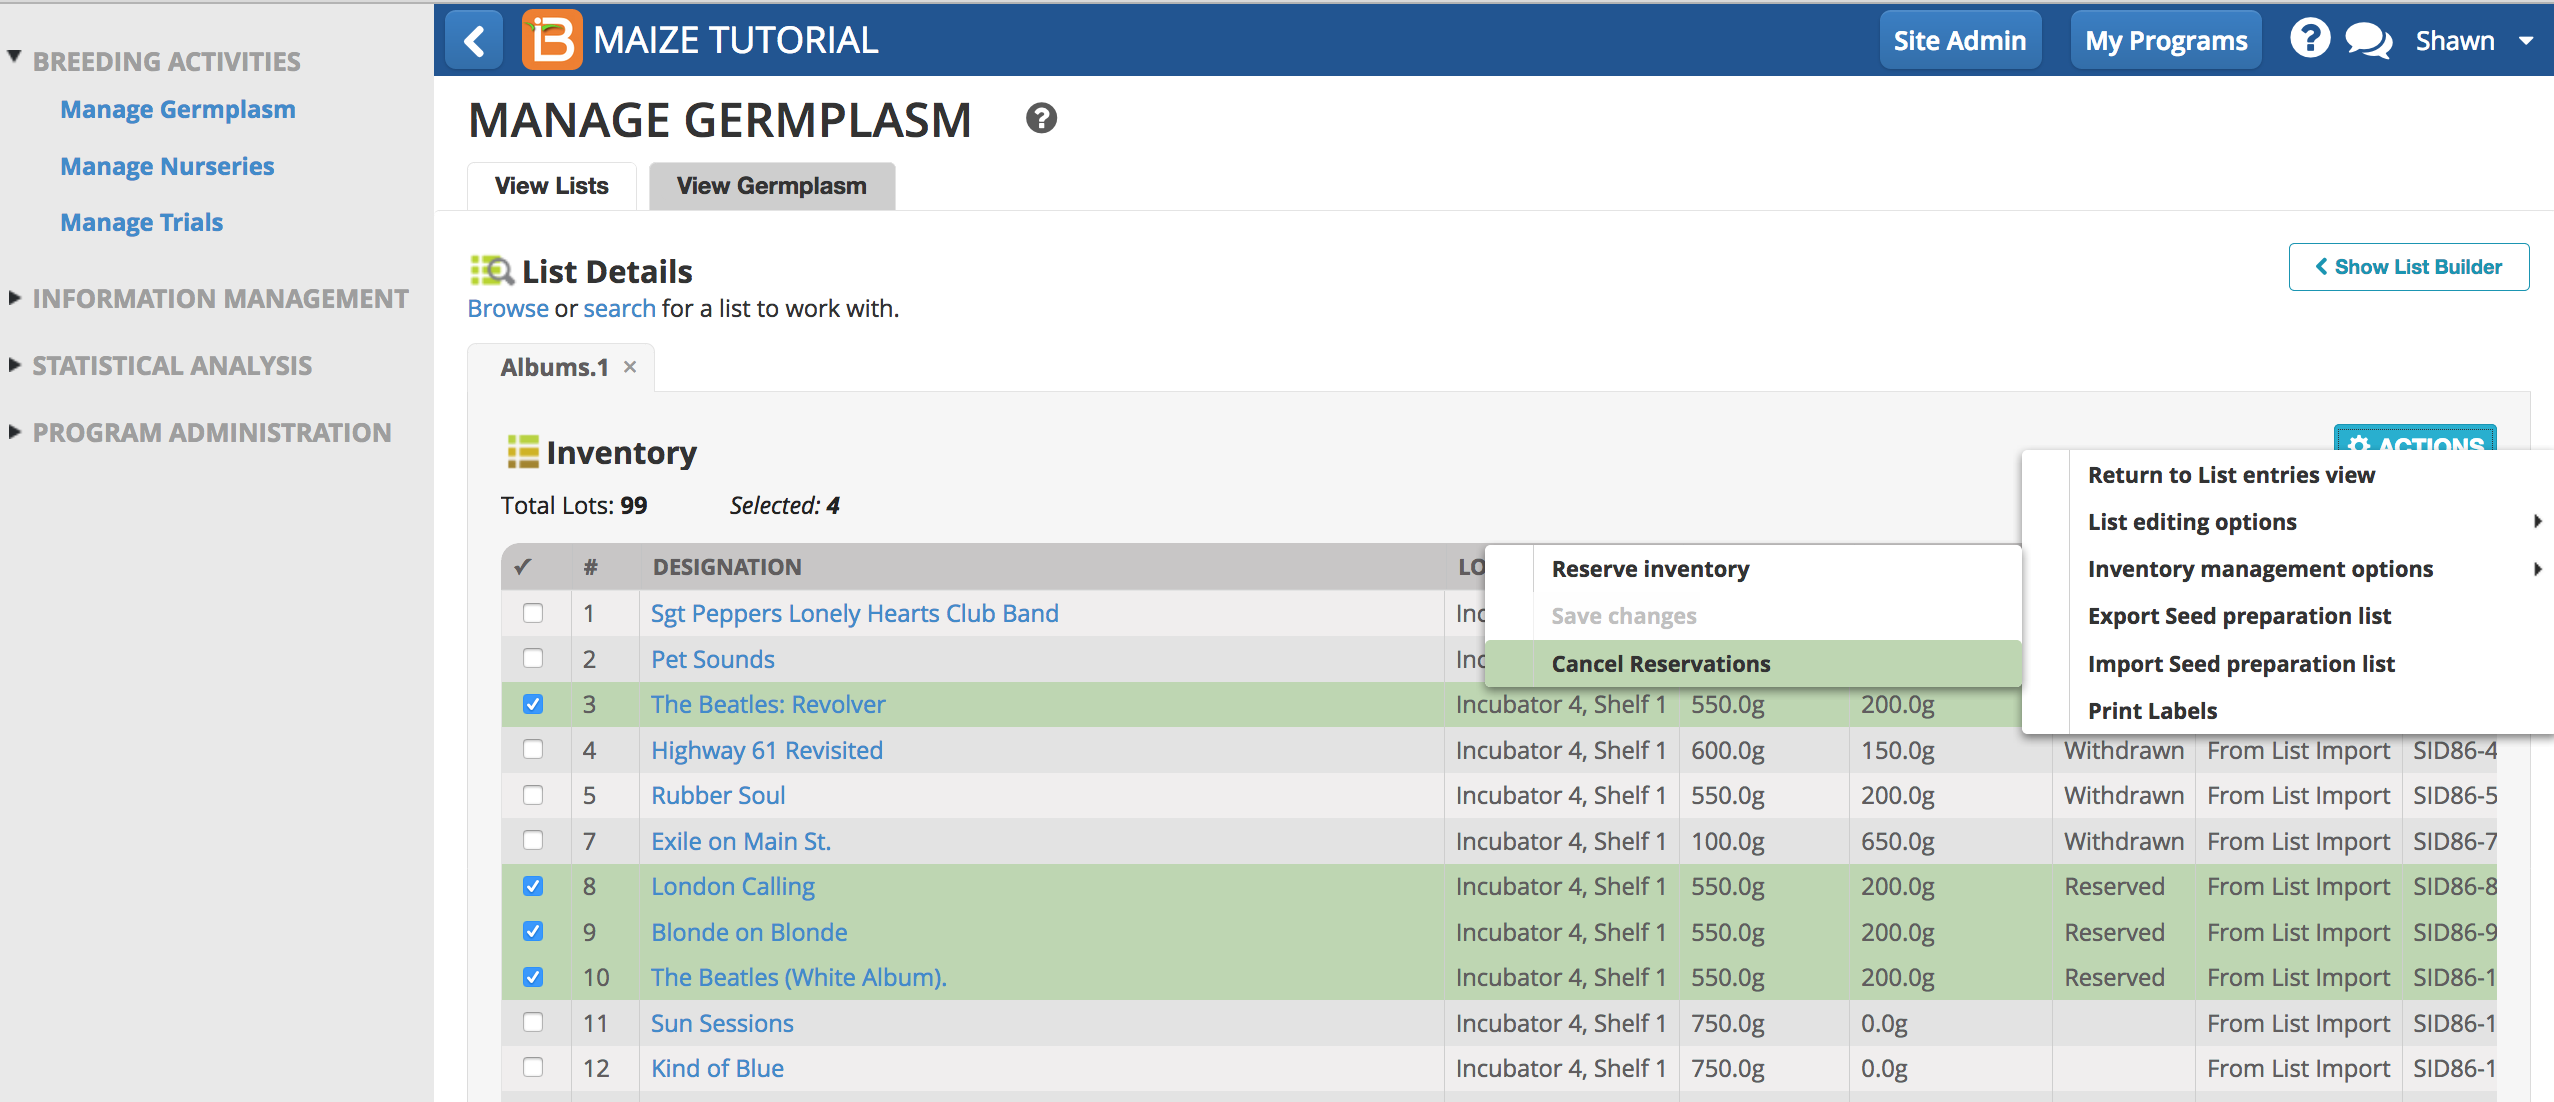
Reserve & Withdraw Inventory
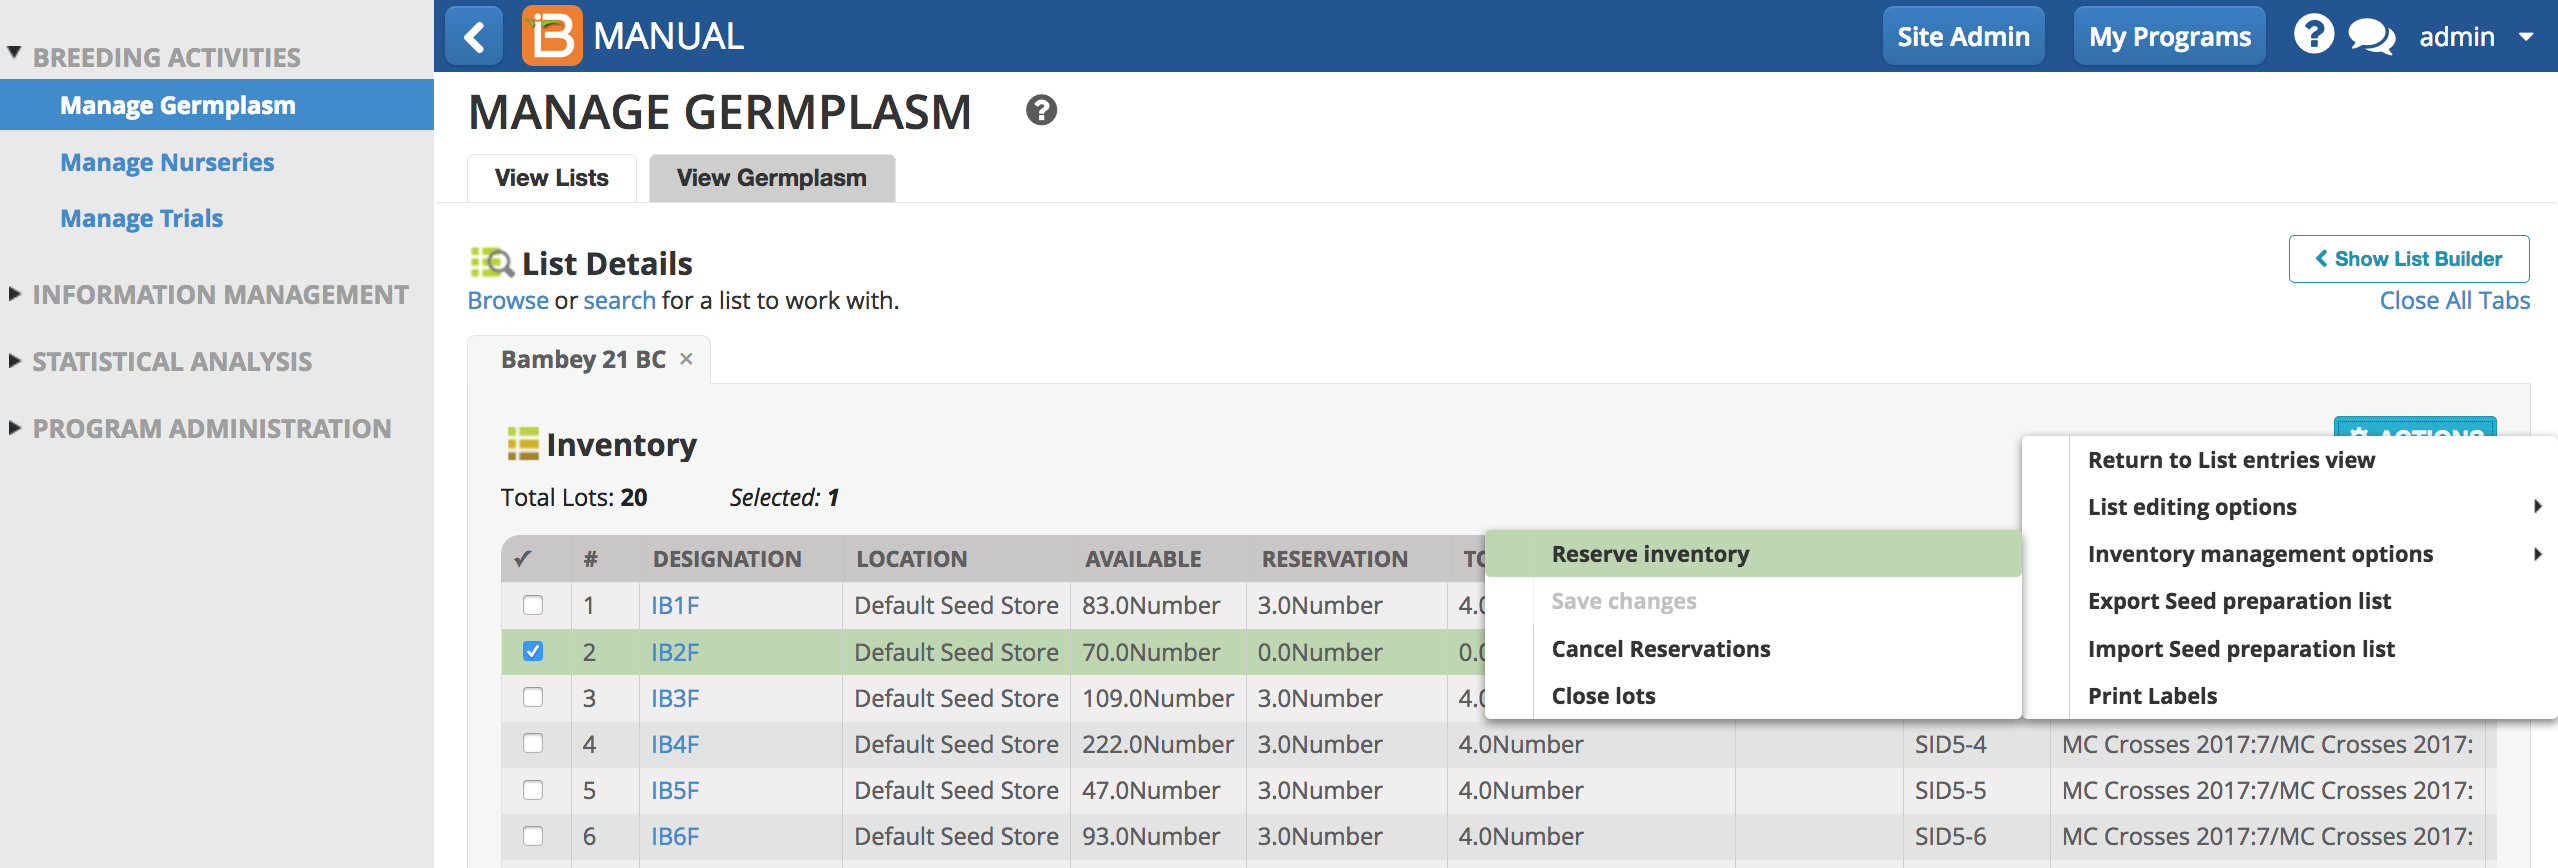
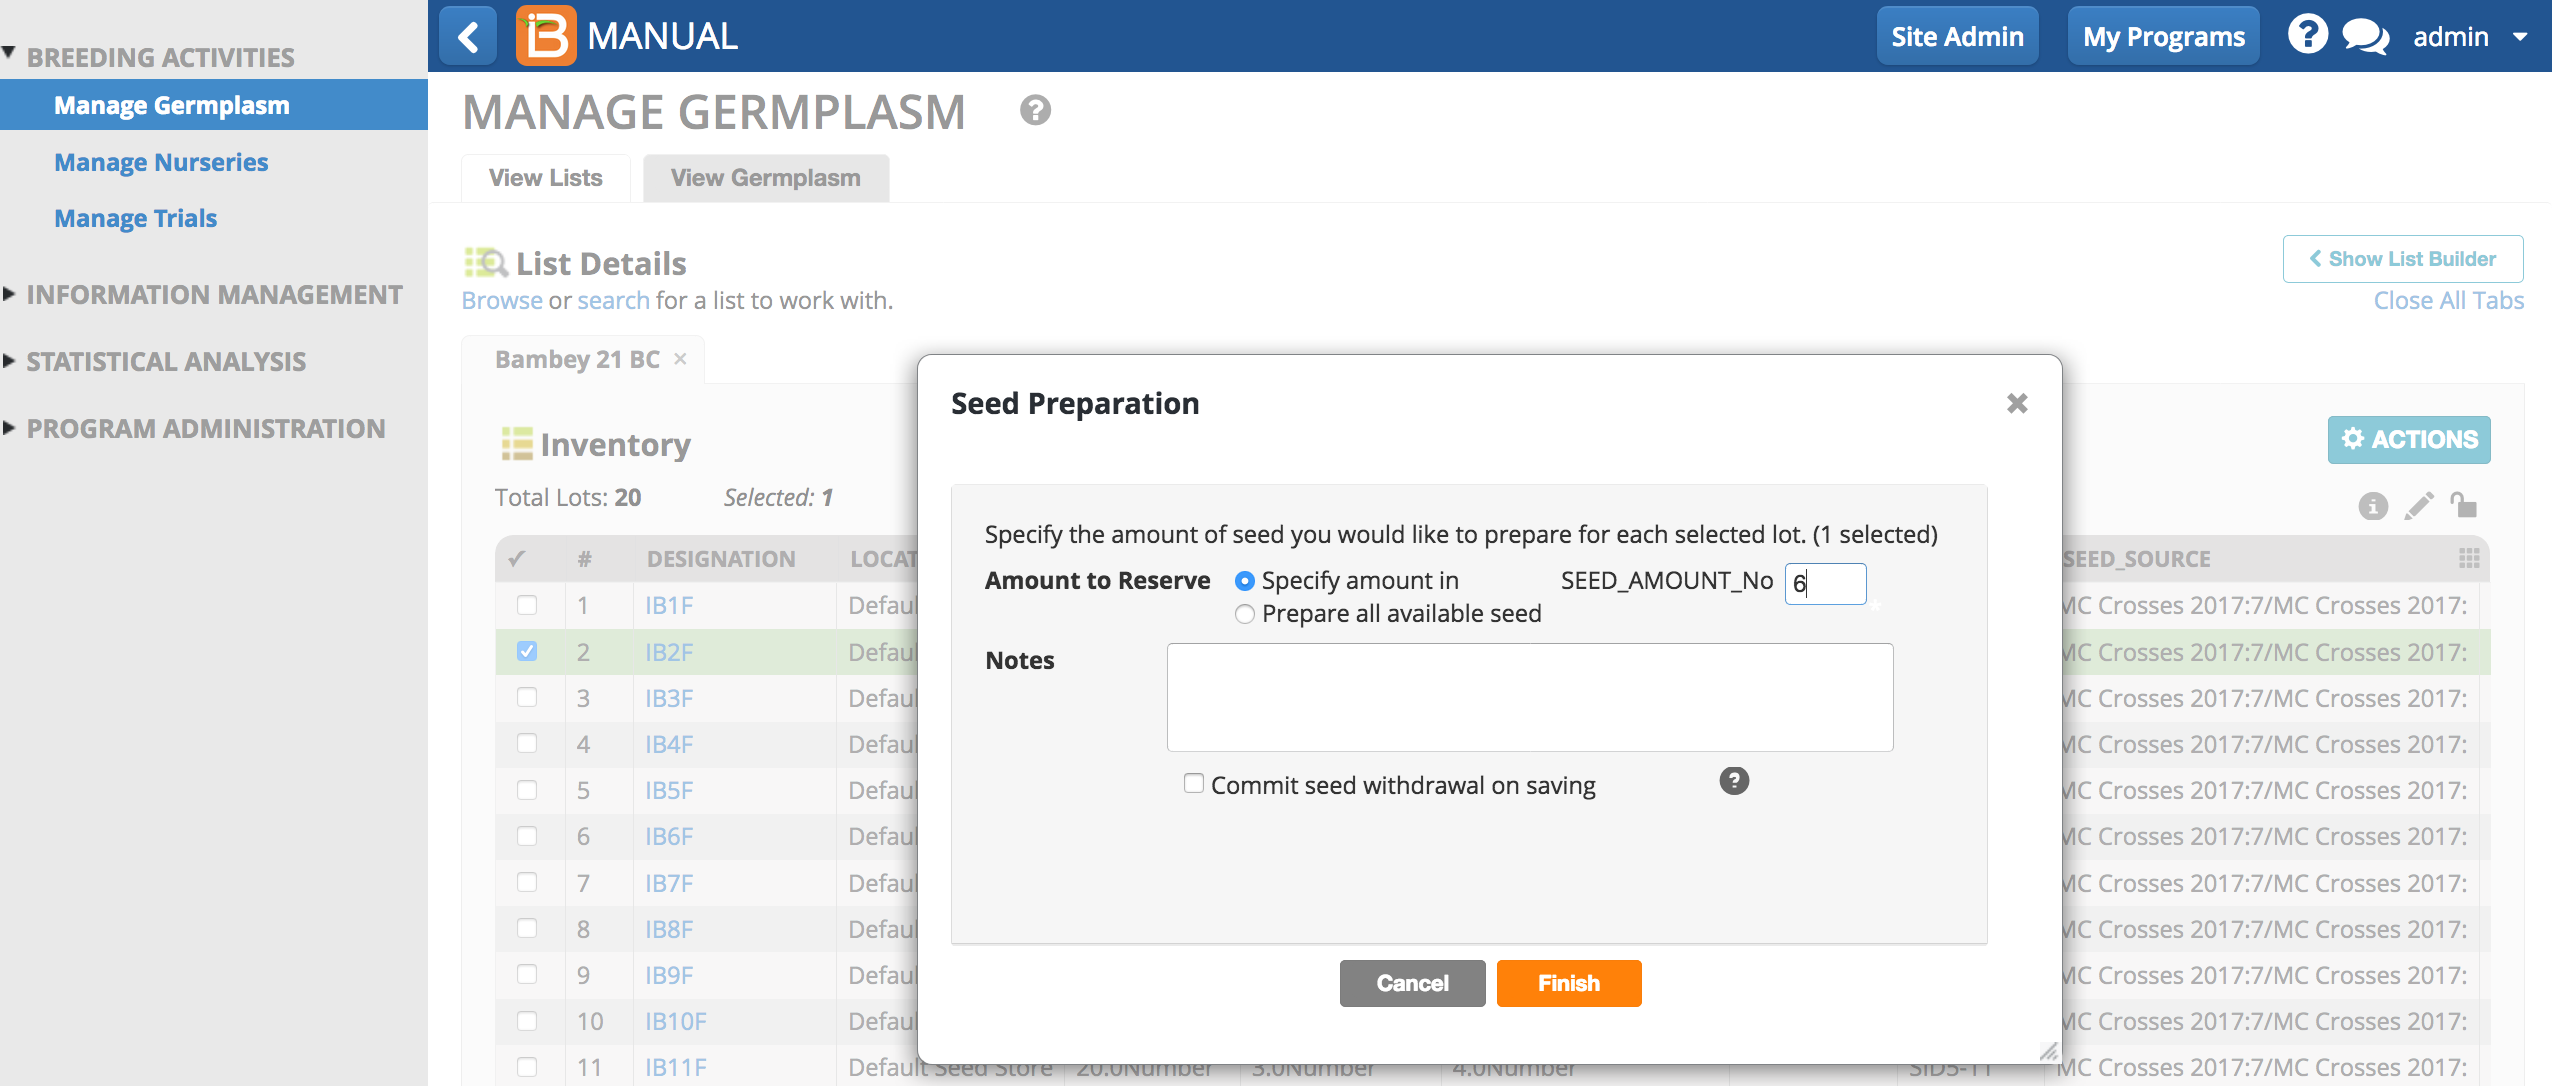
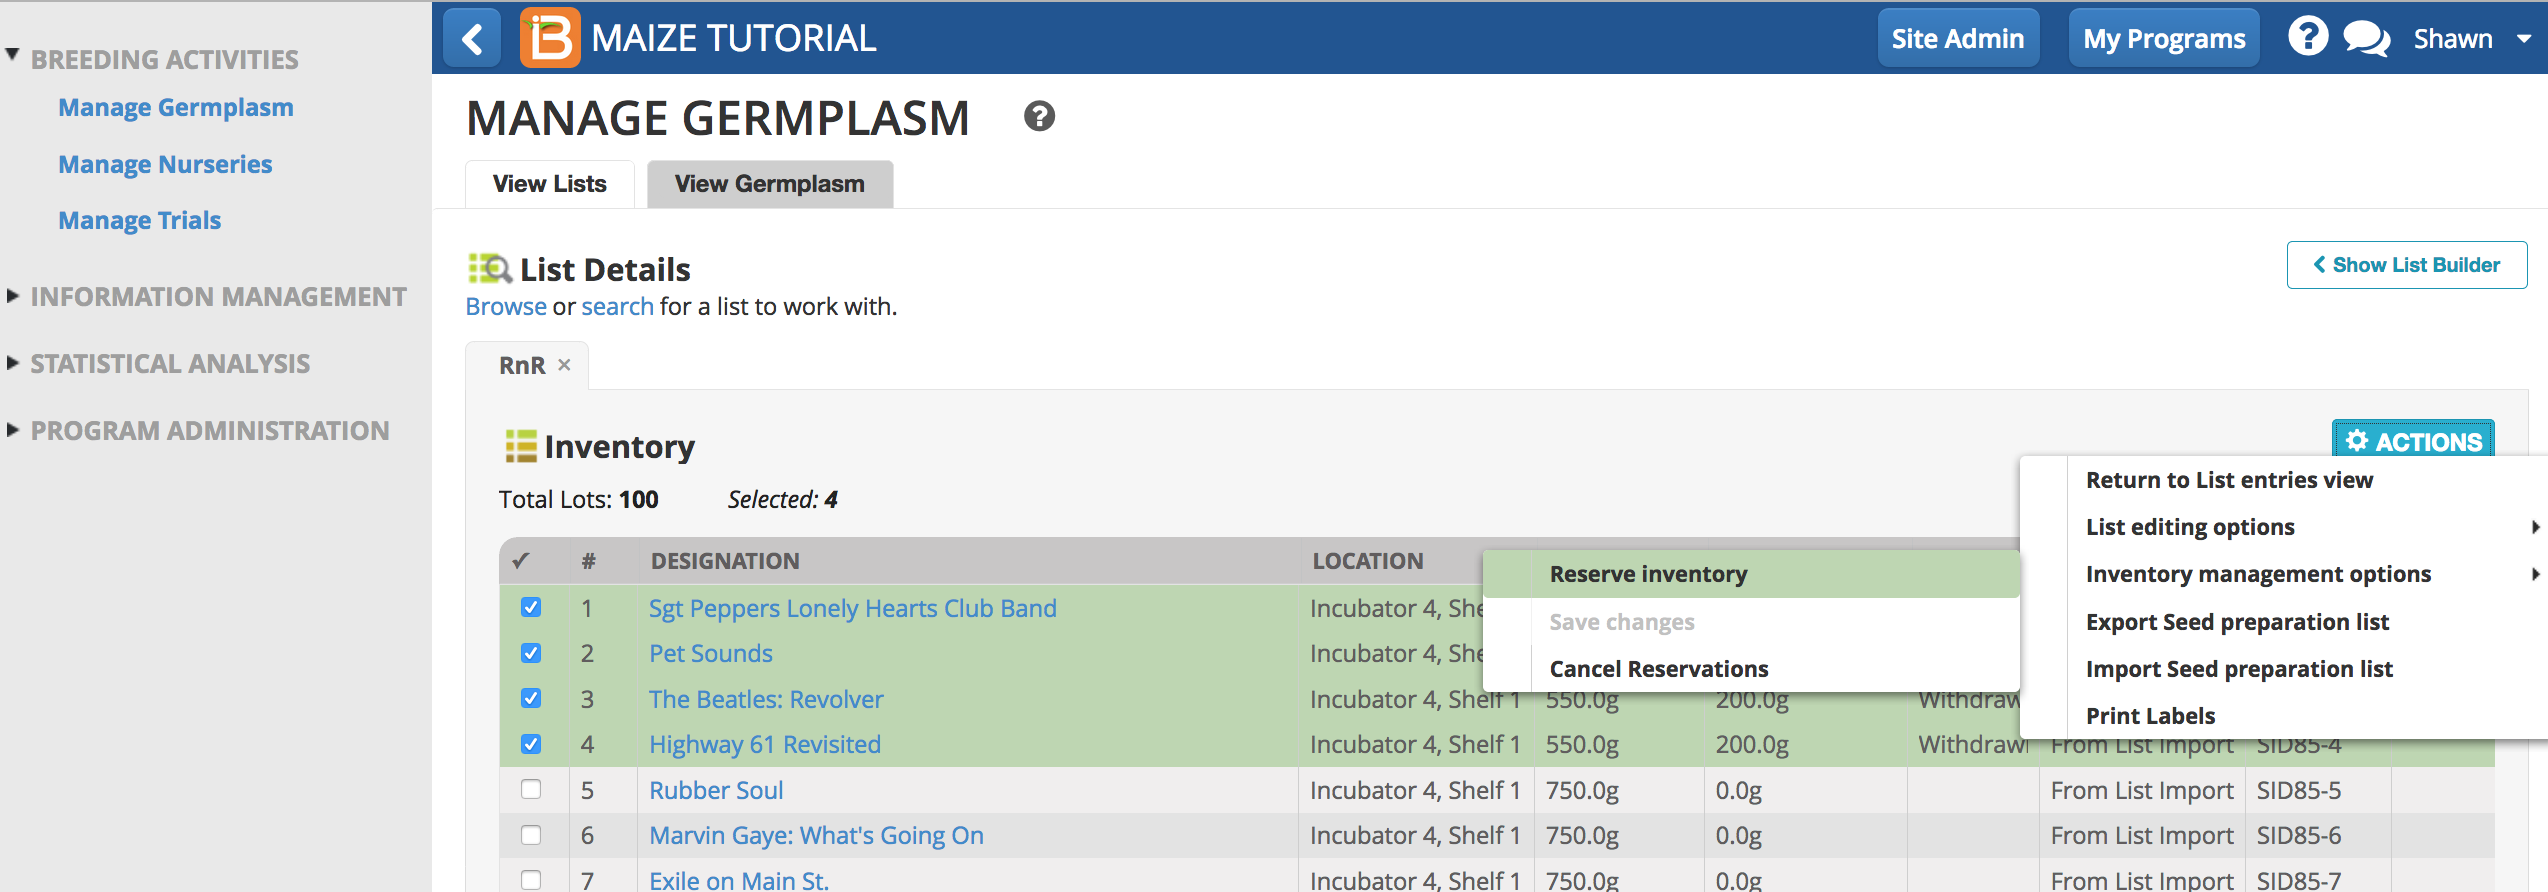
Inventory reservation and withdrawal are available from inventory view of the Germplasm Management tool. The BMS handles inventory subtraction as a two-step process of reserve and withdraw, similar to a pending transaction on a credit card. The user has the option to reserve all or a subset of lots. Only one reservation amount is permitted per selection.
- Reserve Inventory from Actions menu.
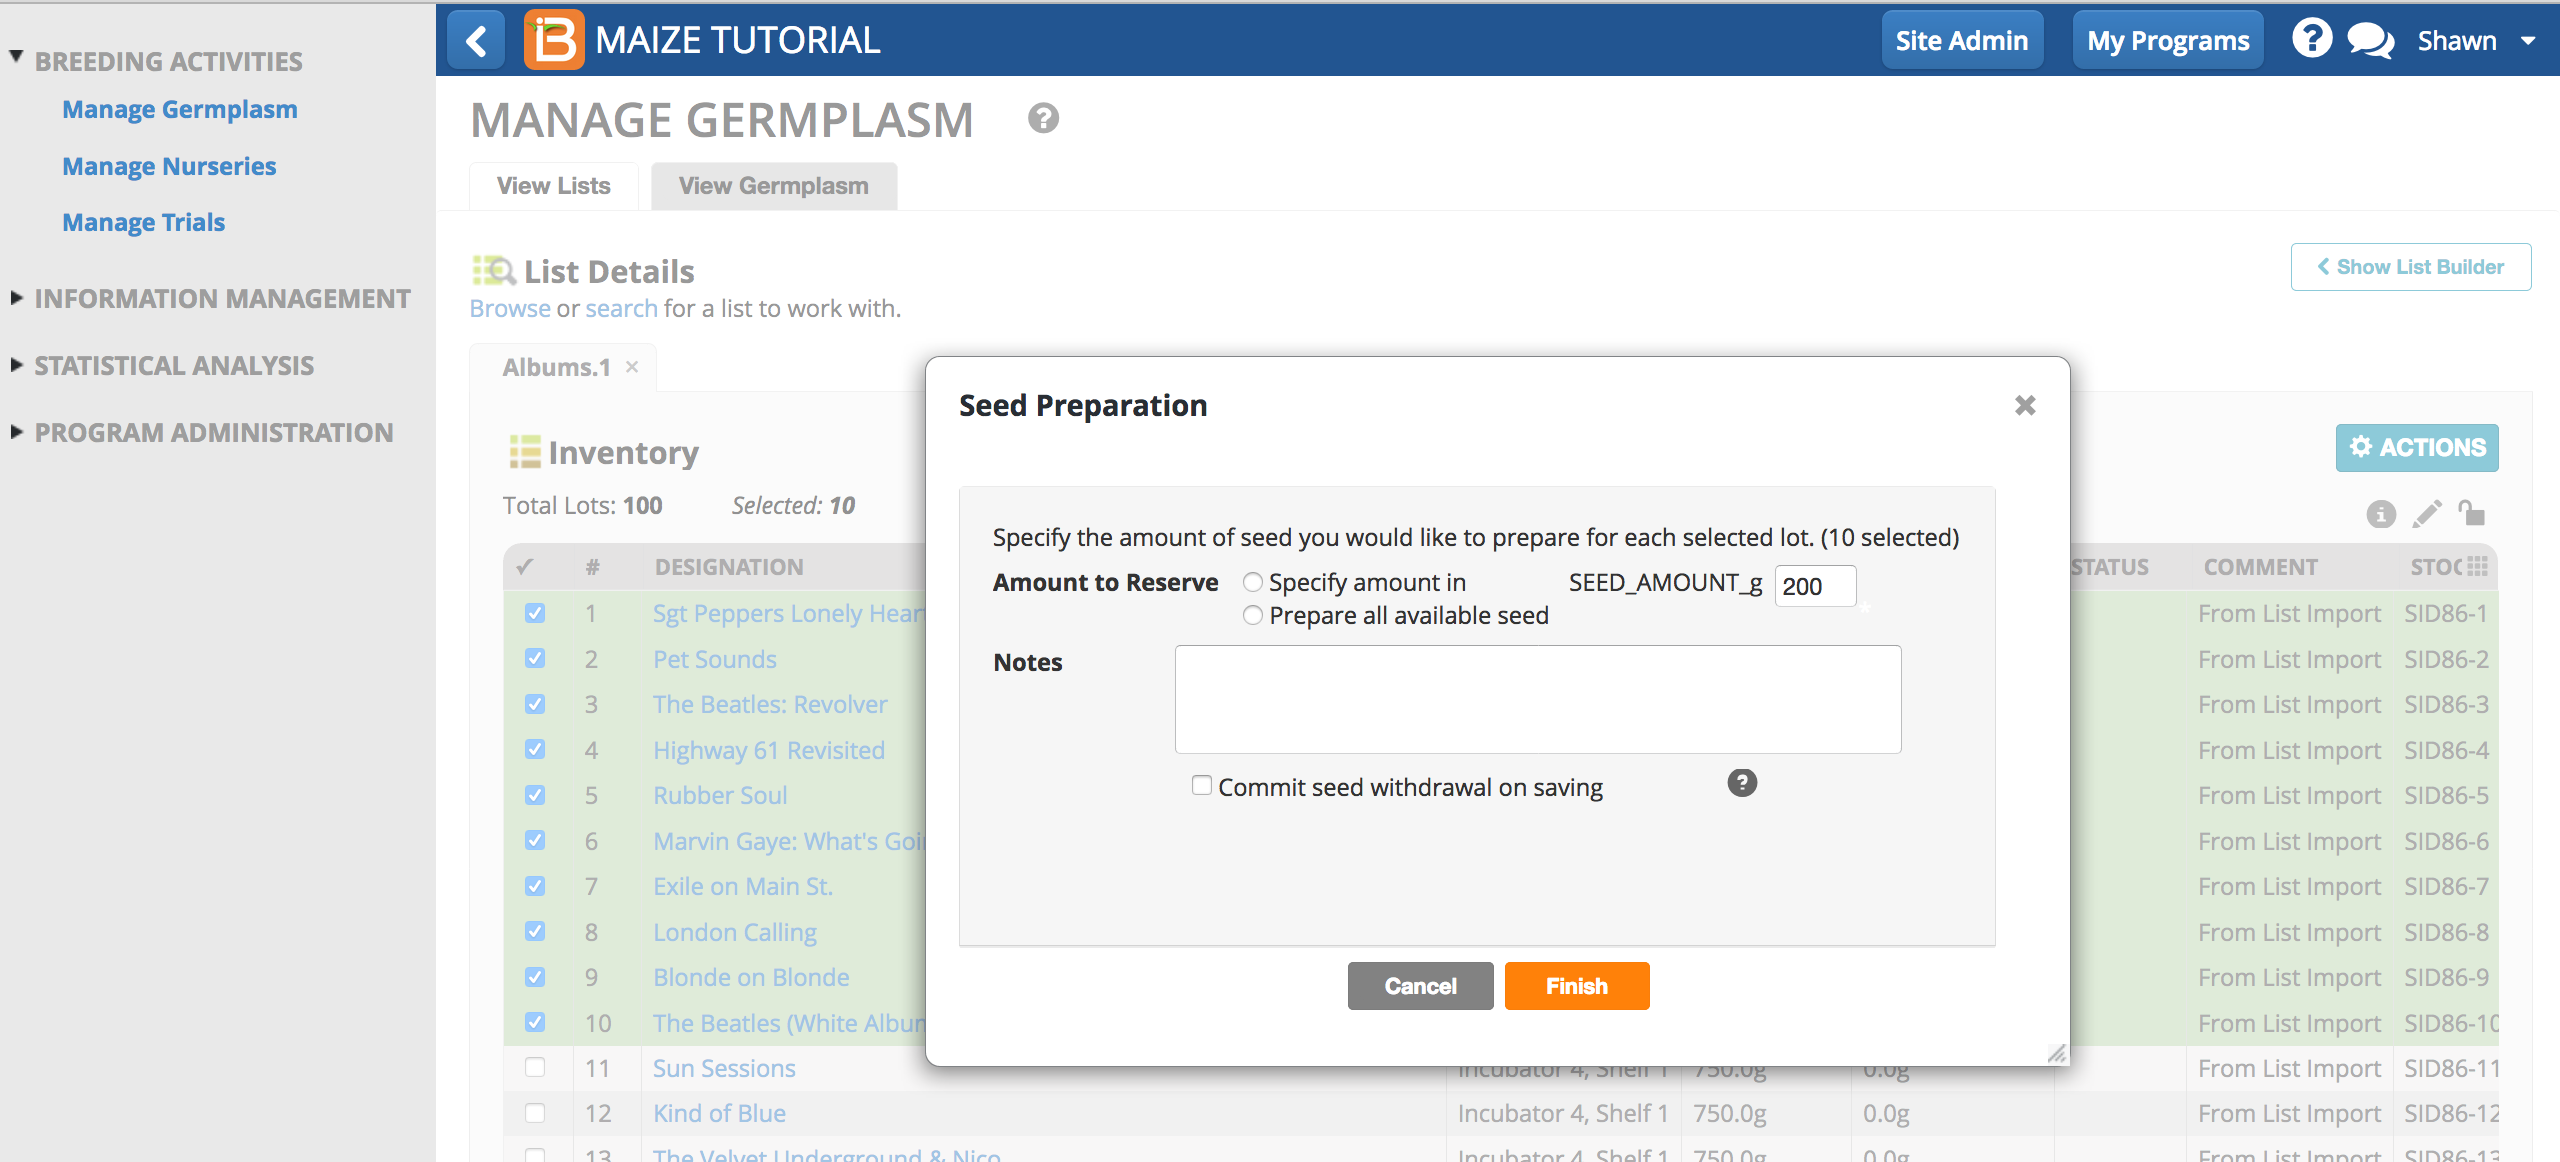
- Reserve specific amount of seed by entering the value or selecting prepare all available and Finish.
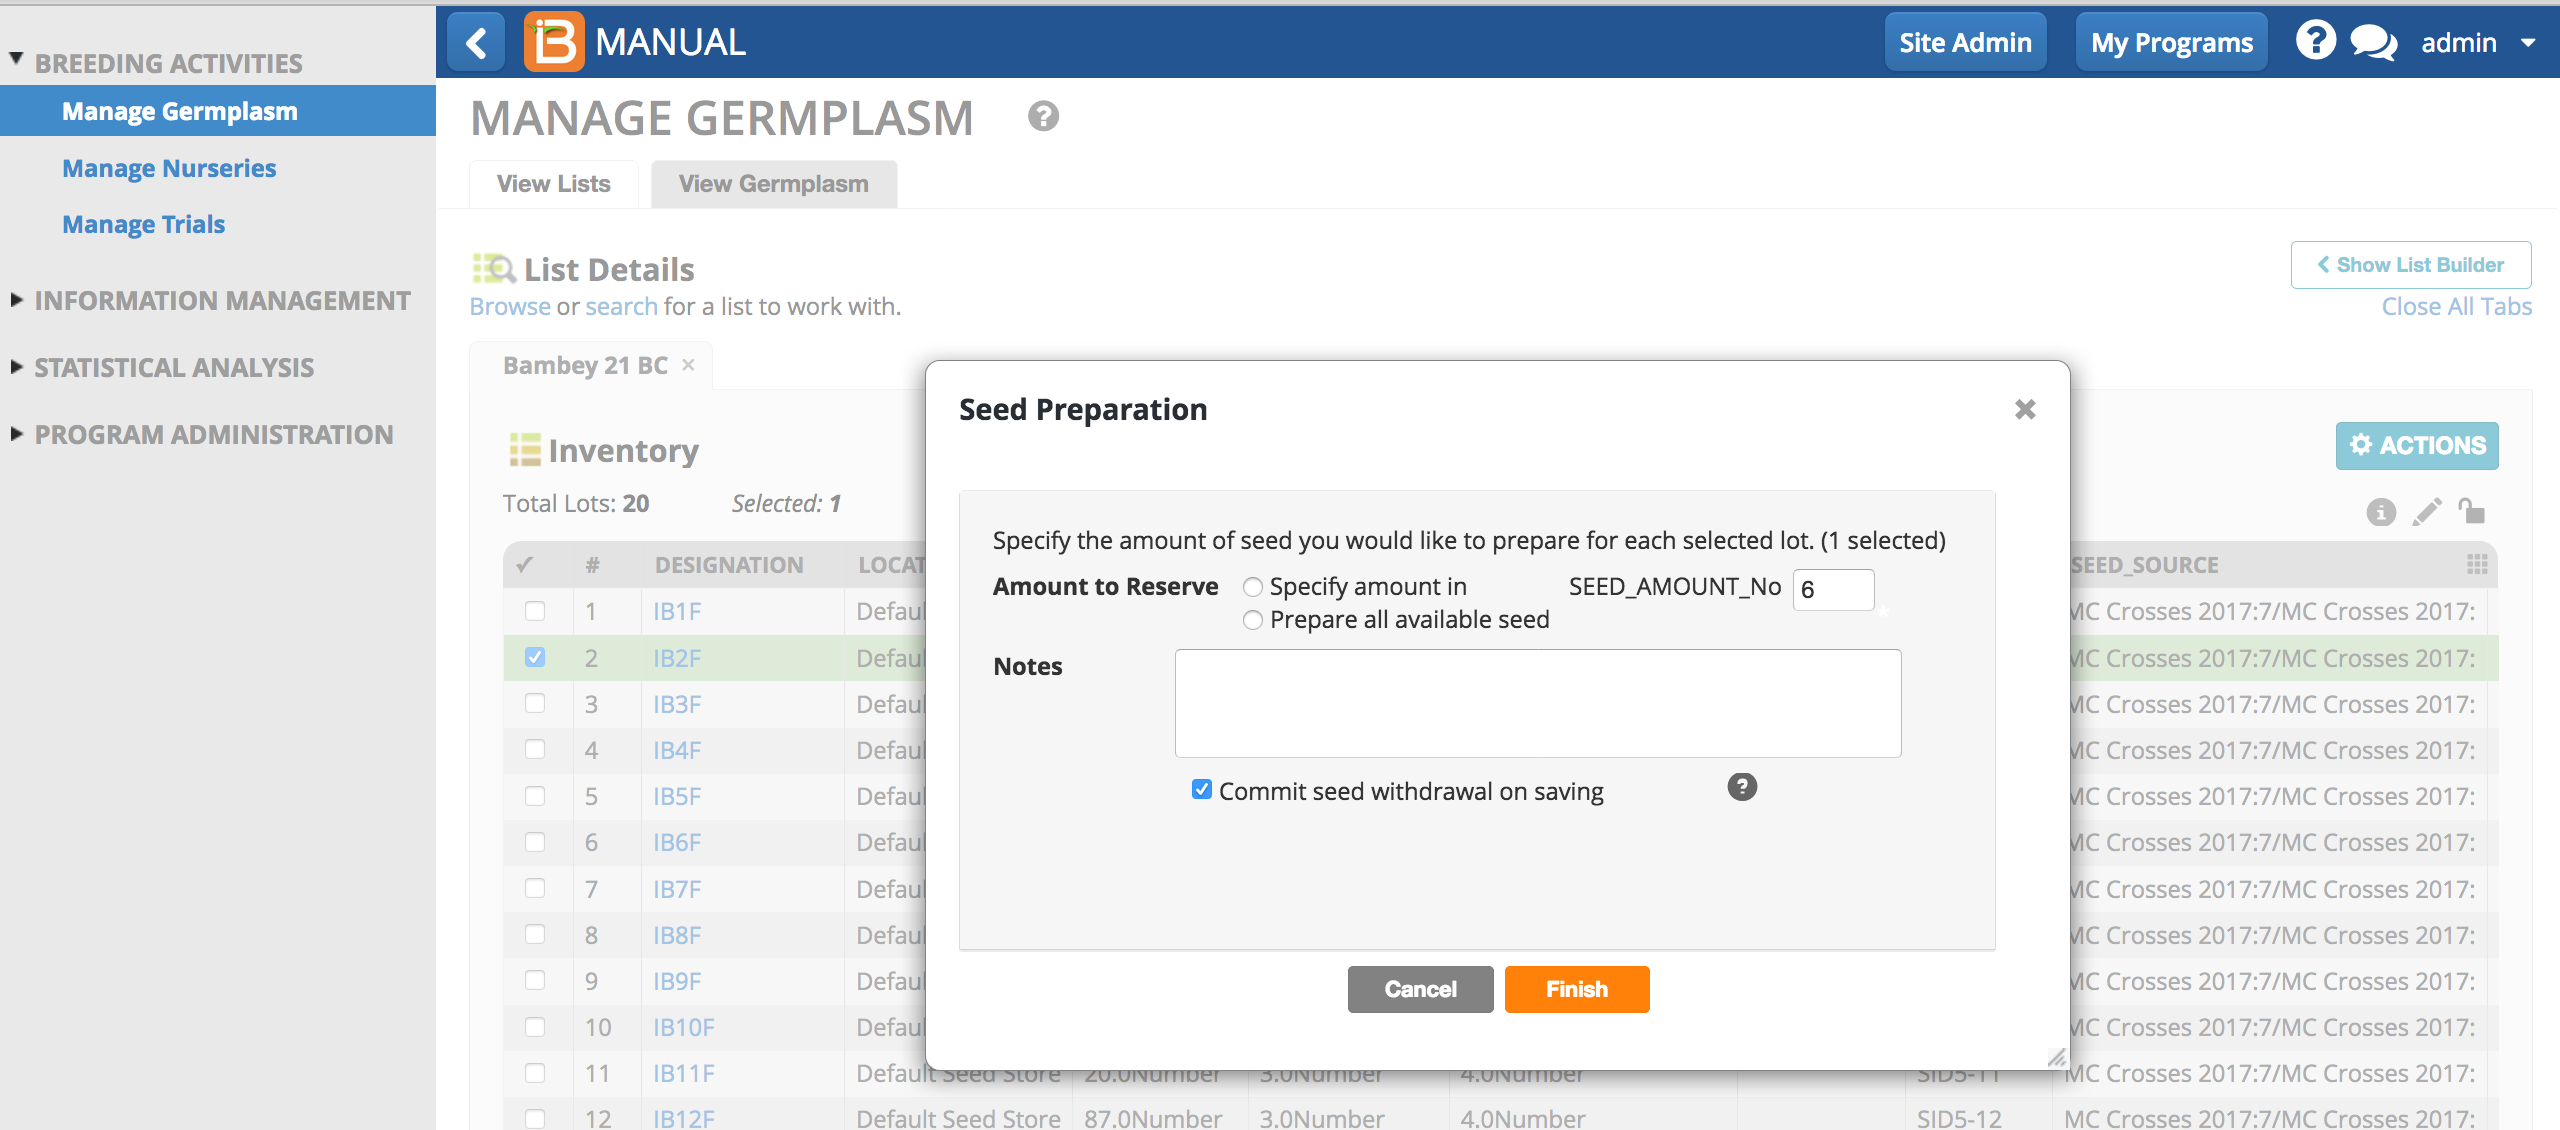
One Step: Reserve/Withdraw
If 'Commit seed withdrawal on saving' is selected, reservation and withdrawal occur in a single step upon saving. The one-step process is suitable for inventory adjustments, such as to change actual amount of inventory in storage to a lesser amount. One stepreserve/withdraw does not allow for the export of a seed preparation files or labels.
- Select commit seed withdrawl on saving.
- Select Save Changes from the Actions menu to update the Status column in inventory view.
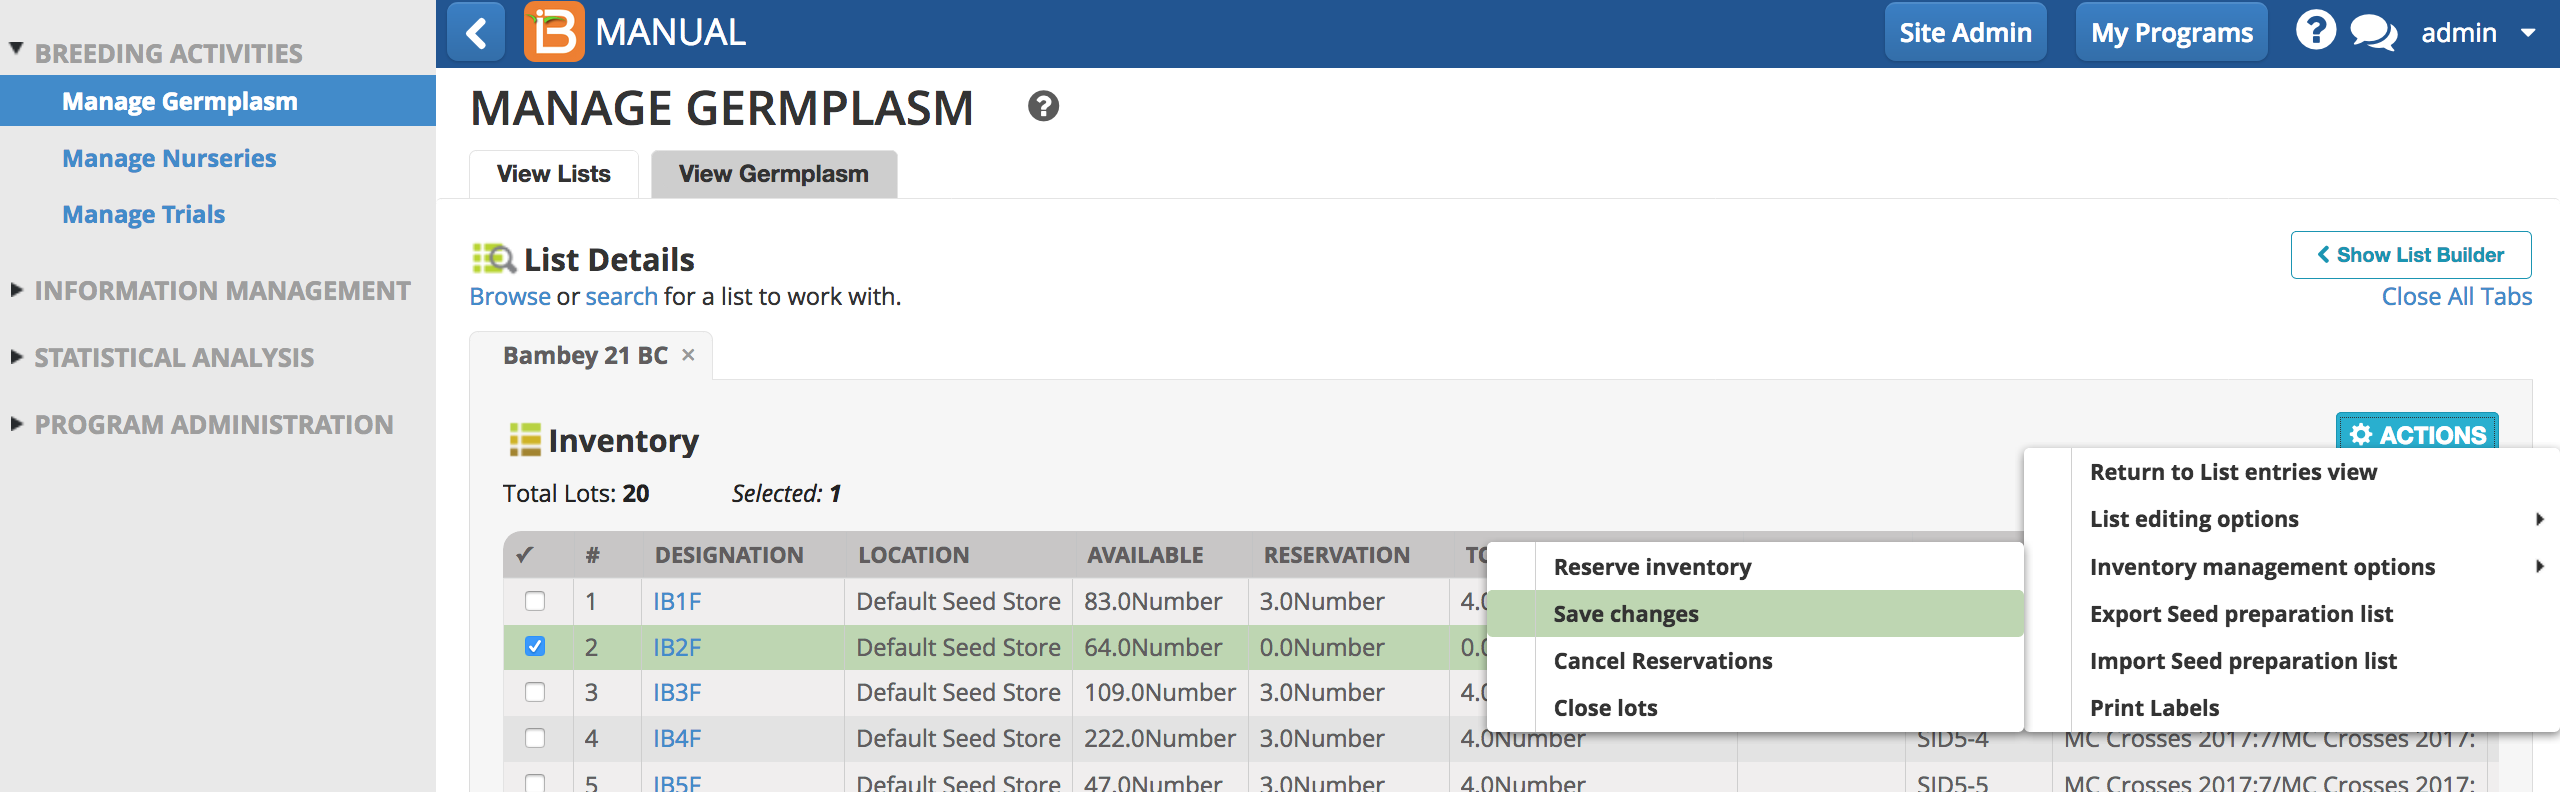
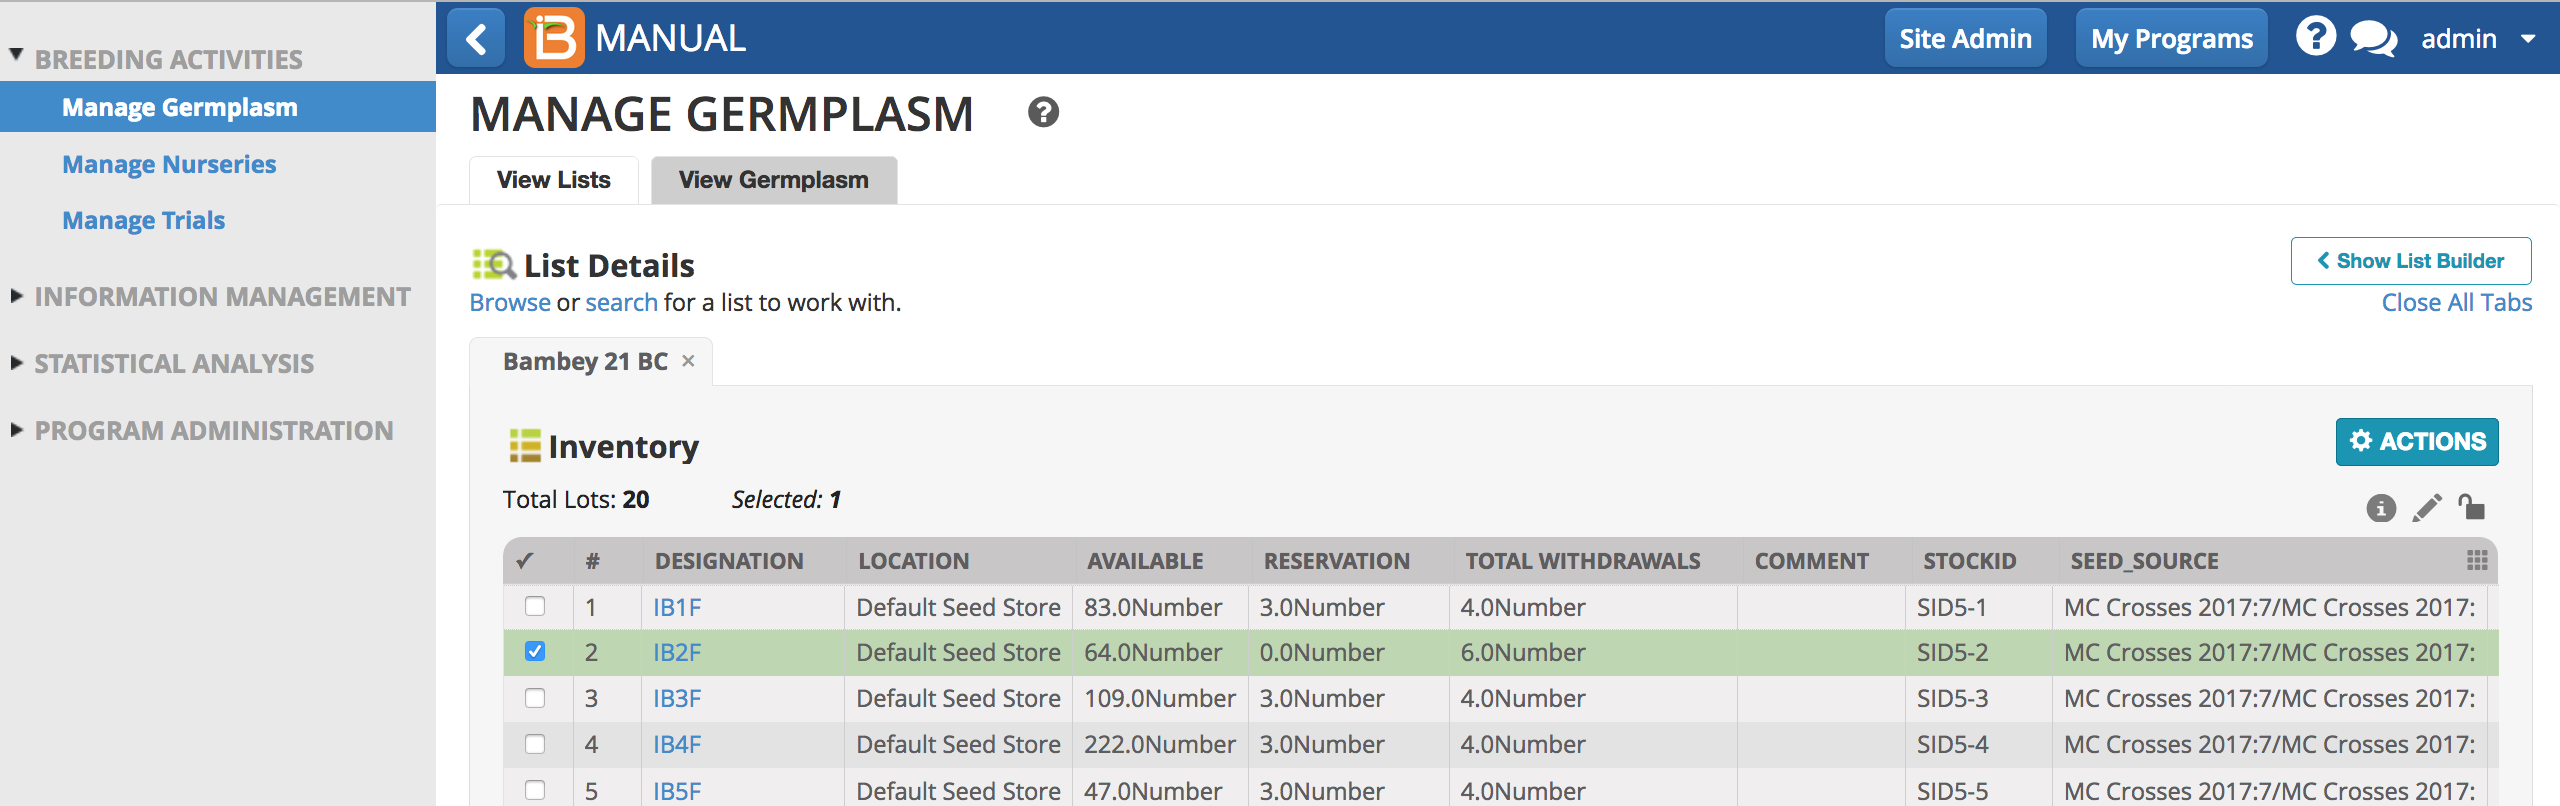
After saving the 6 seeds committed for withdrawal are now withdrawn.
Two Step: Reserve then Withdraw
The advantage of making a reservation before committing the withdrawal is the ability to generate a seed preparation list and labels to assist seed preparation in the stock room.
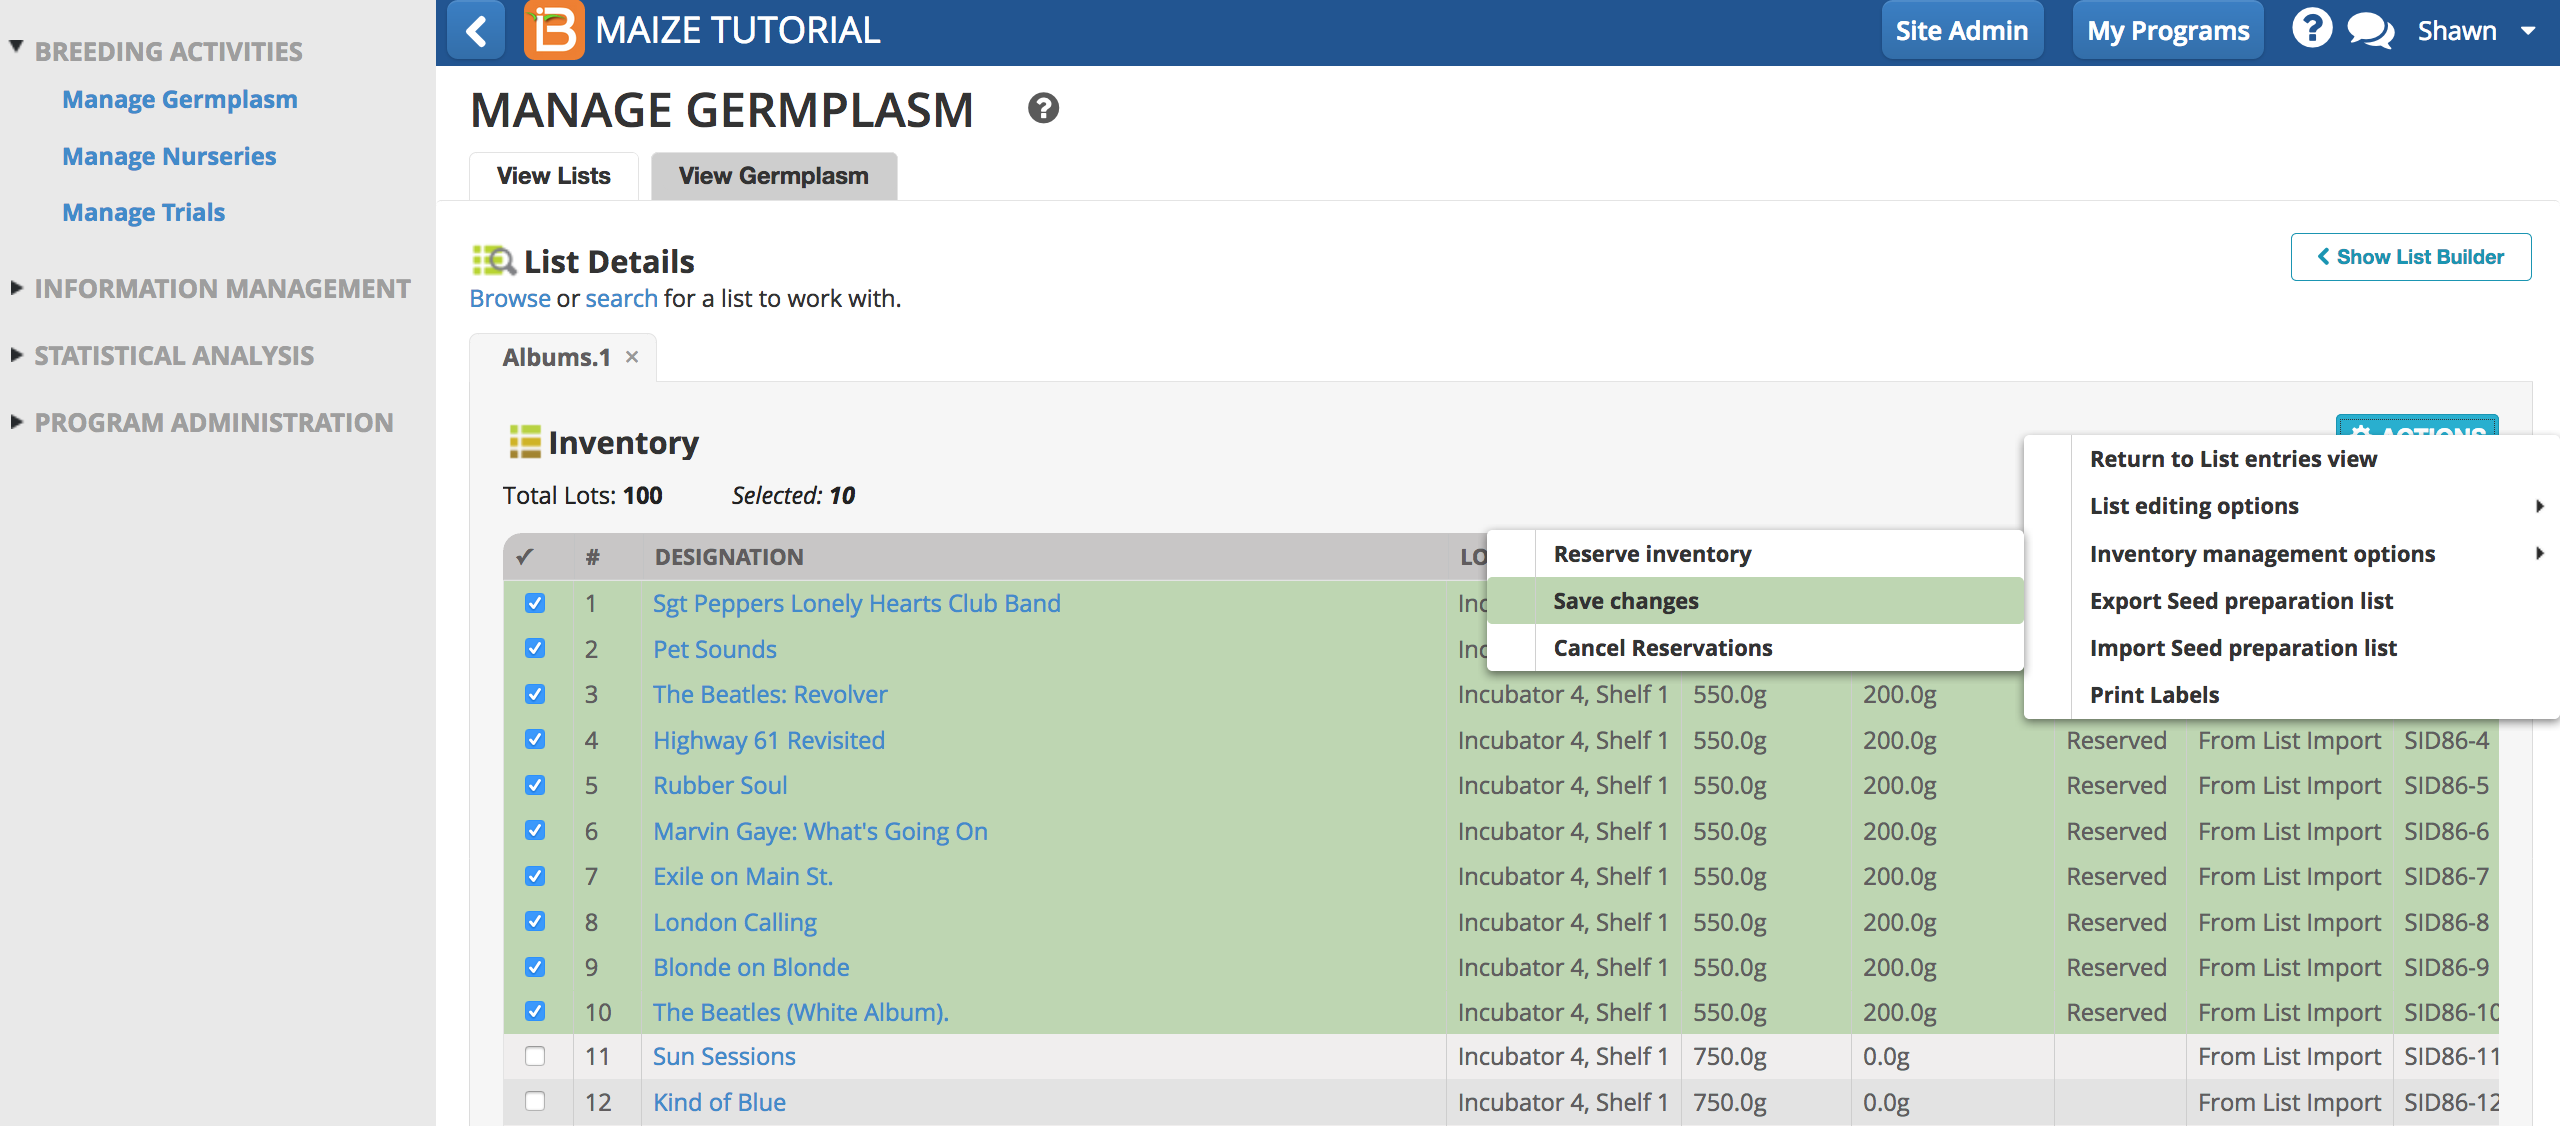
Reserve Inventory
- Select the lots from which you want to reserve inventory. Select reserve inventory.
- Specify the amount of seed to be reserved and Finish. Do not select 'Commit seed withdrawal on saving'.
- Save the changes.
Seed Preparation List
- Select Export Seed Preparation List.
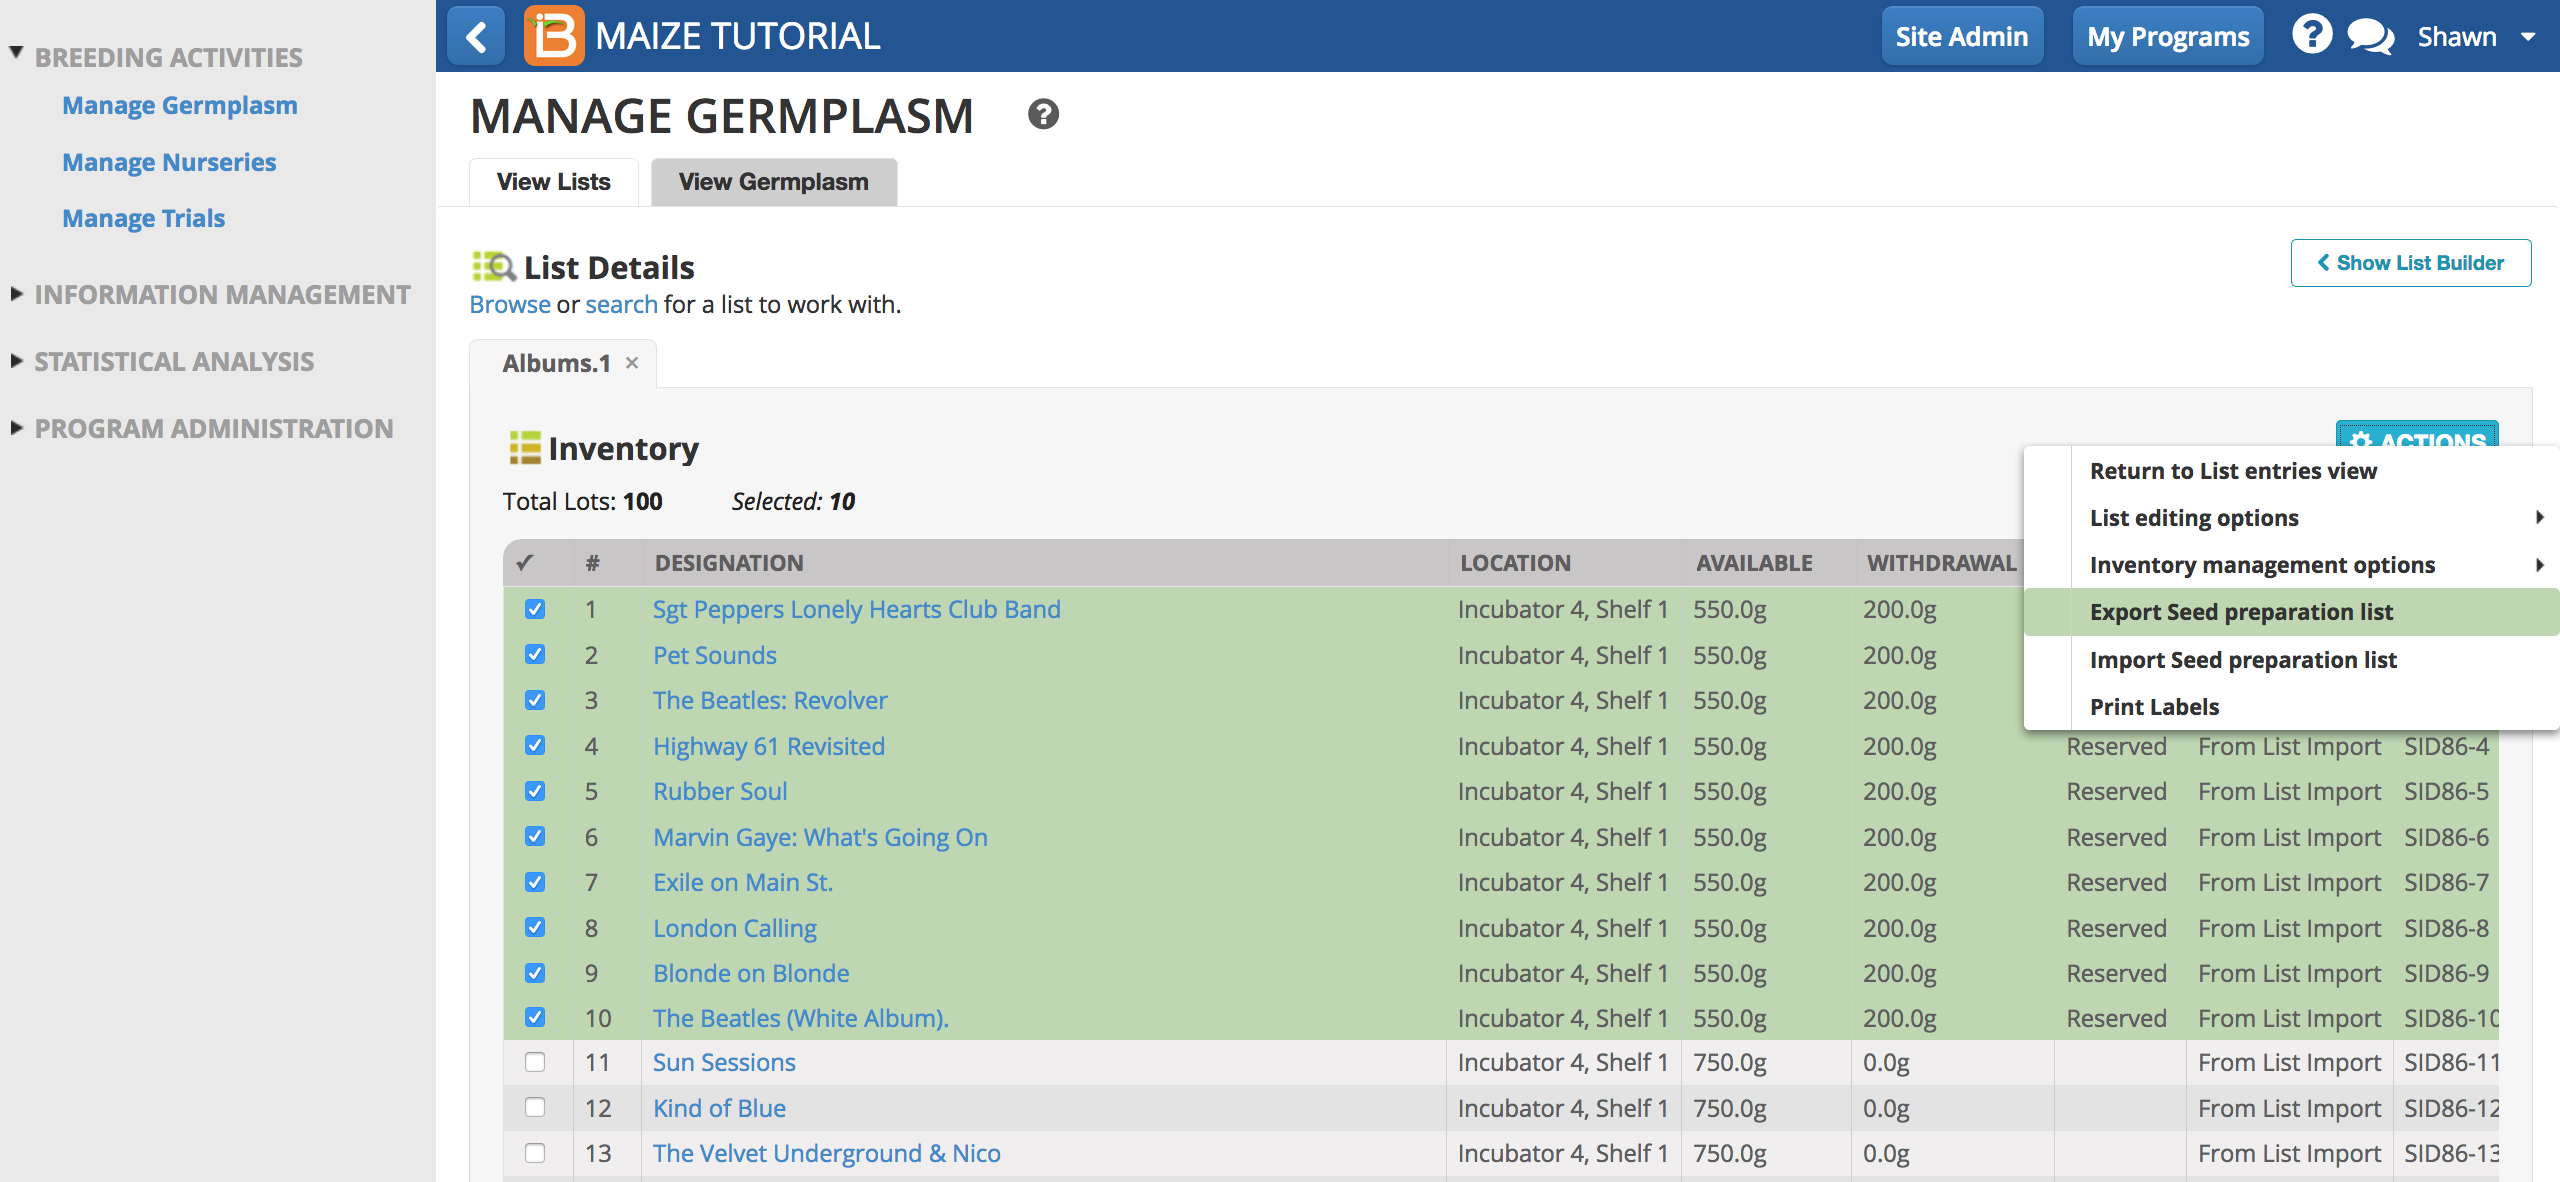
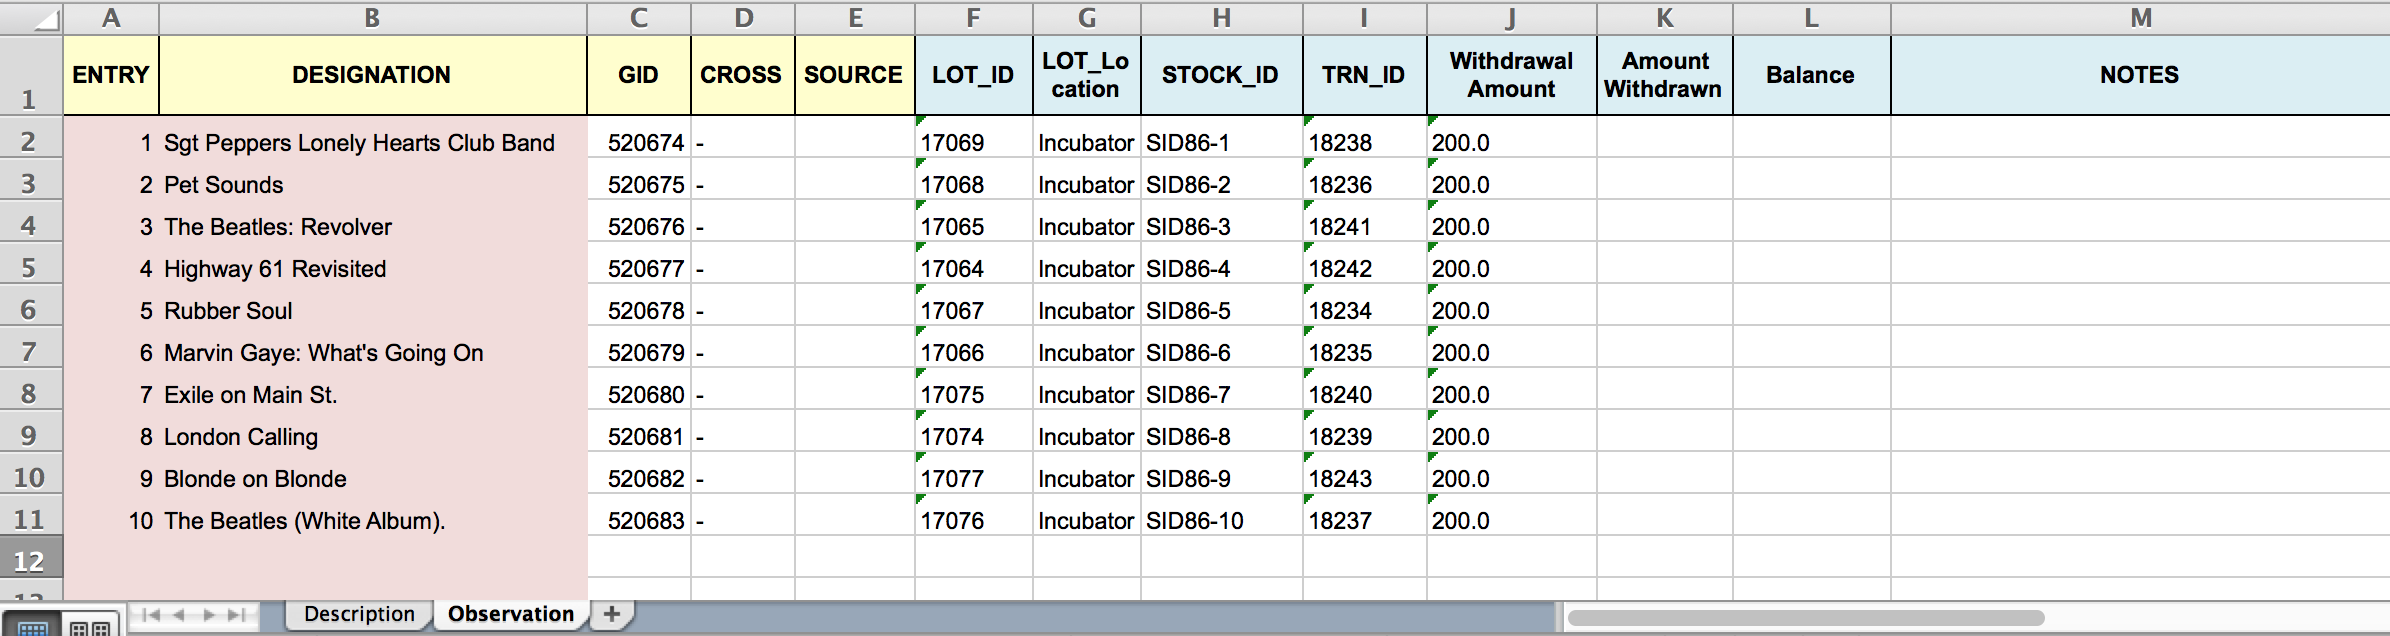
Notice reserved lots are noted in the status column and the pending withdrawal amount is subtracted from the available amount. The Withdrawal column reports the total reserved and withdrawn amount for all transactions.
The seed preparation sheet has empty columns to record either the amount withdrawn or the remaining balance.
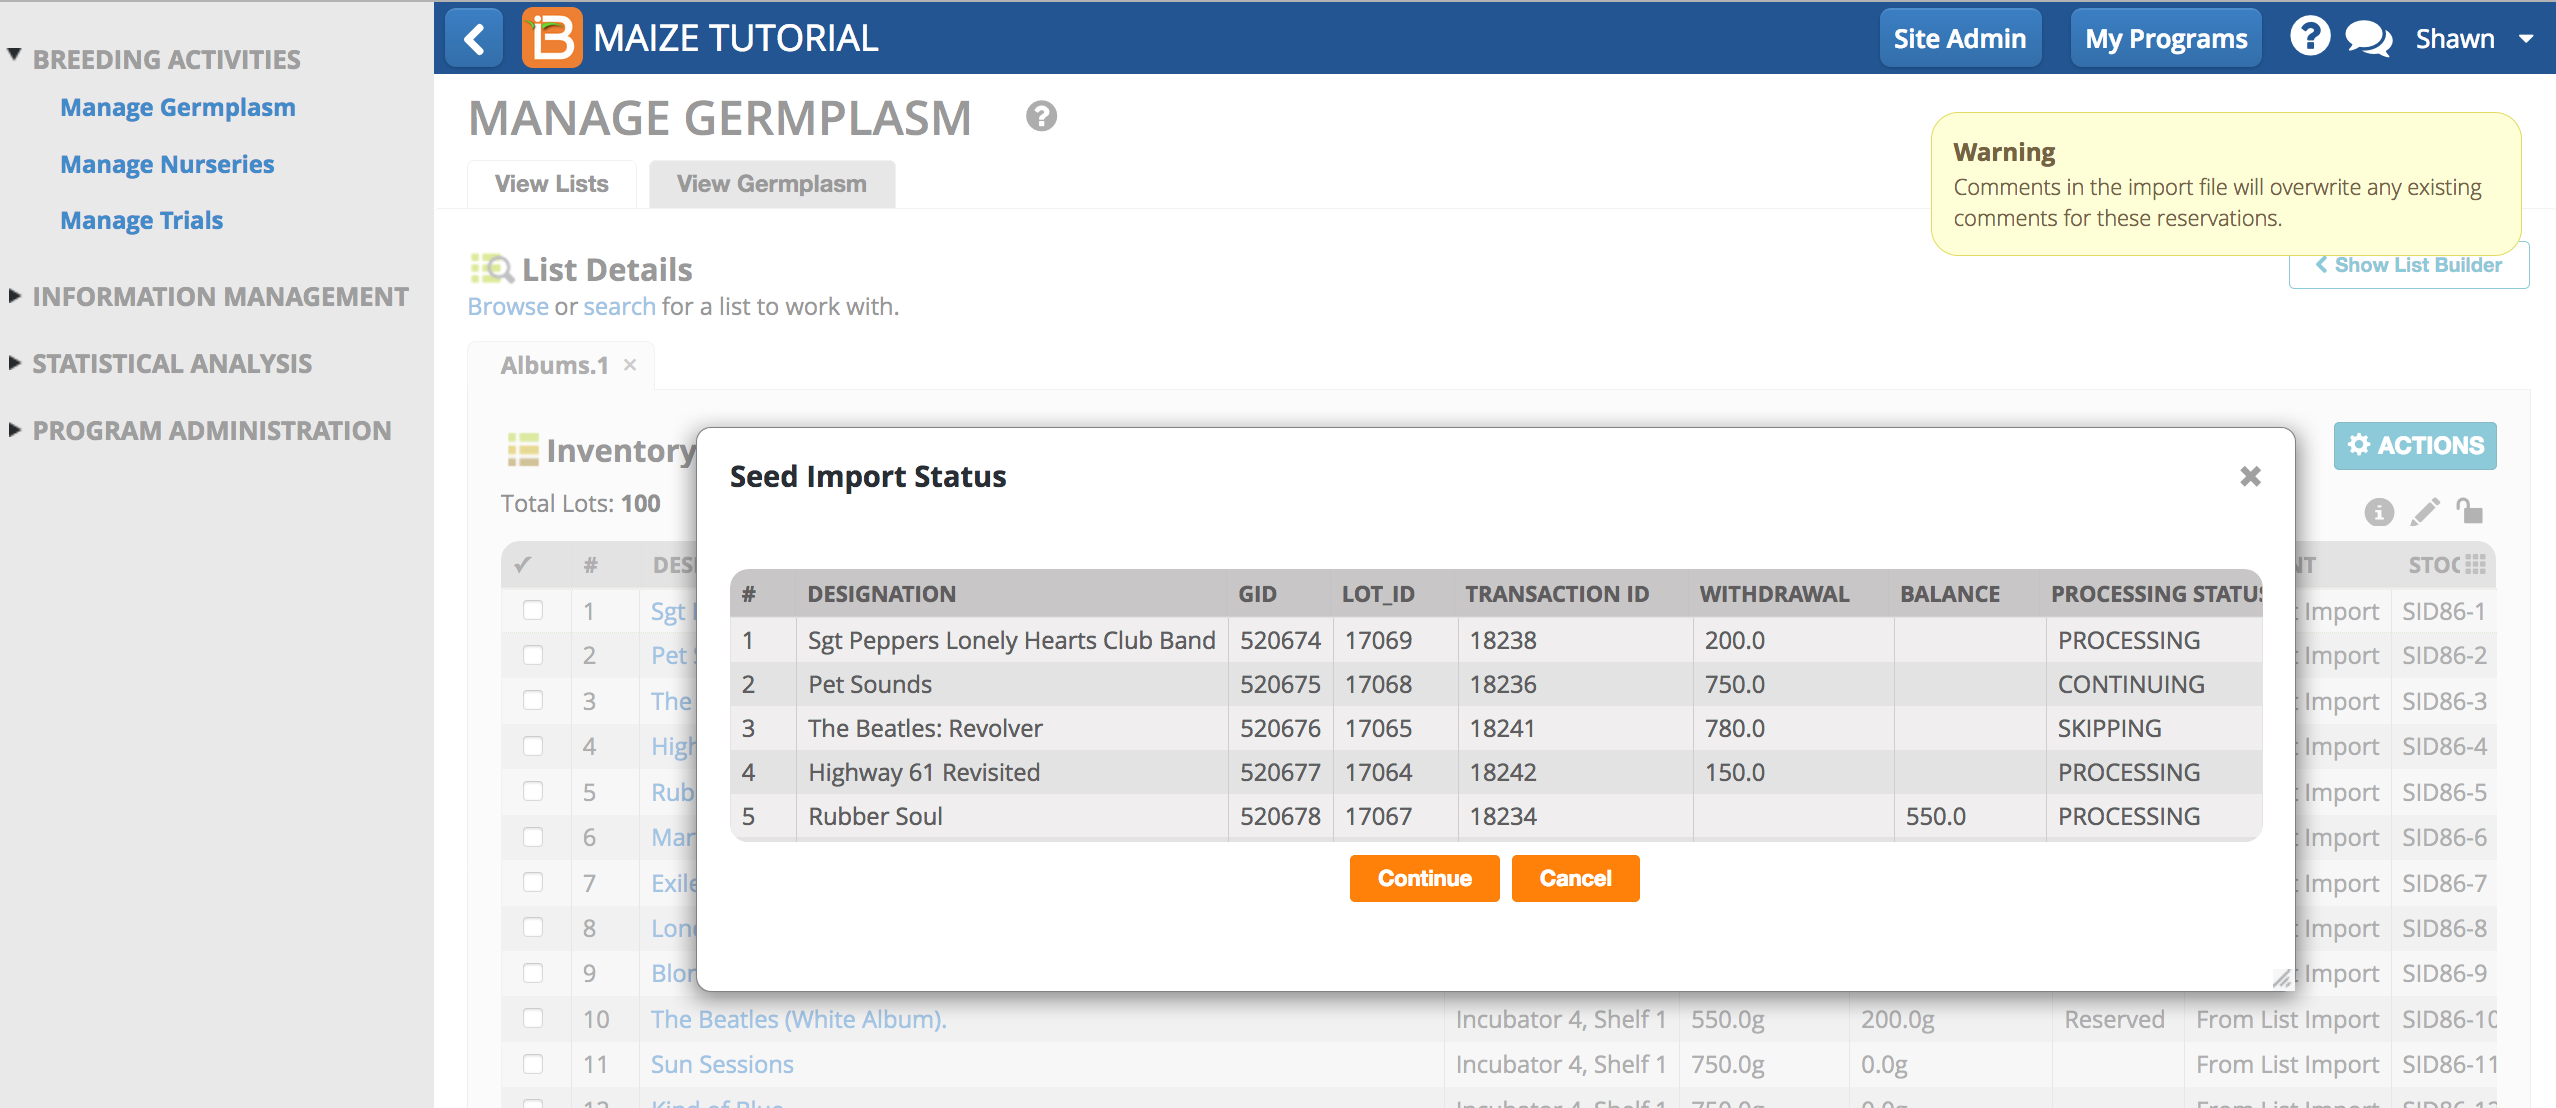
- Enter either the amount withdrawn or the balance remaining and save the seed preparation file. Notes imported via the file will overwrite comments made via the user interface.
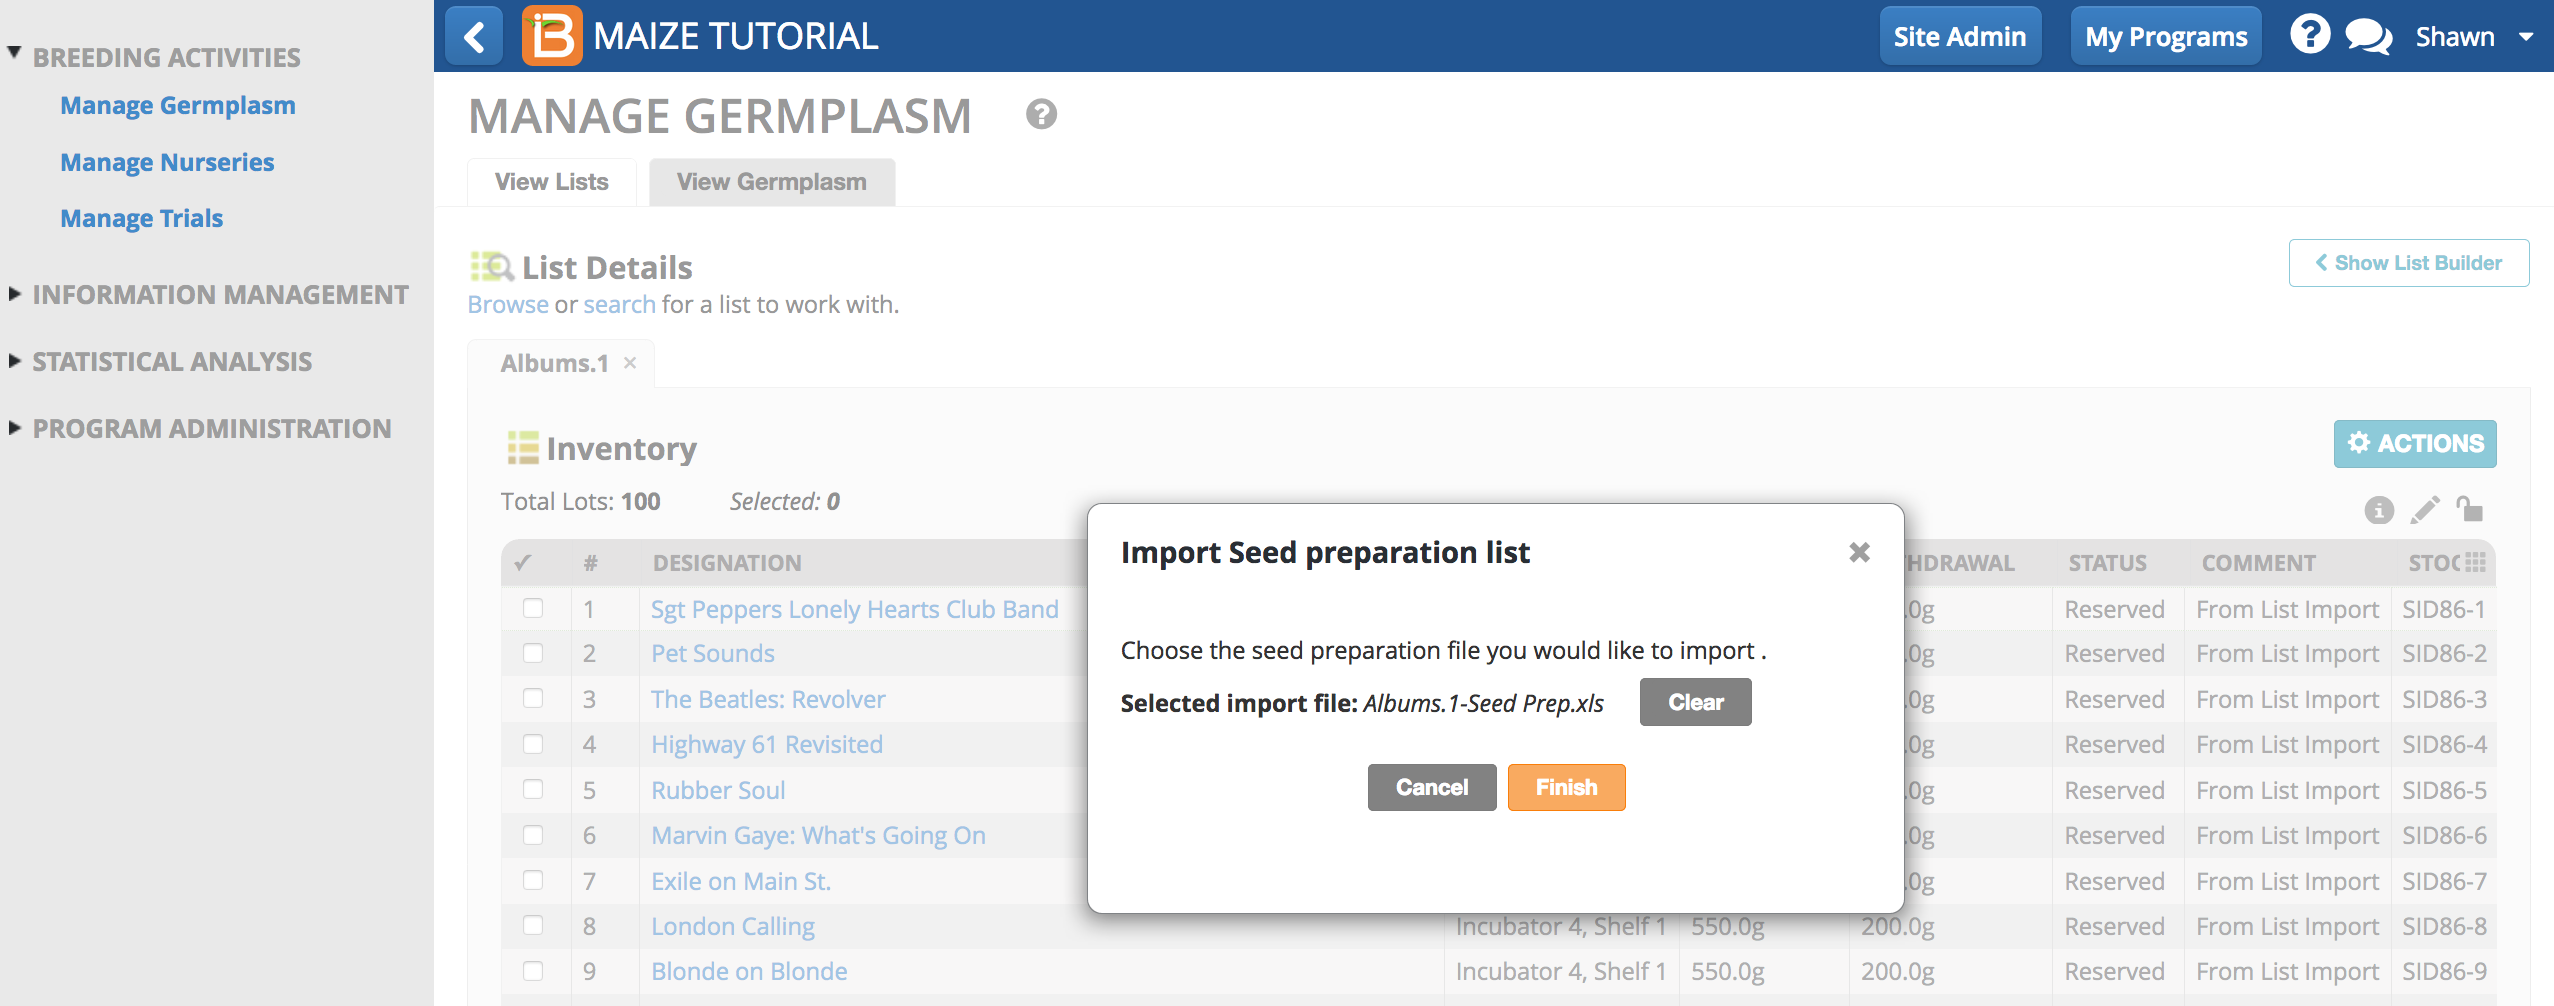
- Import seed preparation list.
- Review the processing status and select Continue. A warning message alerts when notes in the import file will overwrite existing comments on the reservations.
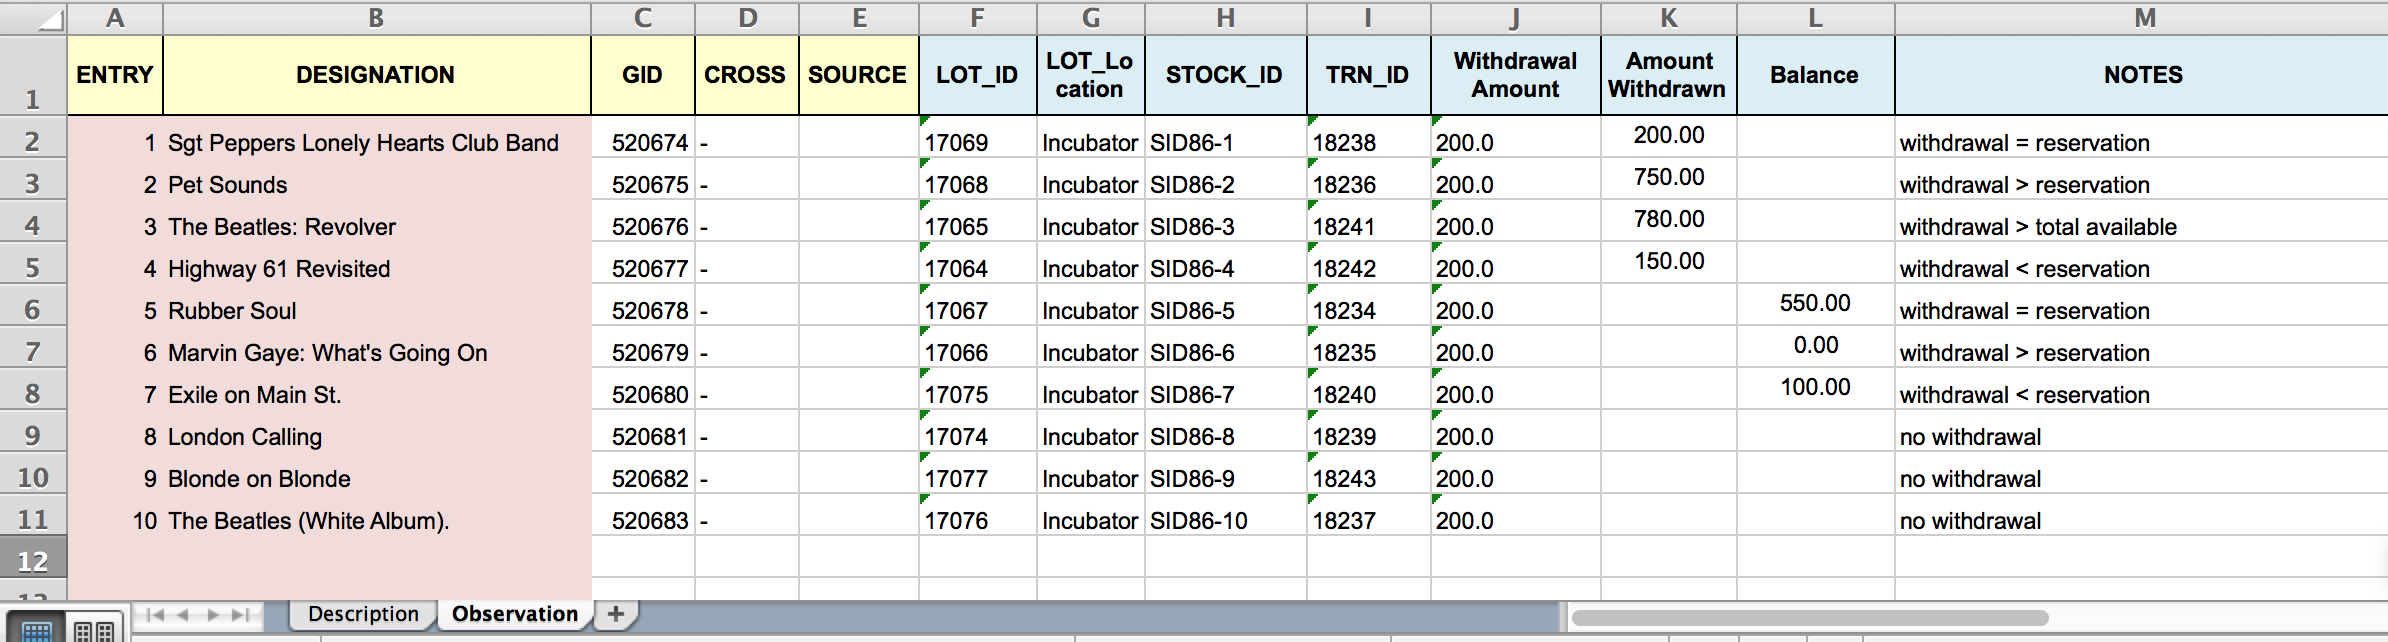
Processing Status
- Processing: withdrawal = reservation
- Continuing: withdrawal > reservation
- Skipping: withdrawal > available amount, withdrawal = 0 or null
Pending reservations remain for all of the entries with skipped withdrawals.
Cancel Reservations
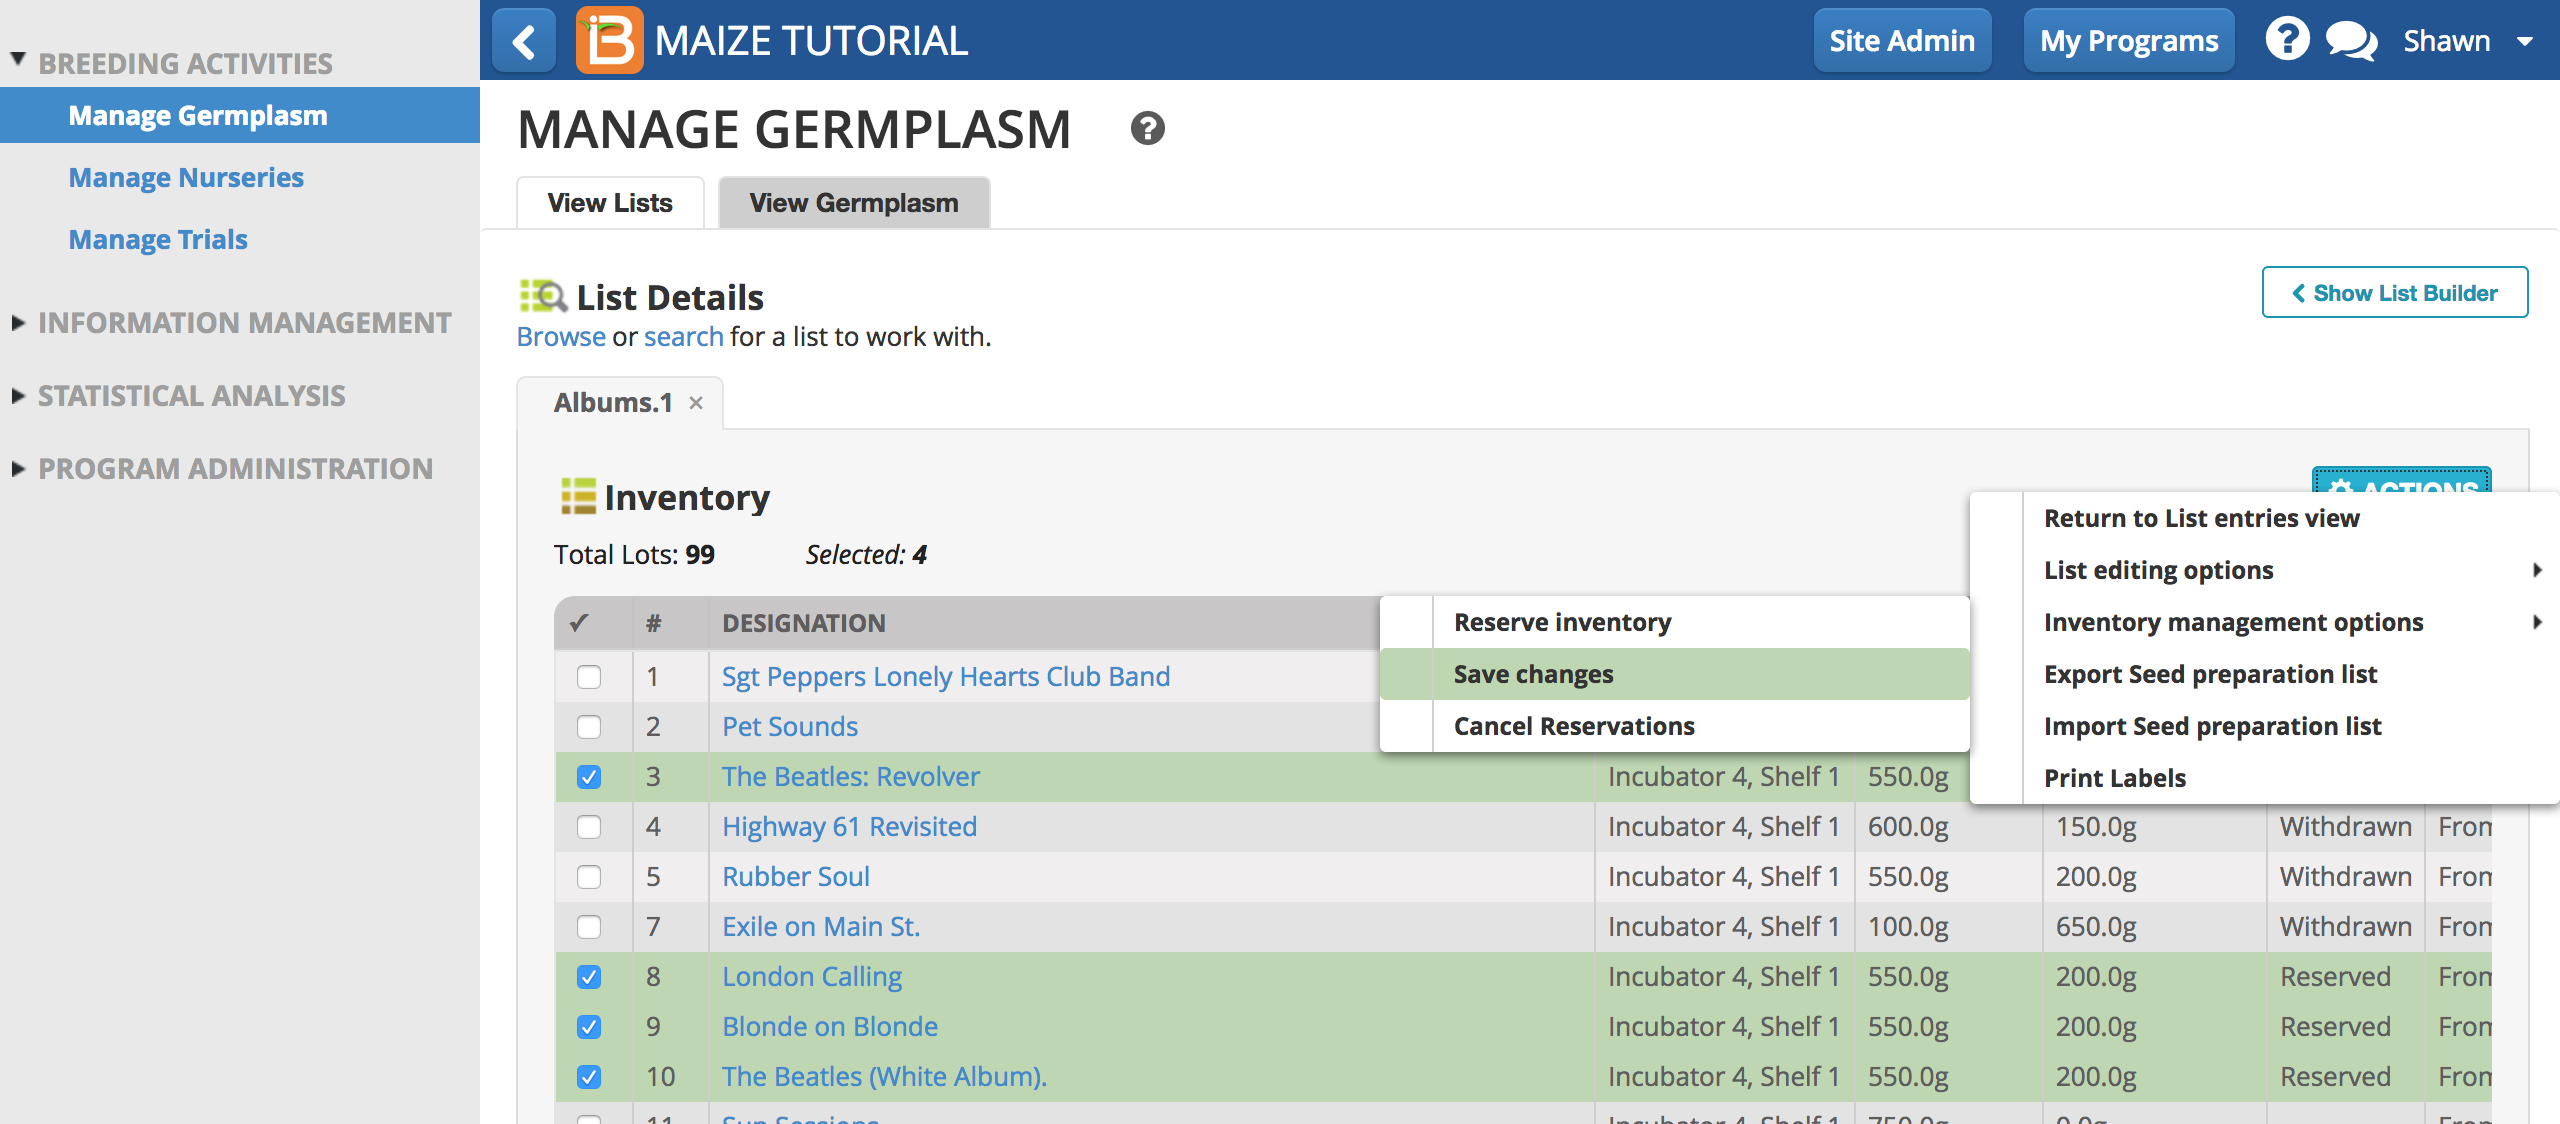
- Clear remaining reservations by selecting entries and Cancel Reservations from the Actions menu.
- Select Yes.
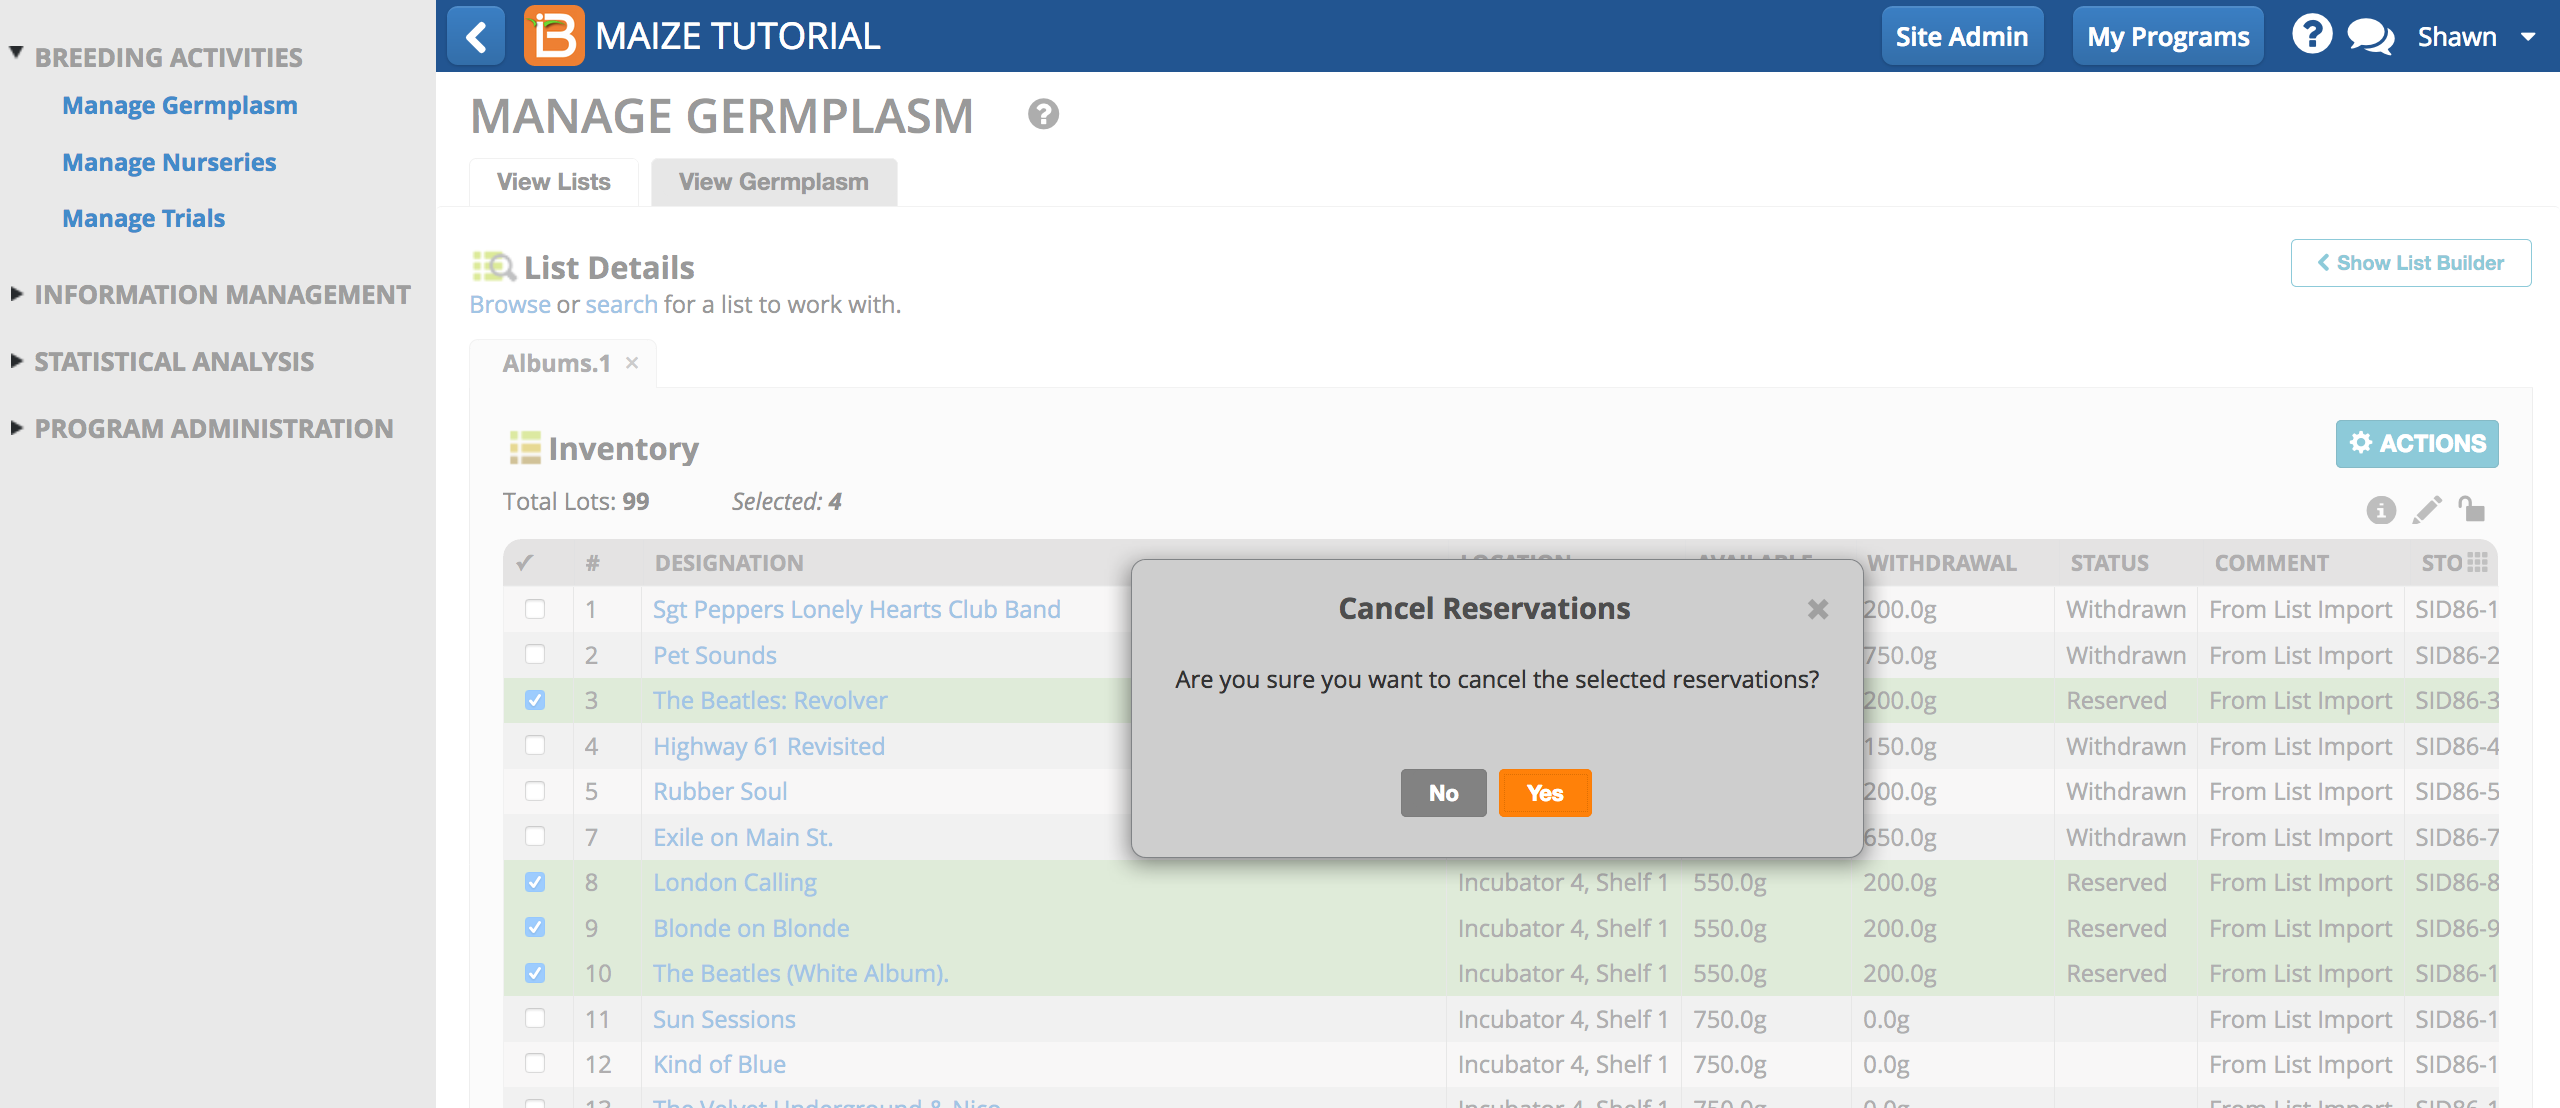
- Save changes.
The pending reservations removed.
Inventory Correction
Subtract
Use either the one or two-step reserve and withdraw functionality to correct inventory to a lesser amount.
Add
Use the balance column in the seed preparation template to correct inventory to a greater amount. When the imported balance exceeds the available amount, the available amount in the system is replaced with the imported value.
Add Inventory After Crossing & Advancement
Inventory amounts are added to the database when when a generation is advanced and when new germplasm arrives in a breeding program.
The option to add inventory is available at several locations in the BMS.
- Manage Germplasm - Import new germplasm
- Manage Nurseries - Import measurements including harvest amount
- Manage Trials - Import measurements including harvest amount
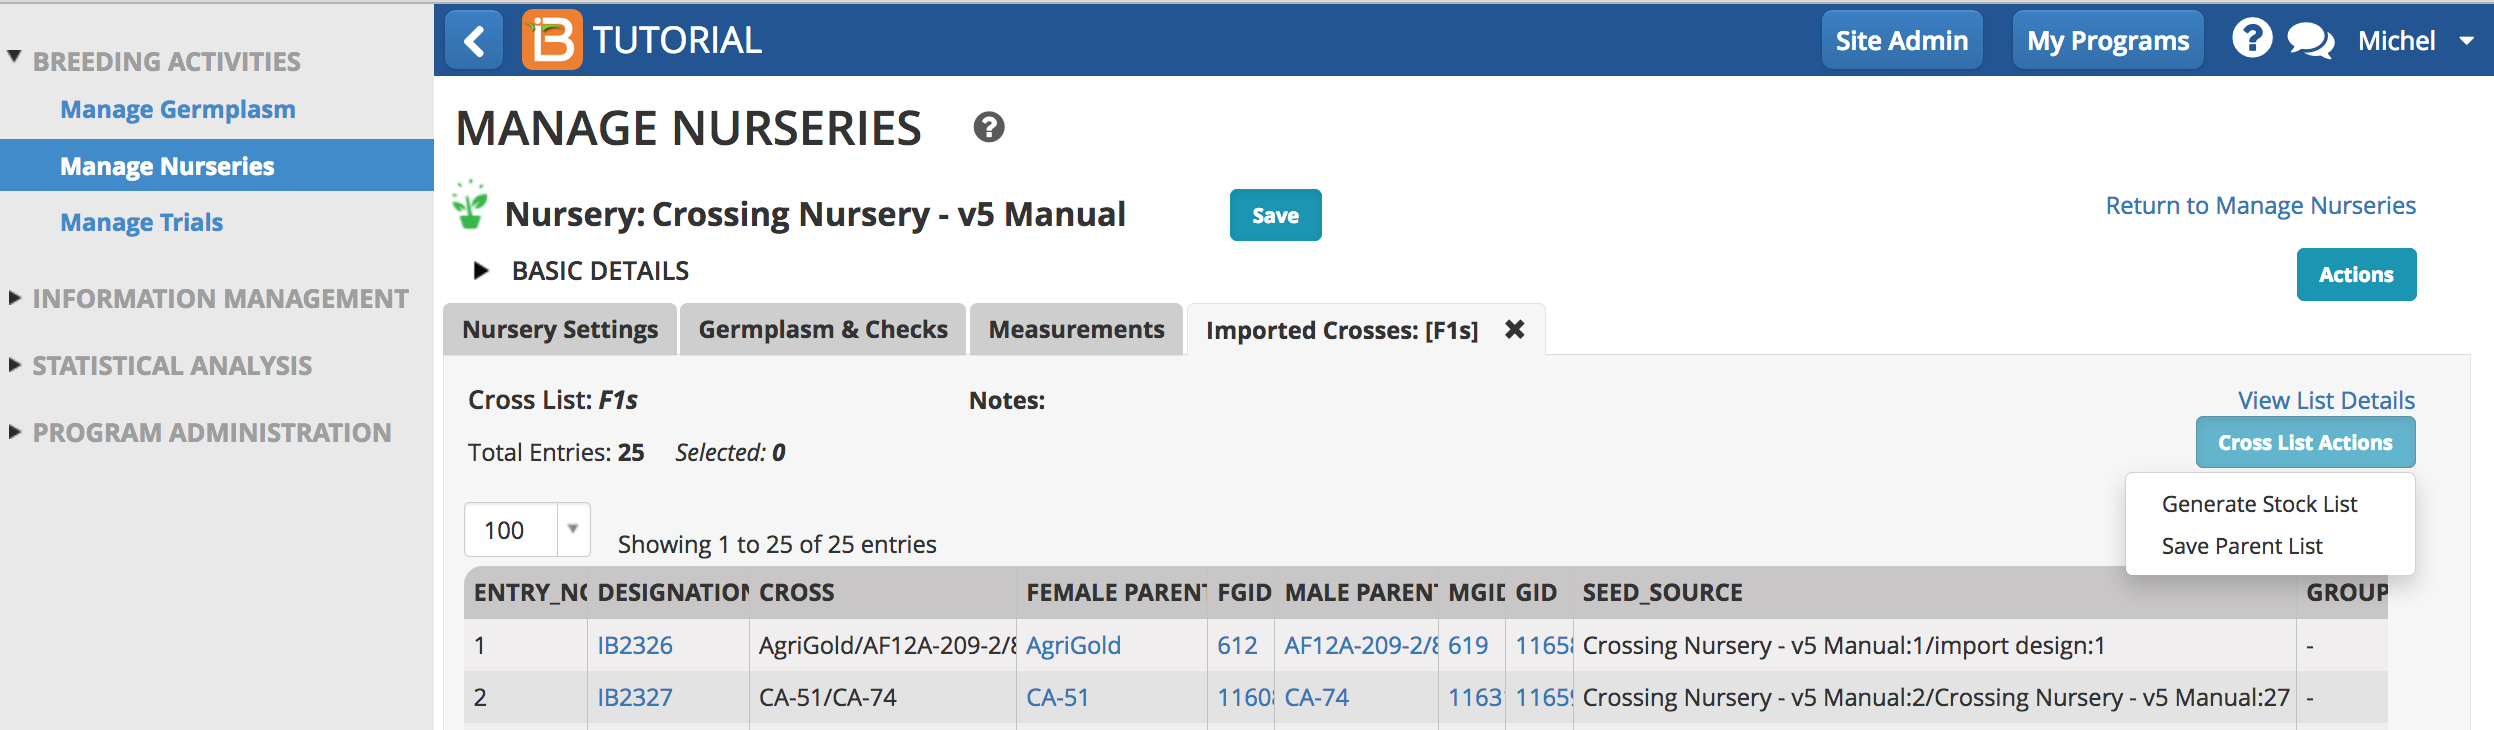
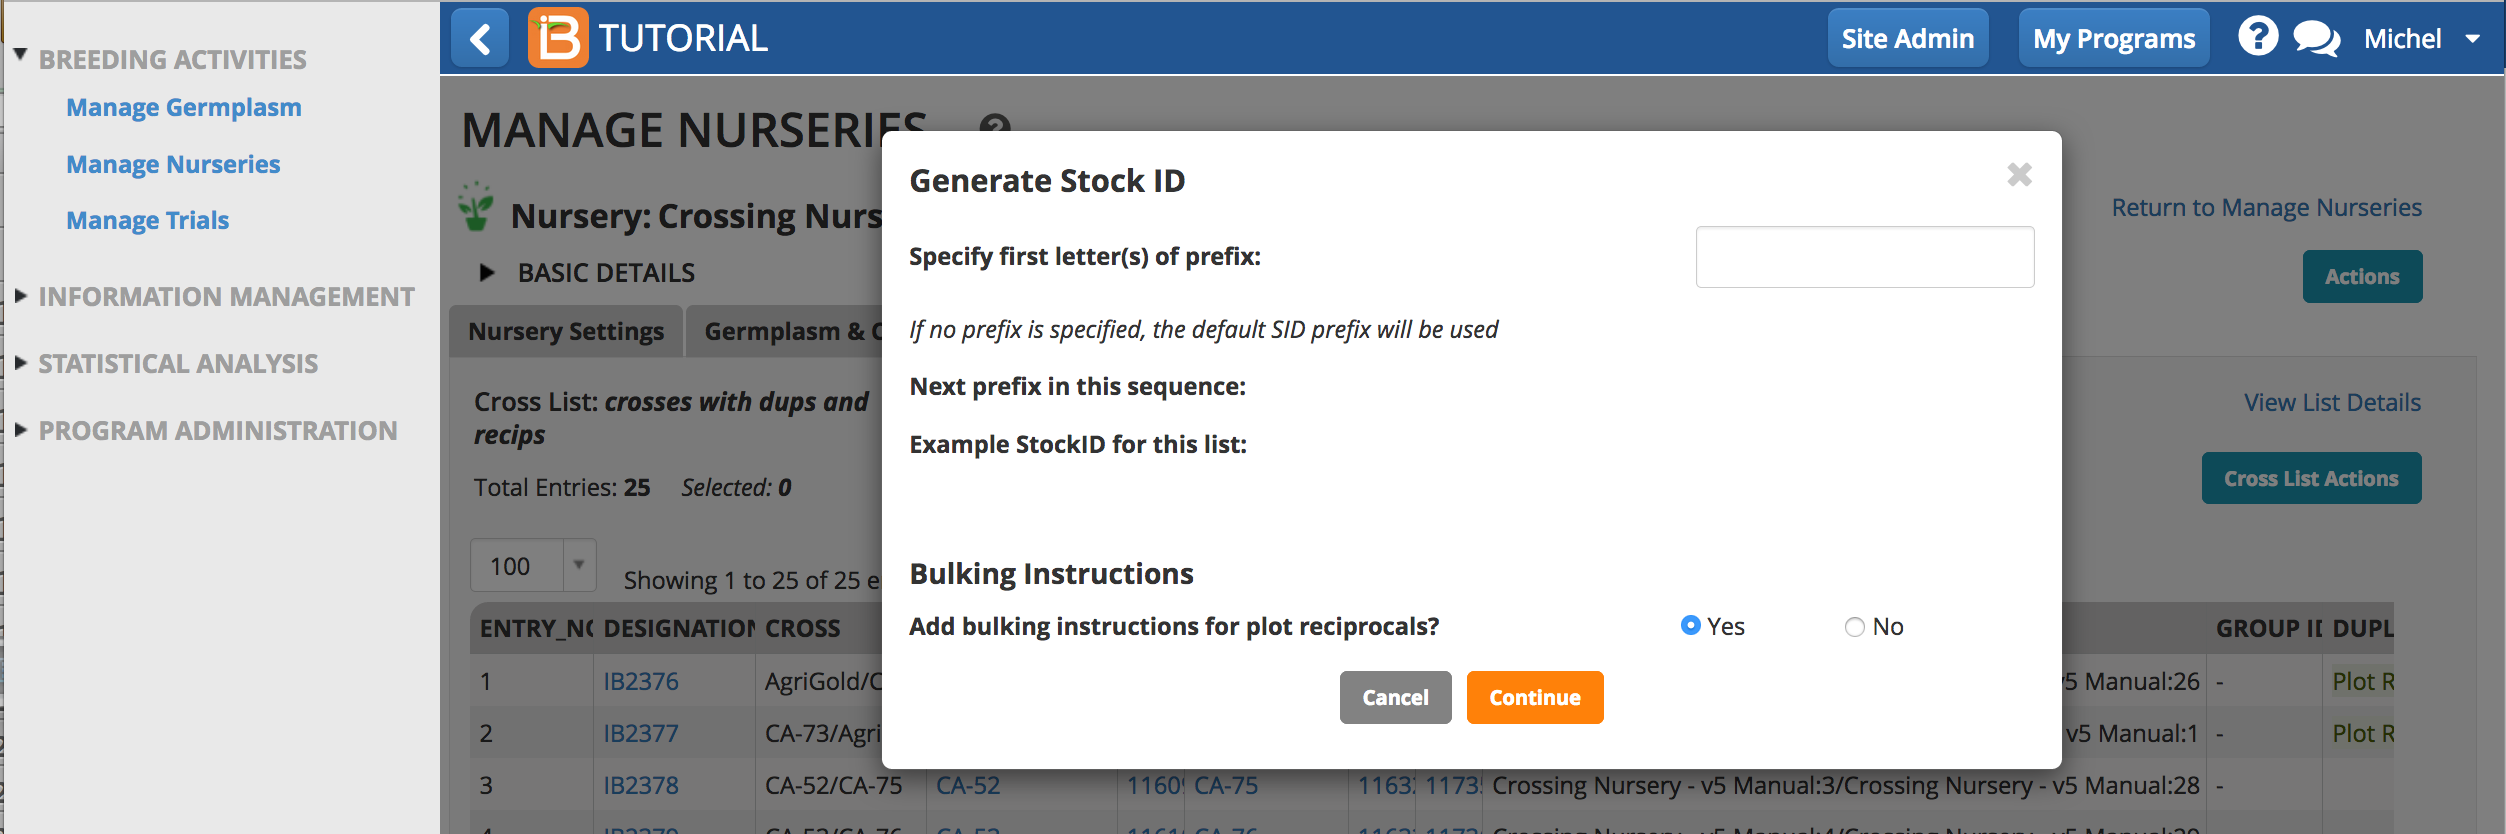
Generate Stock List
The option to generate a stock list is available after the advancement of a generation. The new generation is represented by new GIDs in the database (see more on Germplasm & Genealogy) and possible associated inventory. Lists generated in nurseries and trials (see more Manage Nurseries) can be used to create stock lists for recording and labeling inventory: cross lists and advance lists.
- Select Generate Stock List from the Actions button.
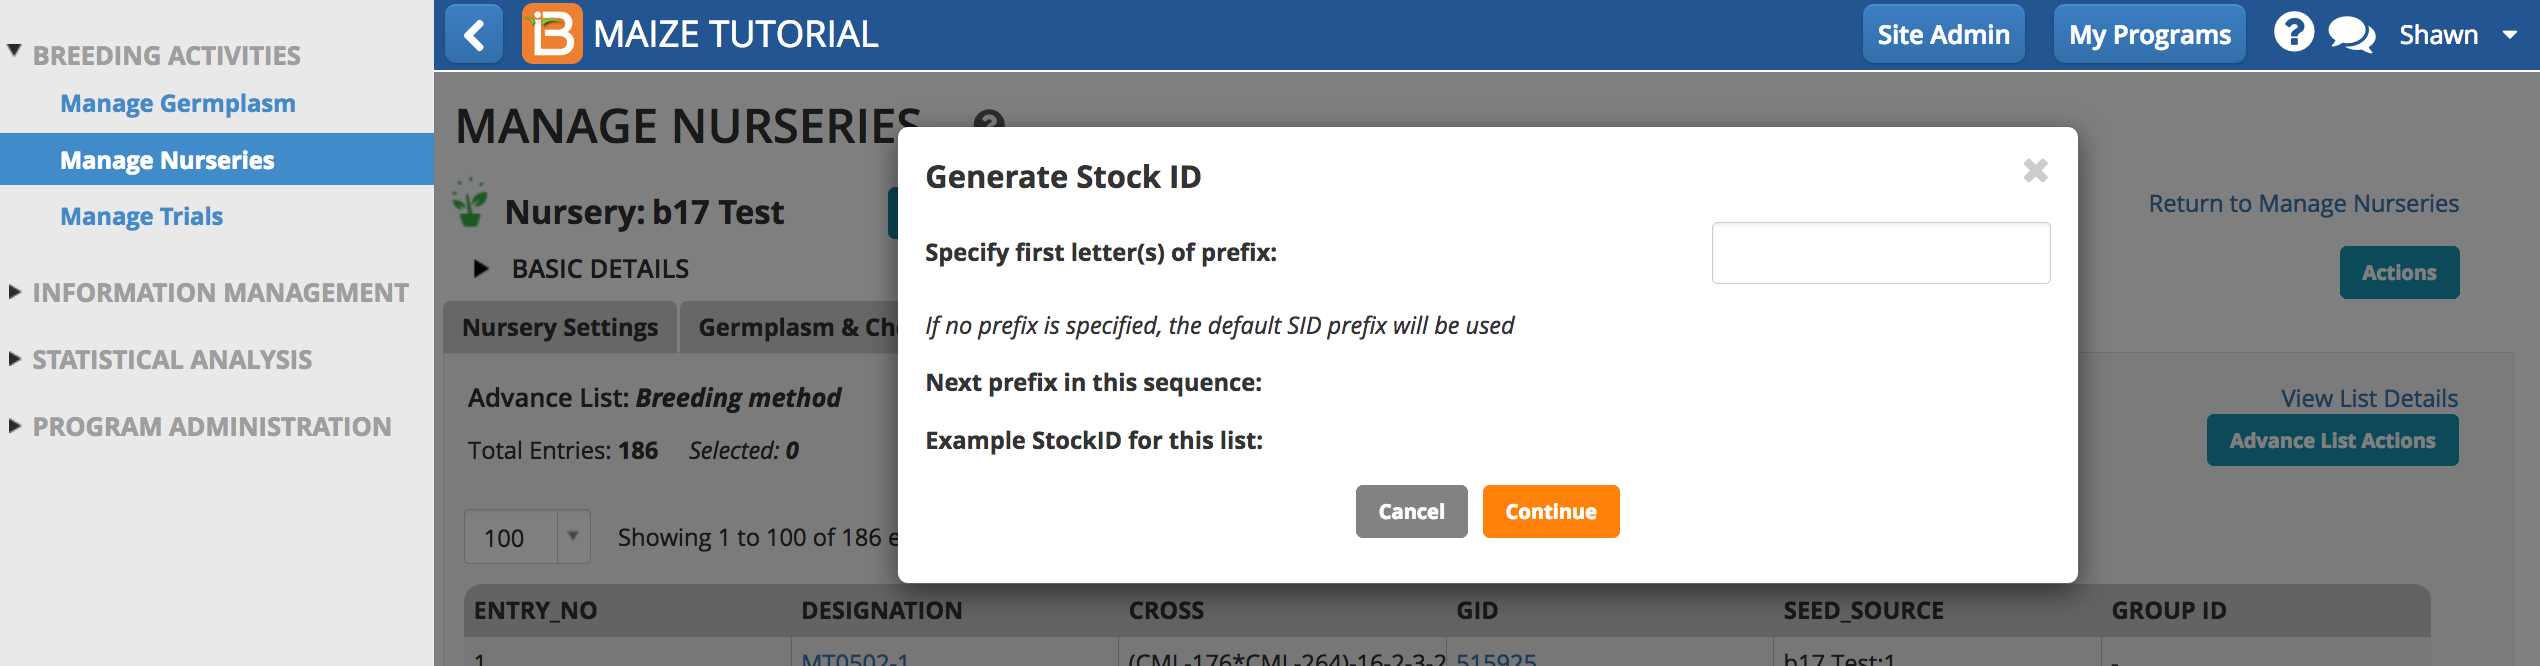
-
Either specify a Stock ID pre-fix or use the default SID convention.
The stock list is now available for review in the nursery and the Stock List Actions menu is activated.
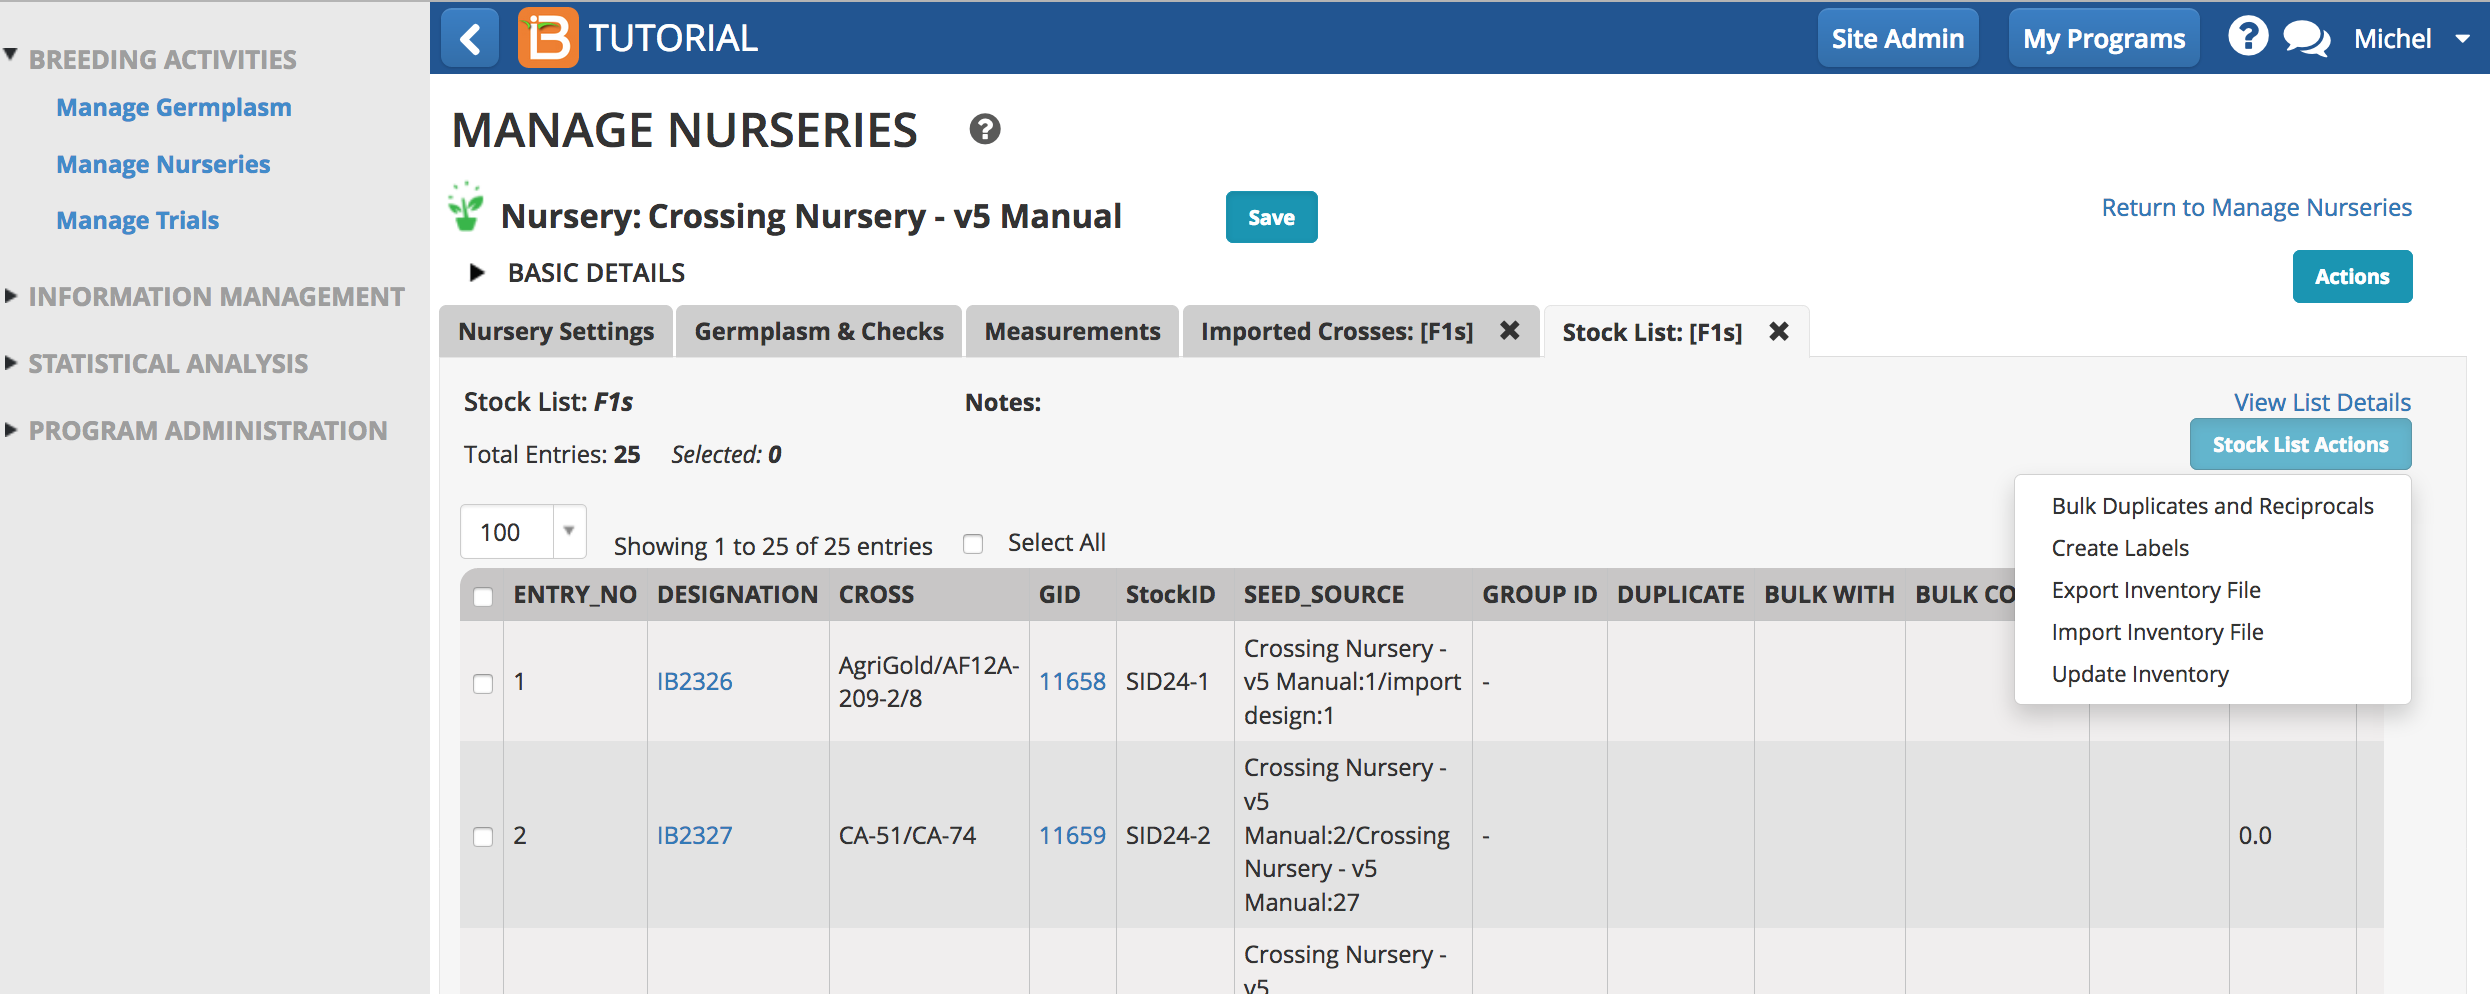
Stock List Actions
Inventory can be added by either Updating Inventory in the UI or by Exporting Inventory File for editing in Excel. For long lists of non-uniform amounts, most users will favor exporting and editing an inventory template in Excel.
Update Inventory in User Interface
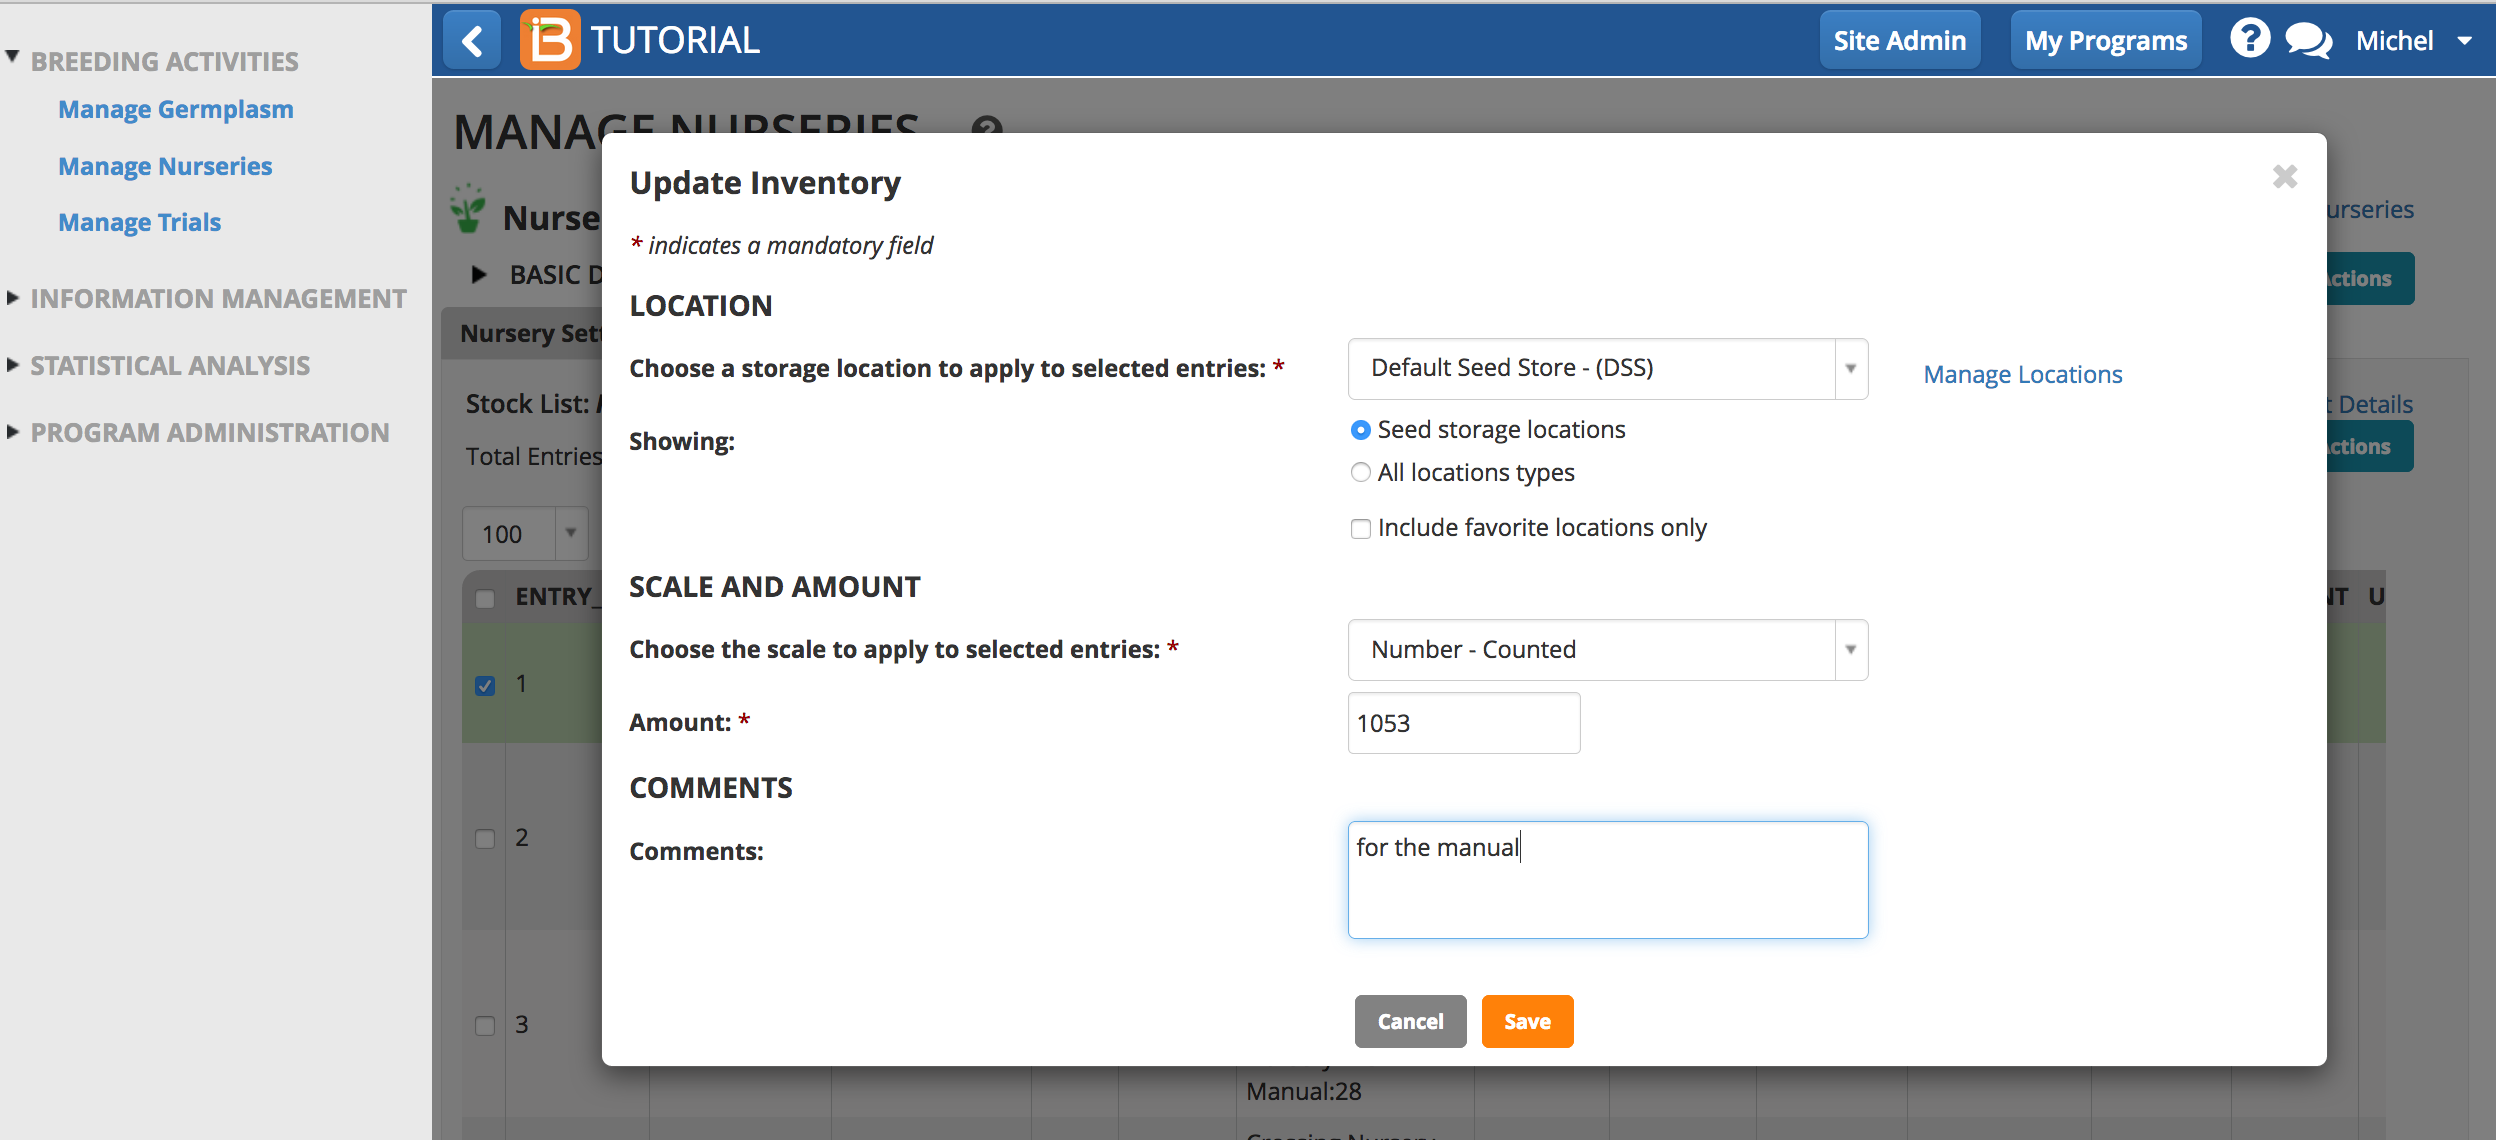
- Highlight entry or entries to update, and select Update Inventory.
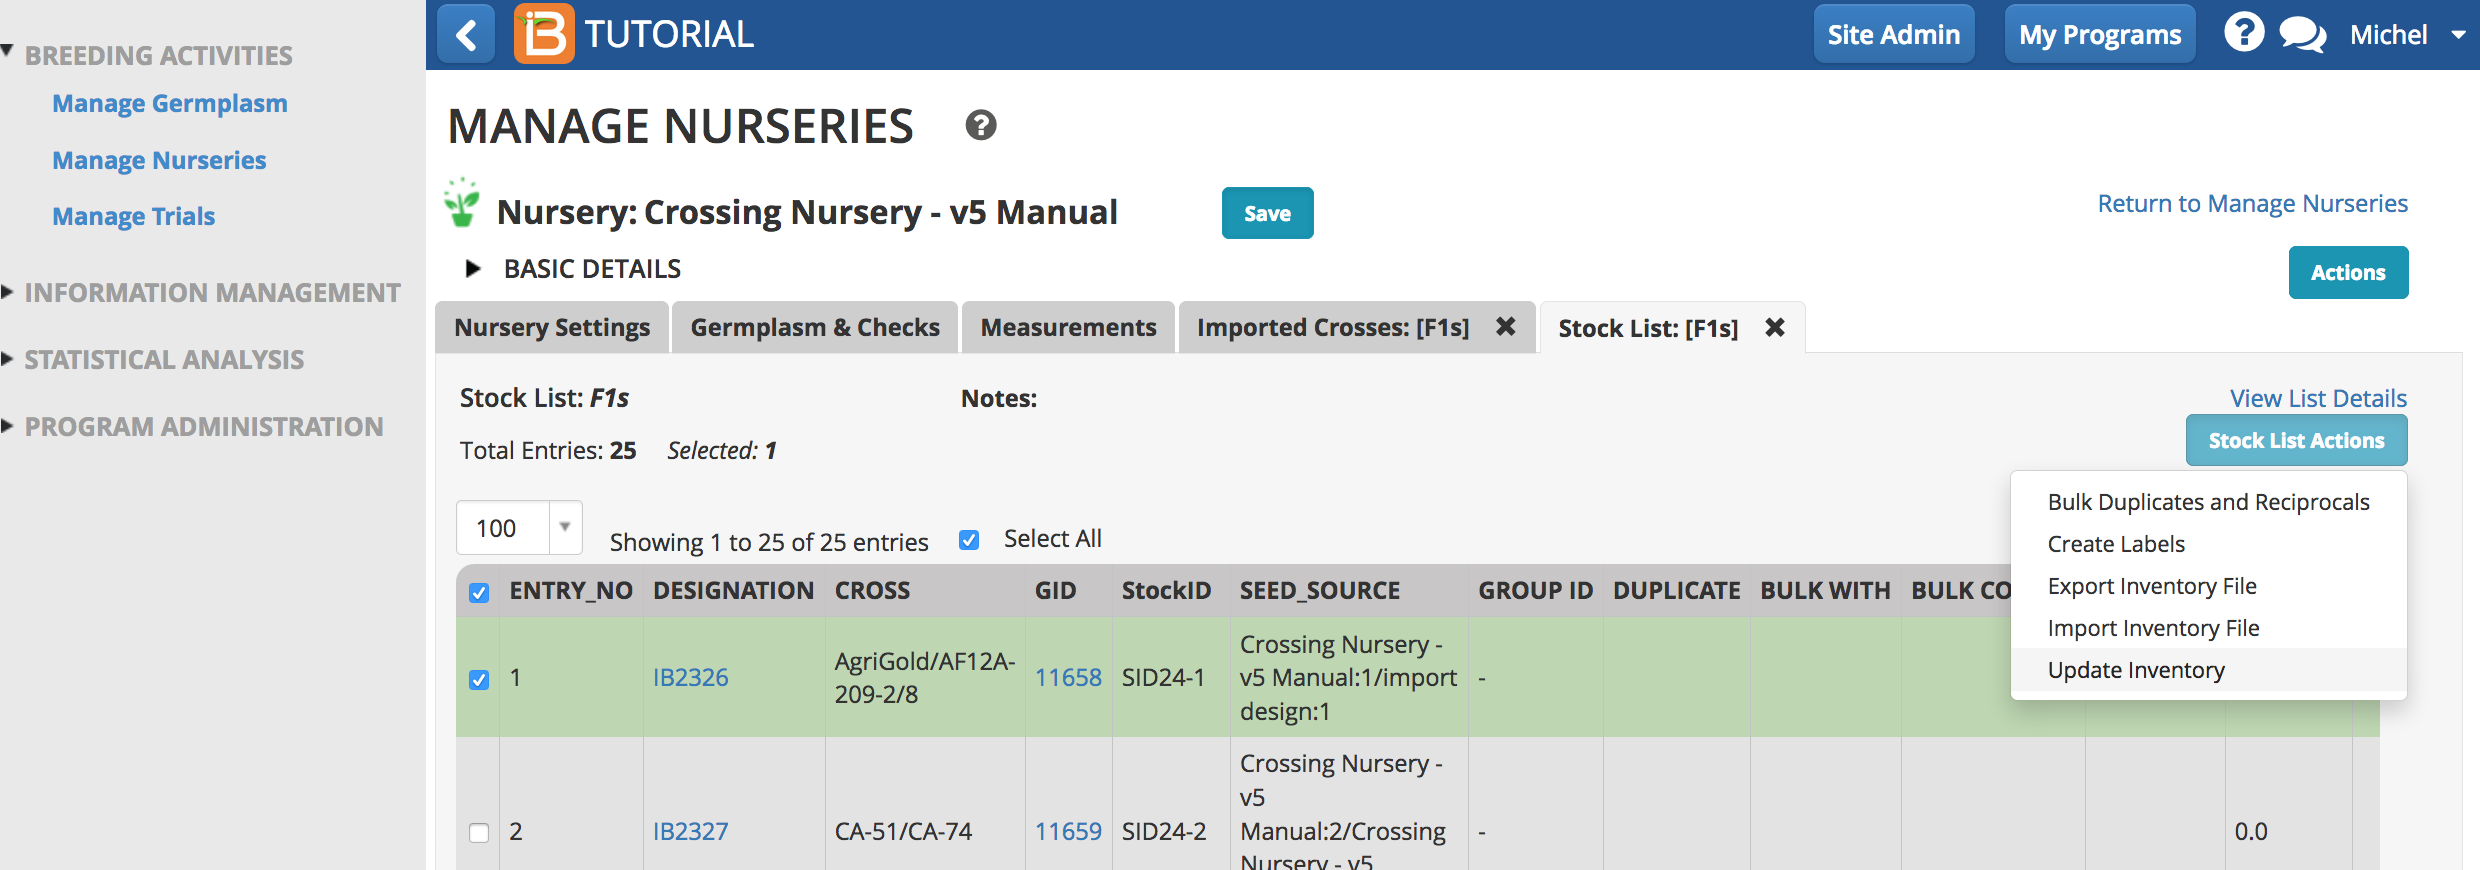
- Select the seed storage locations, the scale of inventory measurement, and the amount. Save.
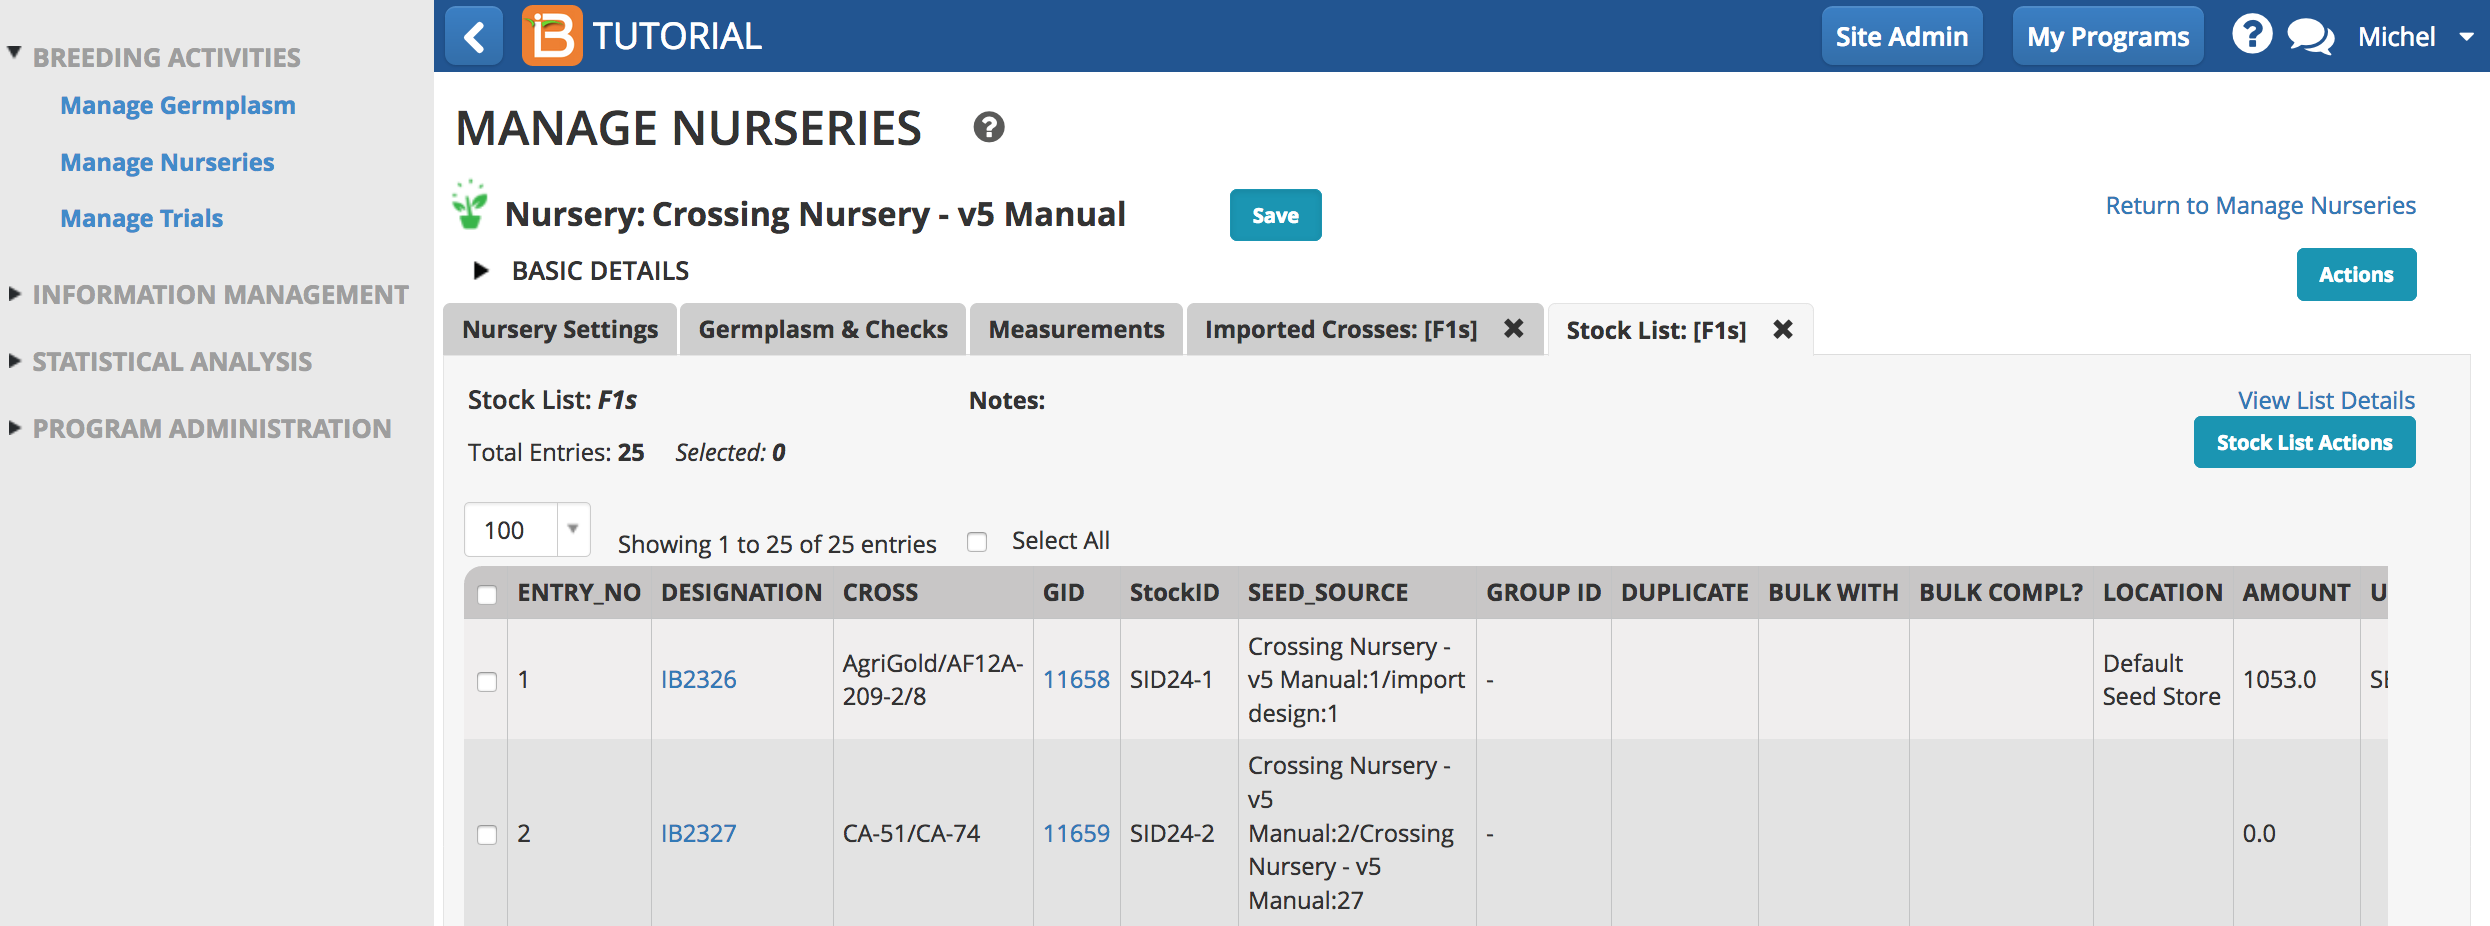
The seed inventory is now available for the updated entry.
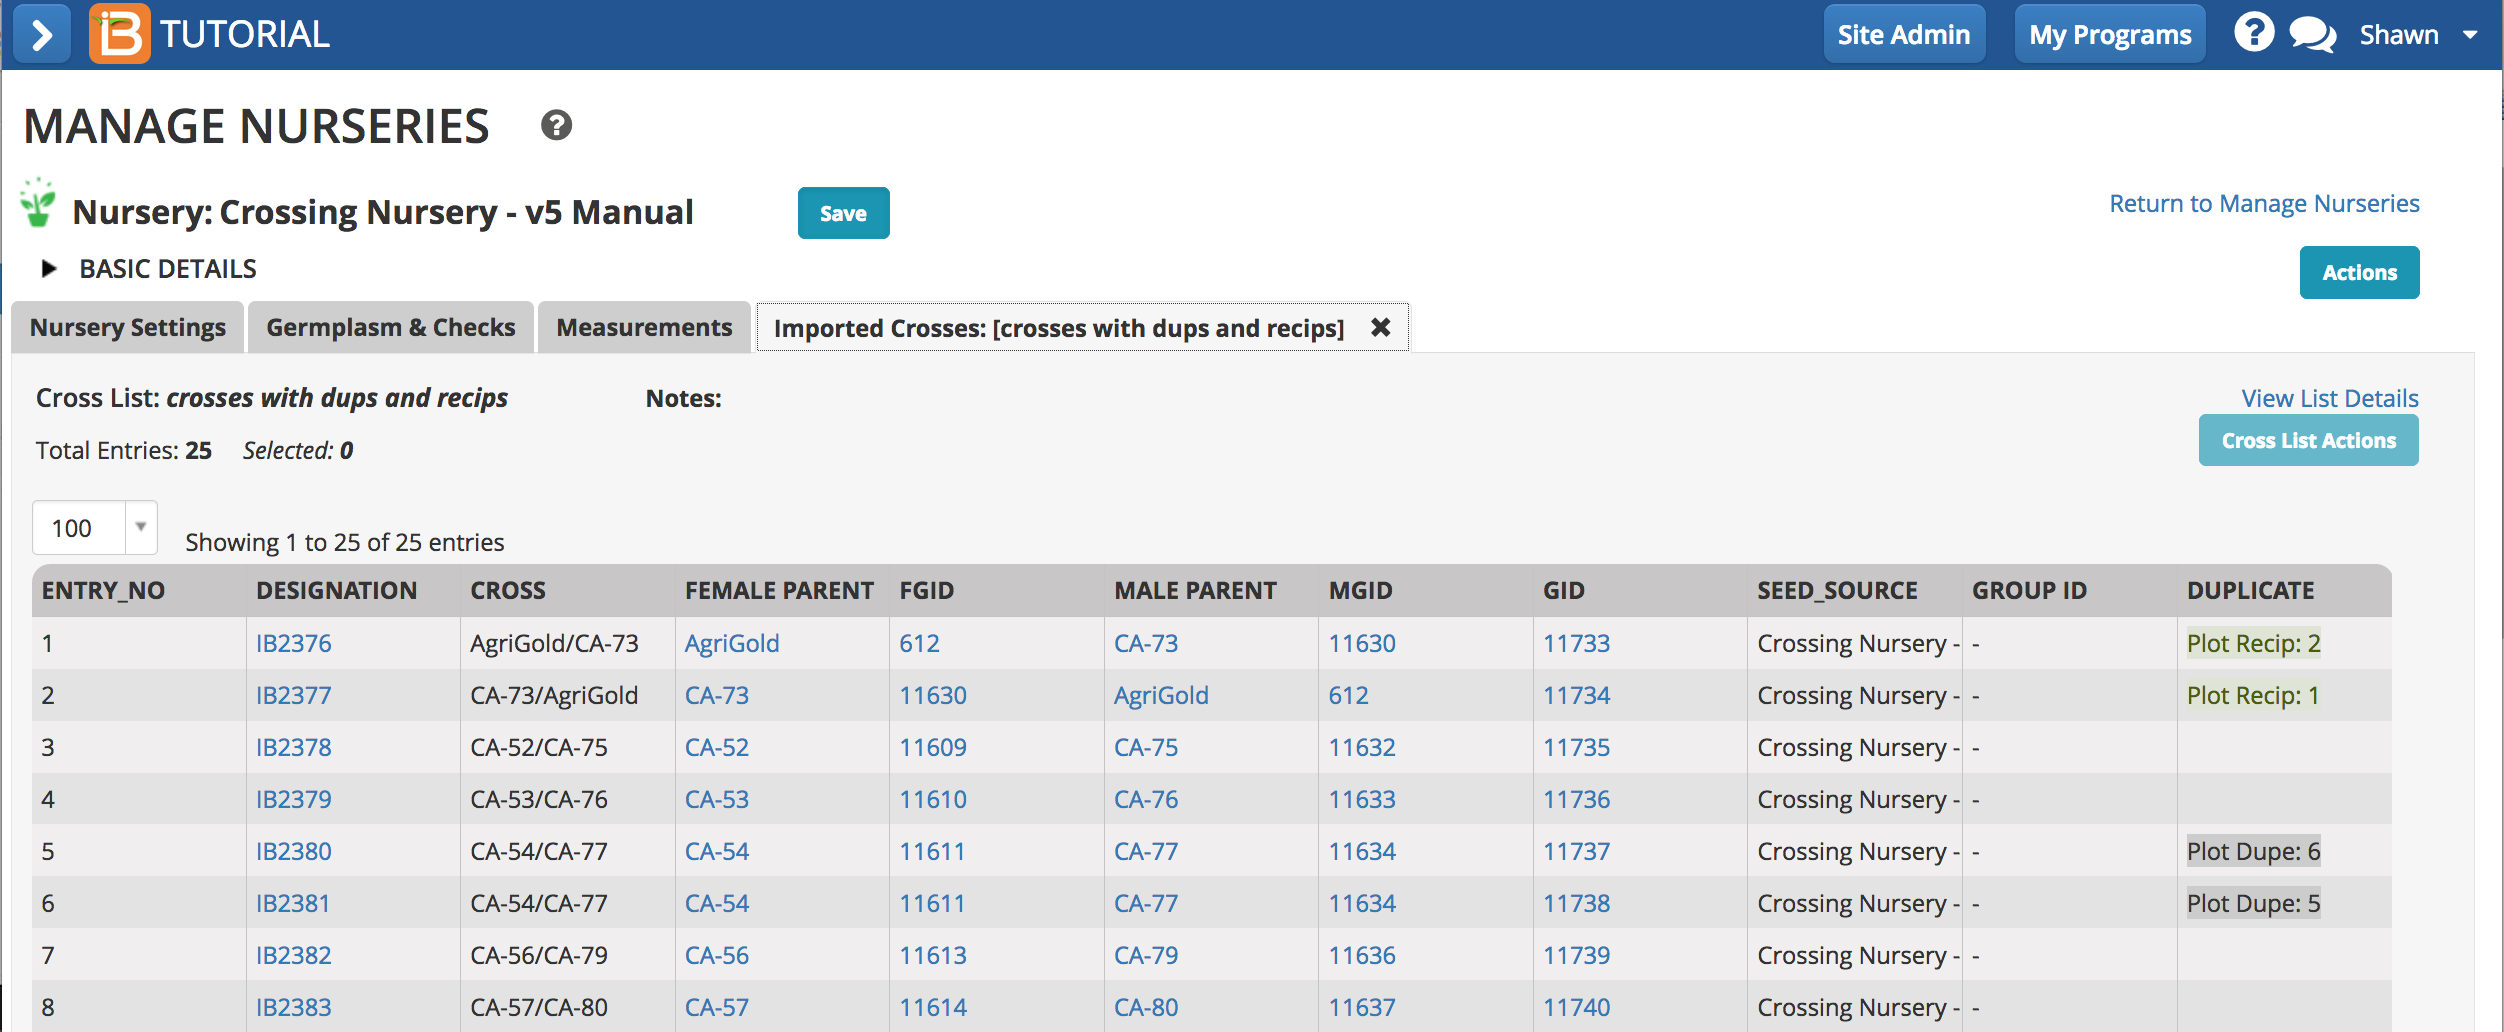
If the cross list contains duplicate or reciprocal crosses they will be identified in the DUPLICATE column.
Update Inventory in File
- Select Export Inventory File (.xls) from Actions menu.
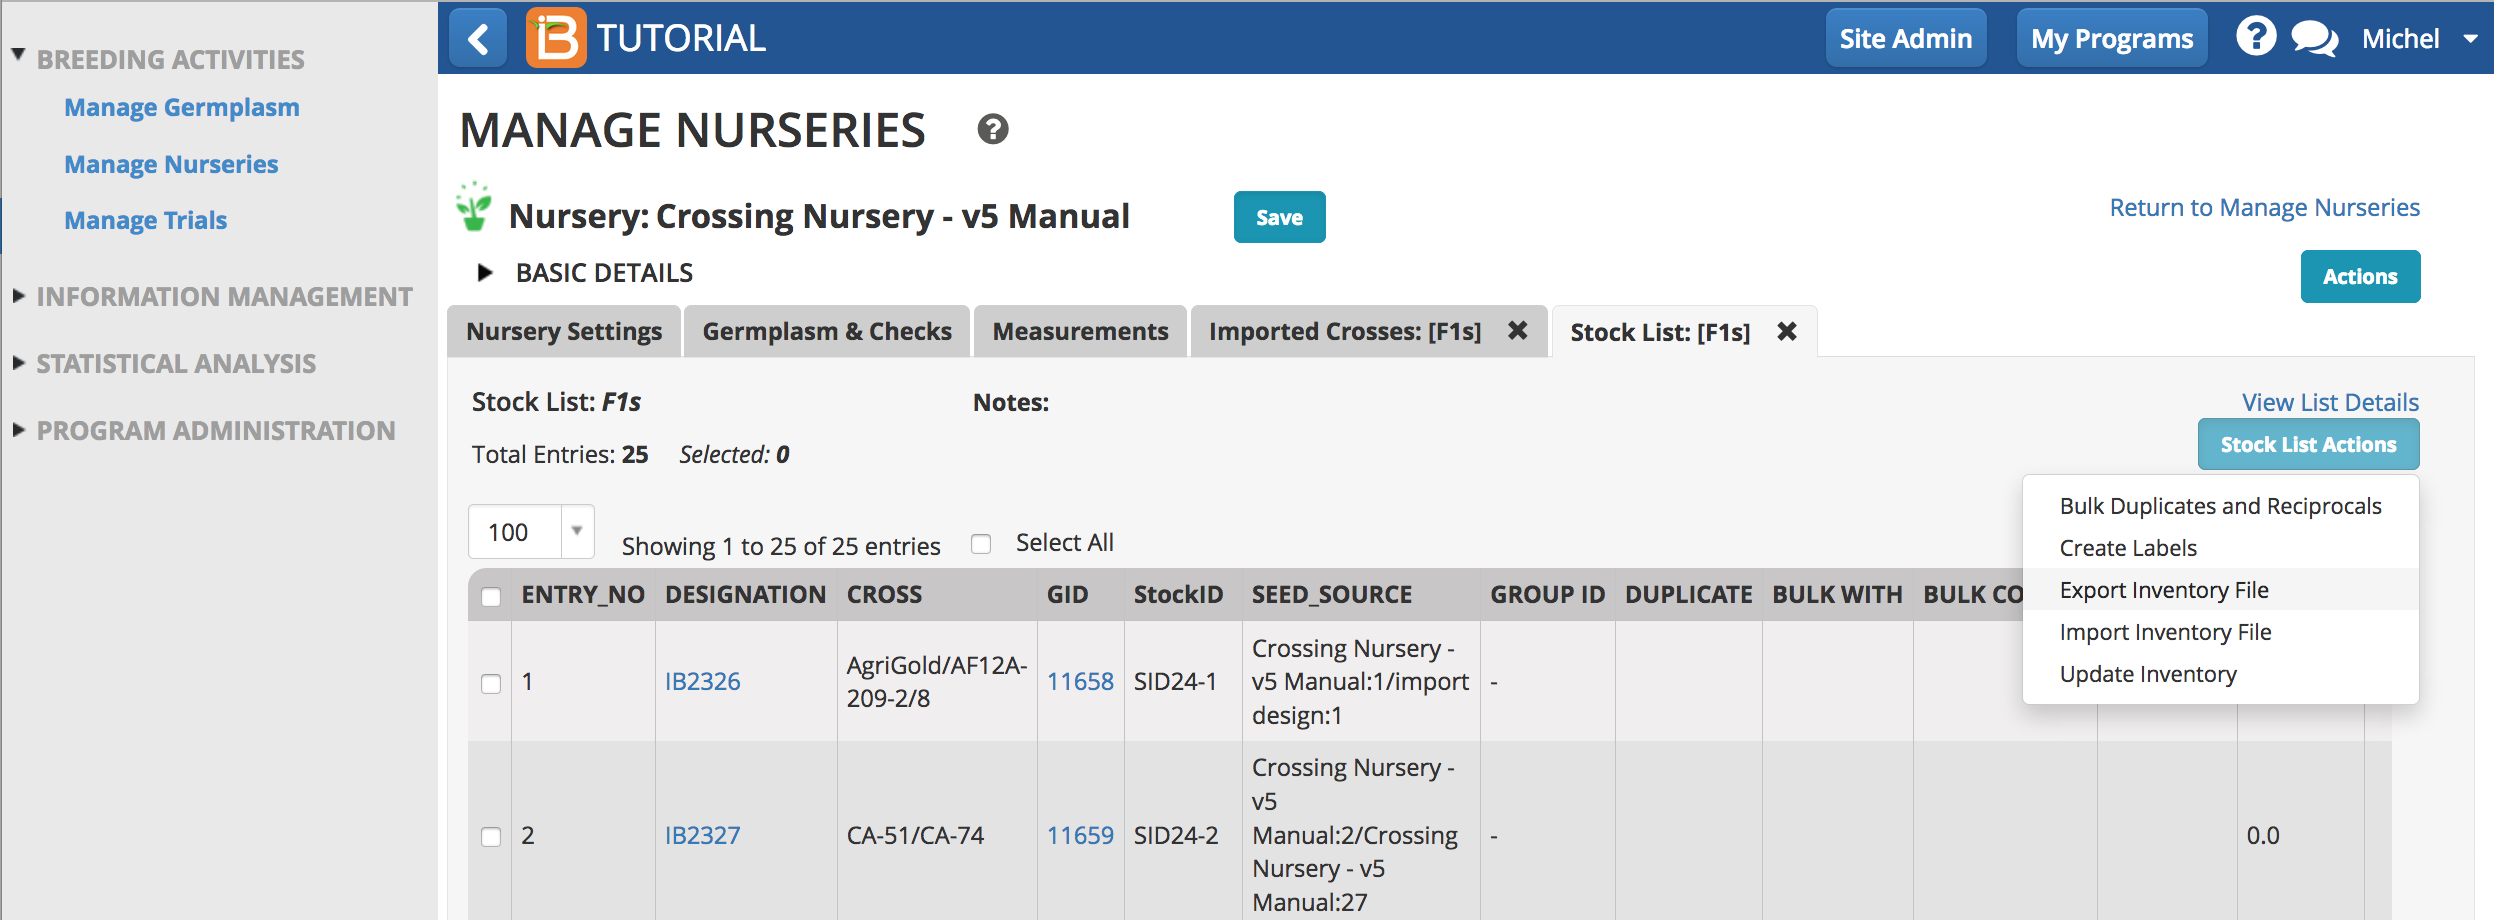
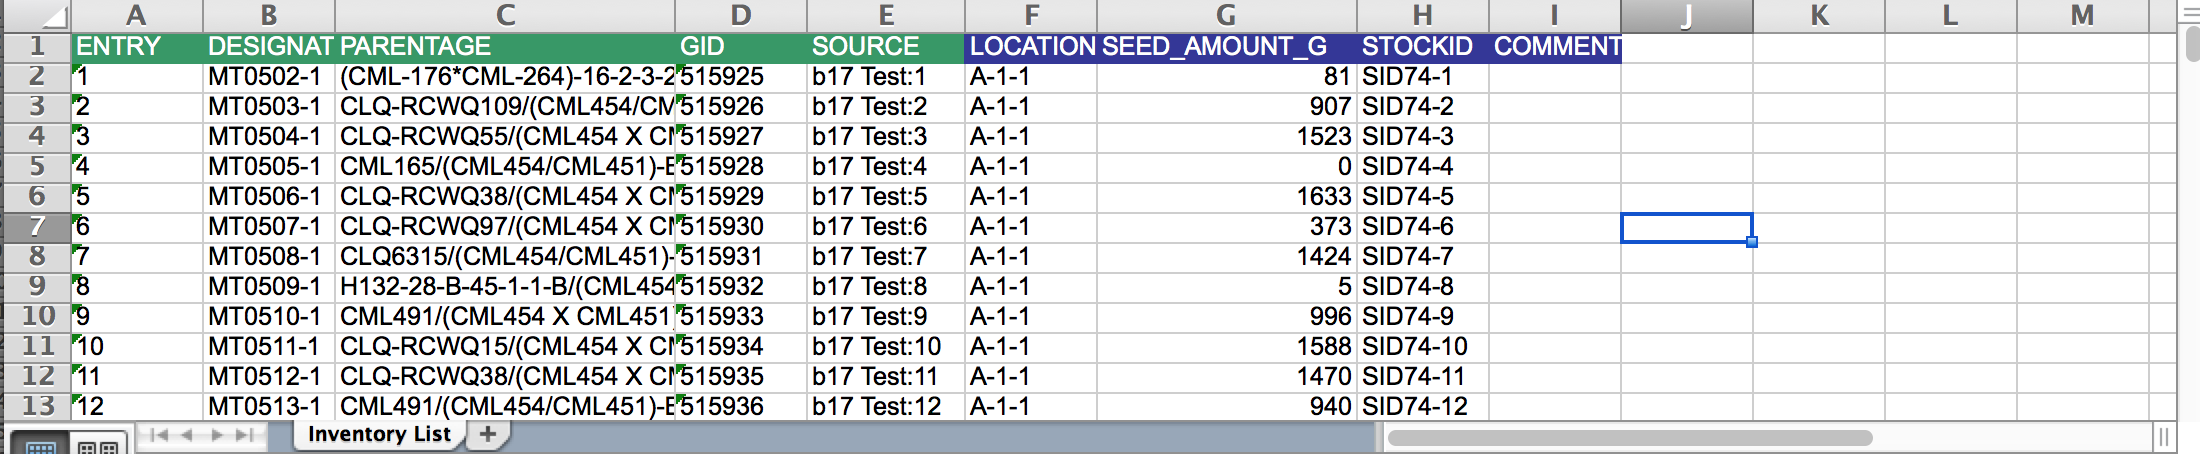
The export file is pre-populated with details from the germplasm list. The Source Column is nursery name concatenated with plot number.

- Add mandatory information, inventory amounts and abbreviation for seed storage location (see more on Managing Locations). Save file.
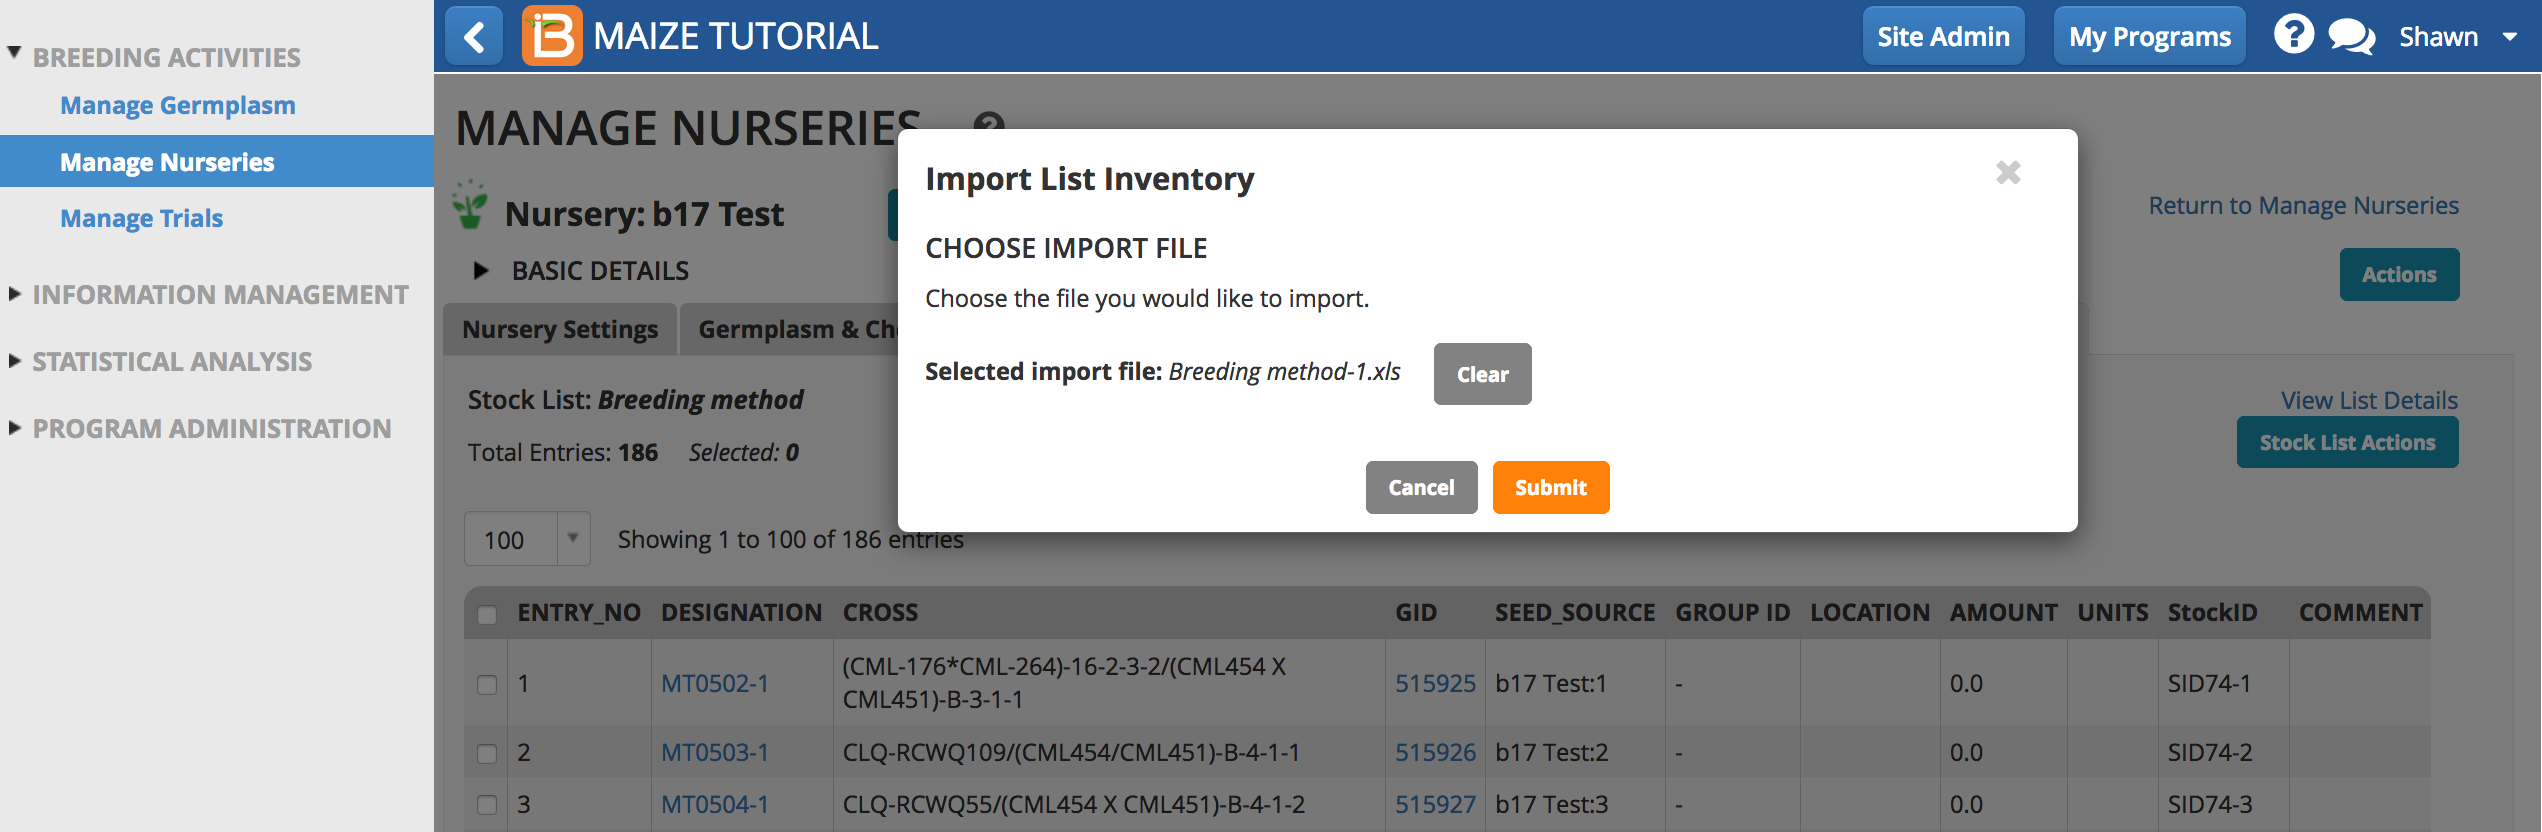
- Select Import Inventory File (.xls) from Actions men. Upload the file and Submit.
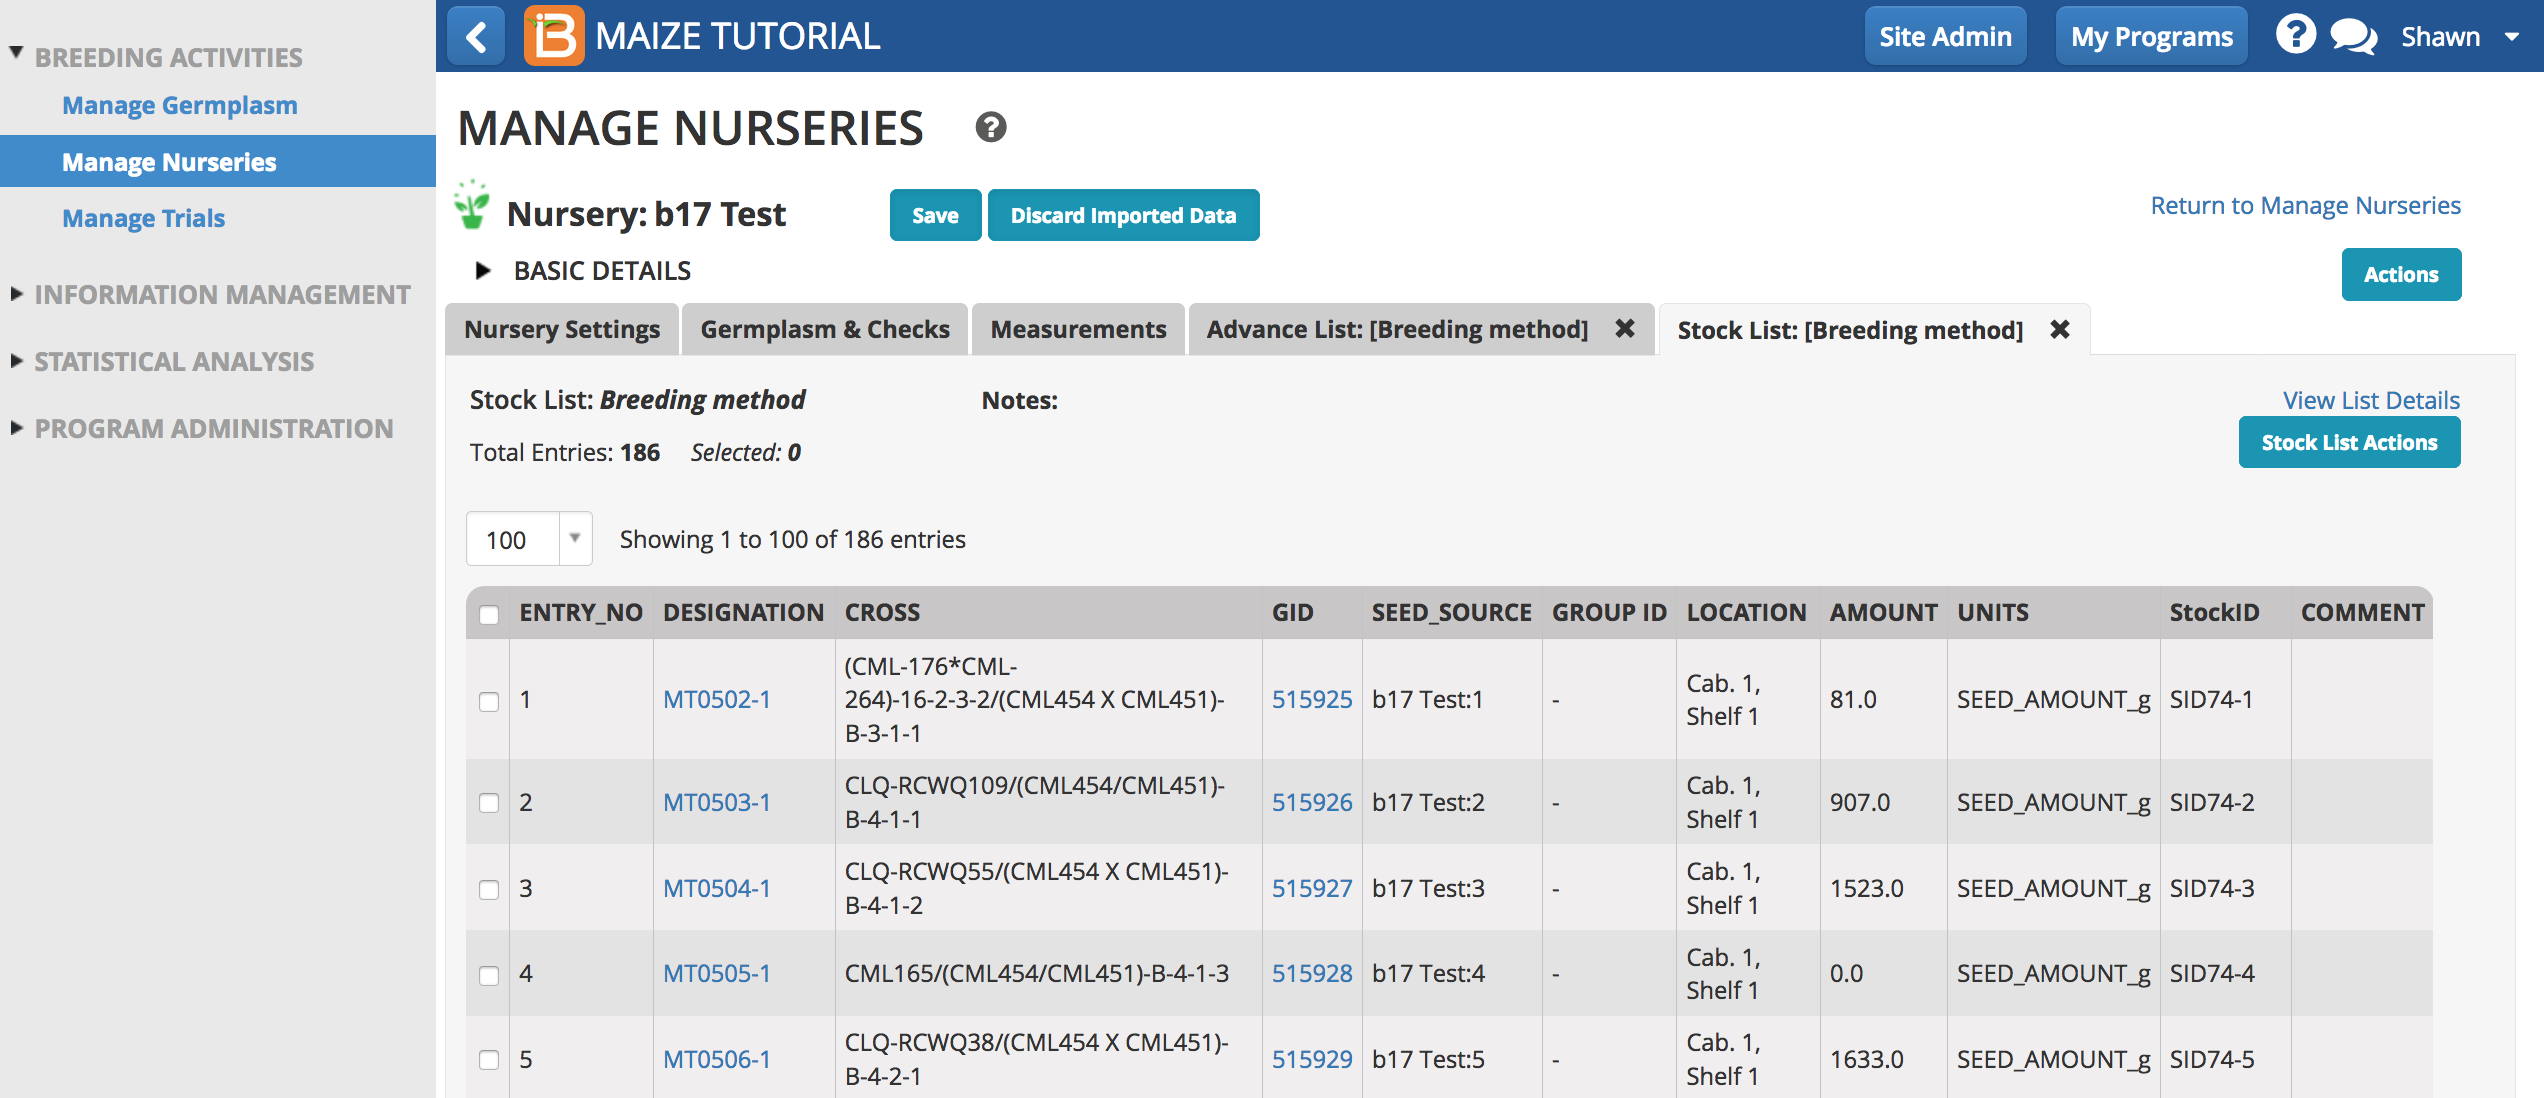
- Save the nursery to save the associated inventory. Now this inventory is available for reservation and withdrawal from the Manage Germplasm tool.
Within Nursery Reciprocal Bulk - BETA
Within nursery bulk options are under development (Beta). Expect improved/expanded functionality in future BMS versions.
If an cross import file contains reciprocals will have the option to bulk these after harvest.
- Select Yes to add bulking instructions for plot reciprocals.
The stock list now includes bulking directions for reciprocals.
Add Inventory with Germplasm Import
See more about Gerrmplasm Import.
